Because this is MY spot. Find yours...
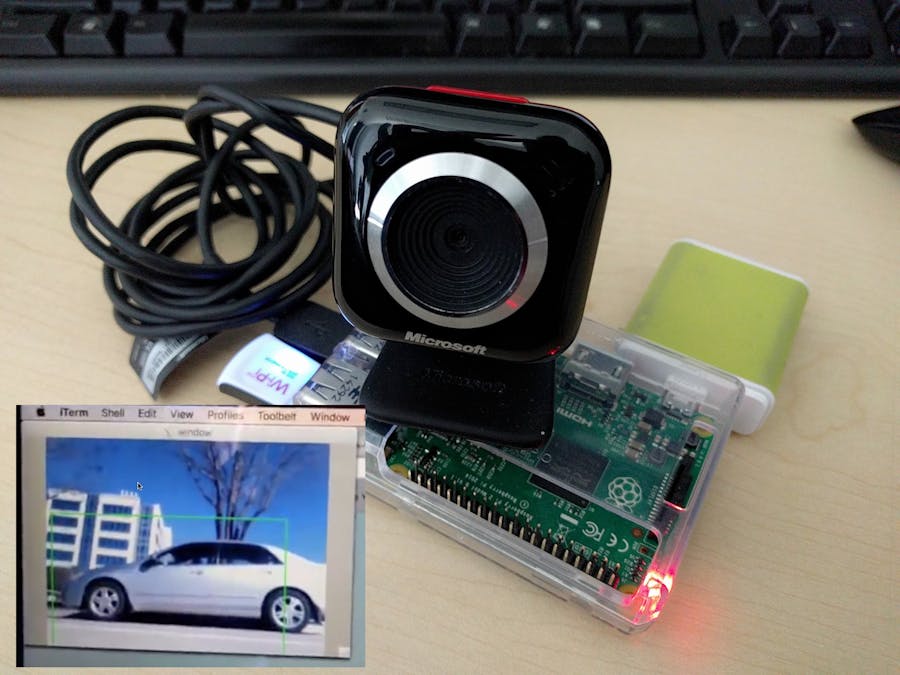
Just kidding! All I want to do is to experiment with OpenCV in Raspberry Pi and make it an IOT device. I've seen a lot of Face Detection algorithms and I found out that there are also other experiments. I found one that can do Car Detection.
Traffic Flow is the study of interactions between vehicles, drivers, pedestrians, cyclists, other travelers and infrastructure (including highways, signage, and traffic control devices), with the aim of understanding and developing an optimal road network with efficient movement of trafficand minimal traffic congestion problems. (From Wikipedia)
At first, I thought I wanted to do a traffic flow IOT device, which is fine. Find an alternative way to analyze traffic flow by creating an affordable car counter analysis tool and harness the power of Big Data to analyze traffic patterns.
But I want something that I can apply to my daily life.. so get off my parking lot... Move along.
And so the journey starts....
In this project we explore a car counter device using:
- Node.js wrapper for OpenCV
- A Raspberry Pi (w/ an SD card of least a 8GB!)
- A cheap Web Camera
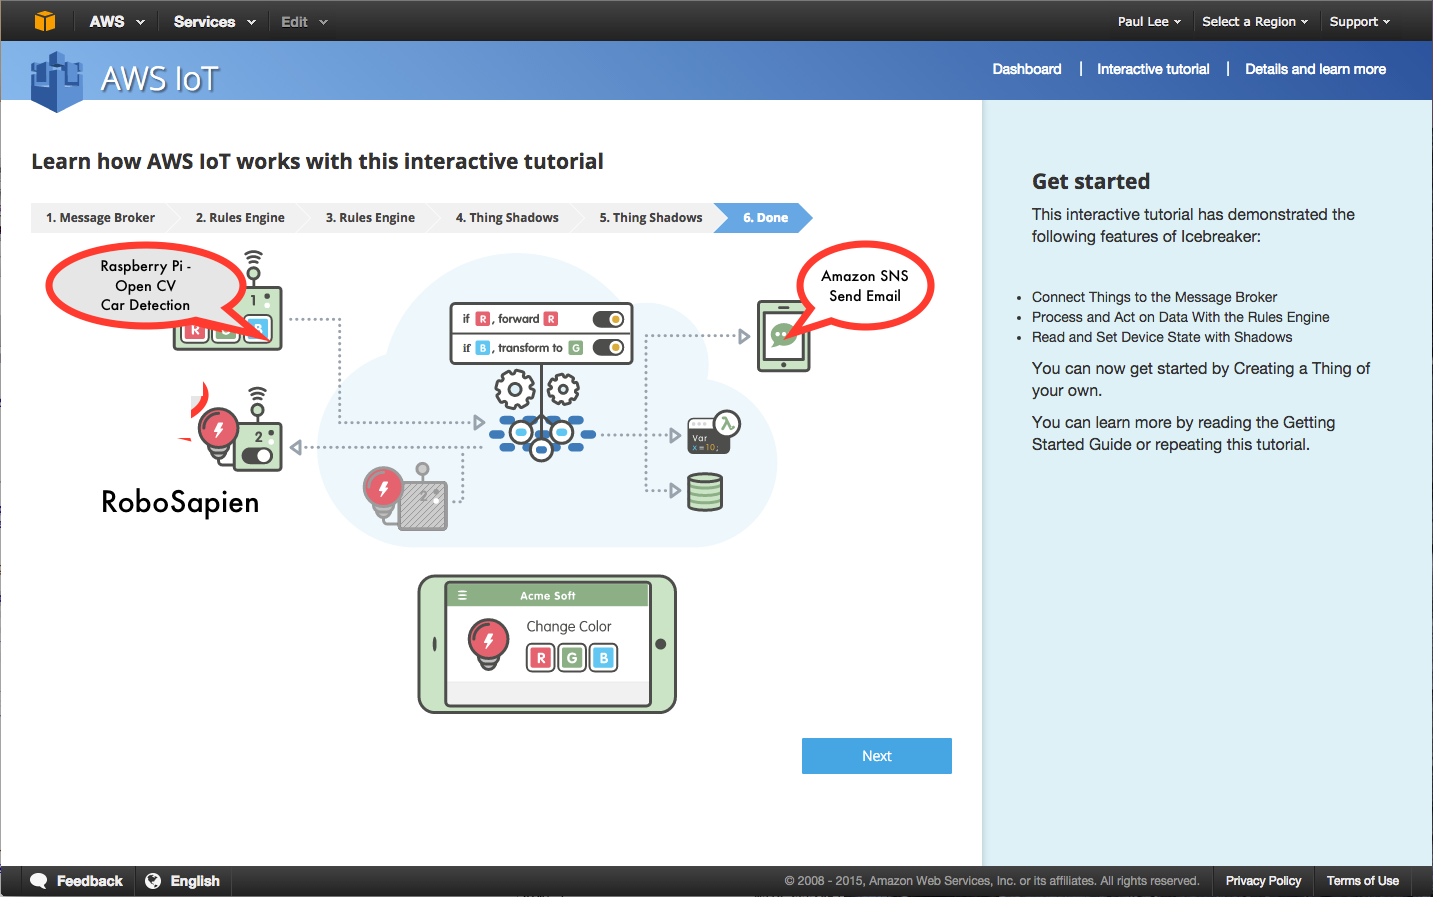
- The AWS cloud for notification thru SNS or saving data to S3 for analysis.
the best thing here is - it will cost you less than $50 dollars.
Step 1 : Install the required packages in your RPi
- Install Node.js in Raspberry Pi
- Build and install OpenCV 2.4.11 in a Raspberry Pi
- Install the CylonJS and CylonJS-OpenCV
IMPORTANT: This Project only works on Raspberry Pi Wheezy distribution.
The instructions here will not work on latest version of Raspberry Pi.
You can download last Wheezy version of Raspbian using this link
http://downloads.raspberrypi.org/raspbian/images/raspbian-2015-05-07/
Installing NodeJS is not a big deal in Raspberry Pi, but make sure you have the latest version. I followed this from installing Johnny-Five
https://github.com/rwaldron/johnny-five/wiki/Getting-started-with-Raspberry-Pi-node-red-and-IoT
I installed OpenCV by following this
http://www.pyimagesearch.com/2015/02/23/install-opencv-and-python-on-your-raspberry-pi-2-and-b/
Make sure you do this before you go to bed because it will take a lot of hours to compile it. Like 9.5 hours or so.
Make sure you install version 2.4, I install OpenCV 3.0 at first and found out that CylonJS uses OpenCV 2.4, so I had to do it twice!
Then I started following instructions how to install CylonJS and CylonJS-OpenCV
http://cylonjs.com/documentation/platforms/opencv/
https://github.com/hybridgroup/cylon-opencv
I followed how to install it in Ubuntu even though we're installing this in a Raspbian. Make sure ffmpeg is installed.
If you're having issues with installing cylon-opencv in Raspbian Wheezy, try to install the stable version of NodeJS 4.2.3
I followed the instructions here but I made sure I download the correct version.
http://doctorbin.tumblr.com/post/53991508909/how-to-install-the-latest-version-of-nodejs-npm
and also run these commands
sudo apt-get install gcc-4.8 g++-4.8
sudo update-alternatives --install /usr/bin/gcc gcc /usr/bin/gcc-4.6 20
sudo update-alternatives --install /usr/bin/gcc gcc /usr/bin/gcc-4.8 50
sudo update-alternatives --install /usr/bin/g++ g++ /usr/bin/g++-4.6 20
sudo update-alternatives --install /usr/bin/g++ g++ /usr/bin/g++-4.8 50
If you want to remotely view the camera, you can use and install
then when you connect to your raspberry pi using ssh like this
ssh -x pi@<ipaddress>
Here's a good tutorial how to connect AWS IOT to Raspberry Pi
https://github.com/sreid/aws-iot-raspberry-pi-how-to
I named the Thing as carcounter.
The sample app is very helpful. Here's the link
https://github.com/aws/aws-iot-device-sdk-js
Once I got the AWS IOT connected to my raspberry pi, I tried to setup SNS
Here's a good tutorial how to setup AWS SNS
Make sure that you specify that you allow other users to publish message to this topic. or else you'll be scratching your head for hours like I did. I warned you.
Then I created a "car alert" rule, with a condition.
I looked for the SNS Target and Created a new Role. Then clicked Create Rule.
I also tried publishing this to S3, just to save the data.
I followed this tutorial
I updated my rule to point to the s3 bucket
I followed the pattern from cylonJS-OpenCV example
http://cylonjs.com/documentation/platforms/opencv/
So instead of detecting a face, this cascade file would detect side view of cars.
I merged this code with sample from aws-IOT
https://github.com/aws/aws-iot-device-sdk-js/blob/master/examples/thing-example.js
At first, I tried running the example on my laptop. I opened two shell window, one is acting as mobile app (value updater), the other acting as a device (update receiver)
it worked! Send update RGB colors from one window, the other receives the updates.
Now I tried it on the Raspberry Pi with a Wifi connection.
It also worked!
It gave me an idea to integrate cylonJS-OpenCV and publish that info to AWS-IOT. Face detection is too common, so I searched a little bit and I found out I can use different HaarsCascade file. Cool! I found one that can detect the sideview of a car.
https://github.com/peterbraden/node-opencv/blob/master/data/hogcascade_cars_sideview.xml
The idea is this; detect a car from opencv, store the coordinates, width and height into a variable then use AWS-IOT to publish the data in to S3 and SNS. The SNS would email me is somebody parked in my car.
Of course with AWS-IOT, we can easily expand this to have phone notifications and visualization from data stored in S3.
Here's the code repository
https://github.com/rlyle78/aws-carcounter
Remember to copy your aws certificates to certs folder, I didn't include mine in the project.
"use strict";
var Cylon = require("cylon");
var carsDetected = 0;
var cars = { }; //here's where I store data
Cylon.robot({
  work: function(my) {
    // We setup our face detection when the camera is ready to
    // display images, we use `once` instead of `on` to make sure
    // other event listeners are only registered once.
    my.camera.once("cameraReady", function() {
      console.log("The camera is ready!");

      // We add a listener for the facesDetected event
      // here, we will get (err, image/frame, faces) params back in
      // the listener function that we pass.
      // The faces param is an array conaining any face detected
      // in the frame (im).
      my.camera.on("facesDetected", function(err, im, faces) {
        if (err) { console.log(err); }

        carsDetected = faces.length; // when I detect a "face" - side view of car, get how many and store it to the global variable cars
        cars = faces;
	if (carsDetected > 0)
	{
	mythingstate = {
 	 "state": {
    		"reported": {
			"carsDetected" : carsDetected,
			"cars" : cars
    				}
 	 	}
	};
		console.log("send");
		var response = thingShadows.update(myThingName,  mythingstate);
		console.log(response);
		thingShadows.publish('topic/CarCounter',
                  'Someone is using your parking lot!');
	}

        // We loop through the faces and manipulate the image
        // to display a square in the coordinates for the detected
        // faces.
        for (var i = 0; i < faces.length; i++) {
          var face = faces[i];
          im.rectangle(
            [face.x, face.y],
            [face.x + face.width, face.y + face.height],
            [0, 255, 0],
            2
          );
        }
     // The second to last param is the color of the rectangle
        // as an rgb array e.g. [r,g,b].
        // Once the image has been updated with rectangles around
        // the faces detected, we display it in our window.
        my.window.show(im, 40);
        // After displaying the updated image we trigger another
        // frame read to ensure the fastest processing possible.
        // We could also use an interval to try and get a set
        // amount of processed frames per second, see below.
        my.camera.readFrame();
      });

        // We listen for frameReady event, when triggered
      // we start the face detection passing the frame
      // that we just got from the camera feed.
      my.camera.on("frameReady", function(err, im) {
        if (err) { console.log(err); }
        carsDetected = 0; //reset this on every frame
        cars = { };
        my.camera.detectFaces(im);
      });
      my.camera.readFrame();
    });
  }
}).start();
I send the carsDetected and cars variable up to the AWS-IOT.
The shadow would look something like this.
{
  "desired": {
    "carsDetected": 0,
    "cars": {}
  },
  "delta": {
    "carsDetected": 0,
    "cars": {}
  }
}
Eventually, it would populate whenever openCV detects a car.
{"desired":{
    "carsDetected":1,
    "cars":[{"x":117,"y":214,"width":236,"height":118}]}},
    "version":14,
    "clientToken":"macbook-15"
}
Eventually, I would receive an email whenever the trigger happens.
If you like this project and want to see more, please add respect and follow me.
Working with openCV is fun, the CylonJS wrapper makes it easy, Since there's AWS-IOT nodeJS support, definitely worth checking out. If you like this types of project and wants to see more, follow me and view my other cool projects. Thanks for the respect.


Comments
Please log in or sign up to comment.