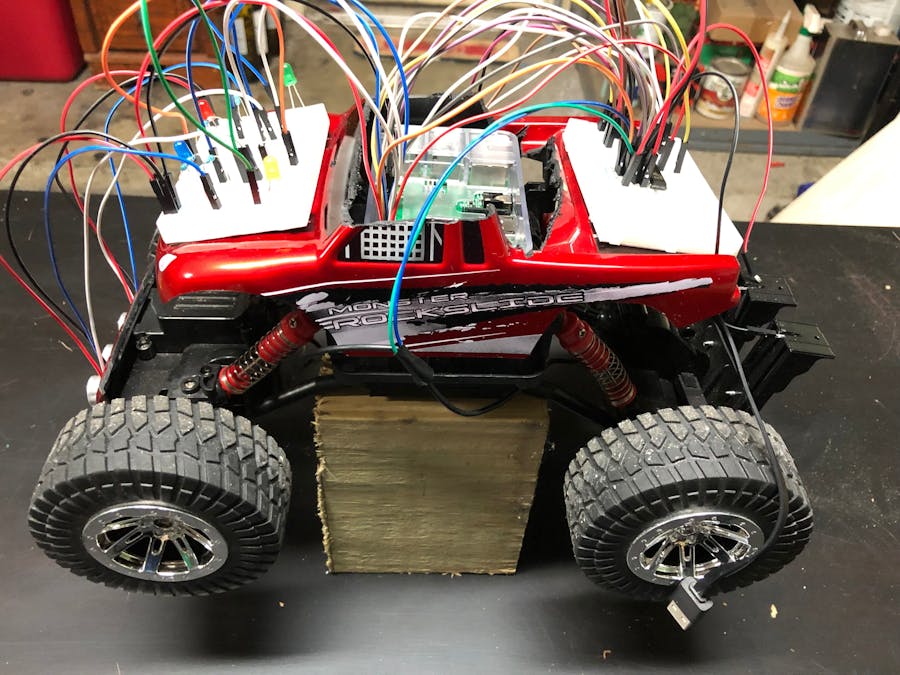
My wife and I were shopping at our local Big Lots store right after Christmas when I came across some marked down RC cars. I have always wanted to try and build a Rasperry Pi "smart car." I figured for the price, why not give it a shot. The worse I could do was lose the $20.00 for the car.
When I got it home, I sat out to take the car apart and see what was on the inside. The first thing I noticed was this car had 4 wheel drive and a separate engine that controlled the steering of the car. I needed to come up with a way to control all three engines at once so the car could drive autonomously. I also needed to figure out how to supply power to the car and the engines.
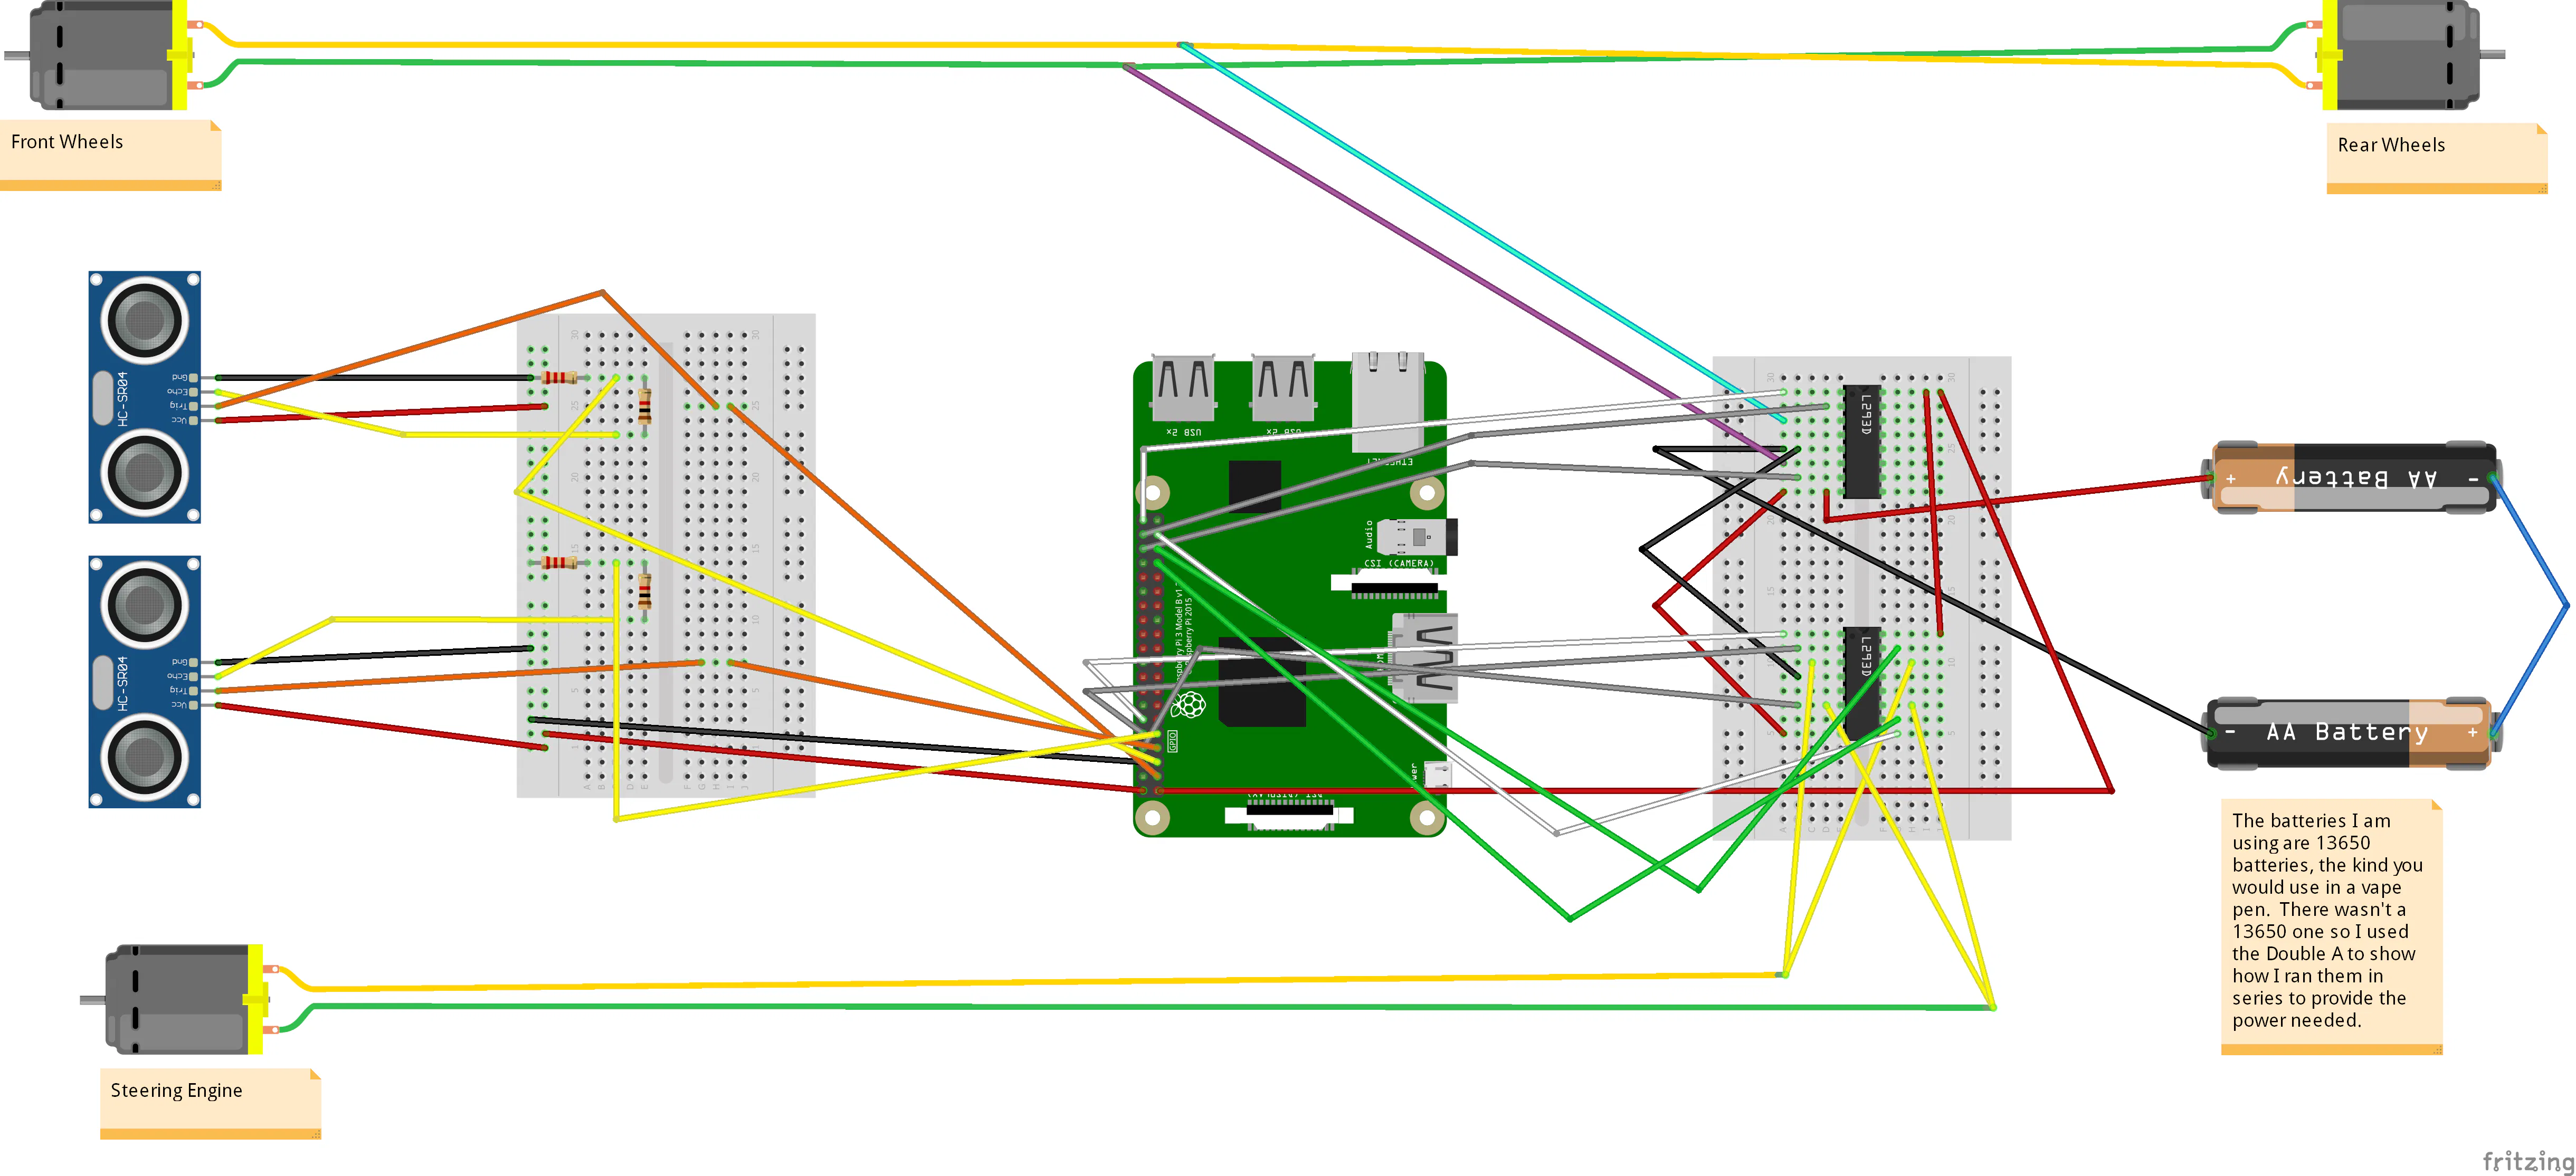
The car originally ran on 5 AA batteries. Which would have been fine to run the motors, however, I wanted something that would be easy to replace. Since the AA batteries are 1.5 volts each (7.5 total volts), I needed to find something that would have been comparable and would also allow me to recharge them. My first thought was to order a battery pack from an RC store, but I wanted to keep the project as cheap as possible. I confiscated some 18650 batteries and decided to use those instead. I ordered a pack of battery holders and soldered two of them together in series.
The two 18650 batteries put off around 4.7 v. (4.7 x 2 = 9.4v). Even though the car originally ran on 7.5 volts, the 9.4 volts wouldn't burn up the engines when you factor in voltage loss because of the soldering. What I ended up with was 8.4 volts being supplied to the breadboard.
Now that I had the power figured out, I needed to figure out how I was going to mount everything on the body. The car that I was using has individual suspension, which means that if the weight is not distributed evenly, it will ride crooked and in doing so will not make the front sensors work correctly. I wanted to keep the body, if possible, so I took my Dremel and cut the roof of the car off, that would allow the Raspberry Pi to sit on the frame of the car. I attached two half breadboards, one to the back for the engines and one to the front for the sensors. I was going to originally only use one and have everything run off of them, but since I wanted to keep the weight distributed evenly, I went with two.
I read through many great articles here on Hackster.io to figure out the best way to control the engines. I ended up going with two L293D chips. One of the chips control both the front and the back drive engines at the same time. If you are using a car that has 4 wheel drive, connect the front drive and the back drive together, then connect both of those to the output on the L293D chip. You can make them go forward and backwards depending on which pins you set as HIGH on the GPIO board of the Raspberry pi.
Another tricky part that I ran into was the ability to steer the car. I took the same approach as I did with the drive engines and used the input and output on one side of the L293D chip. In doing this, it would only control the car turning in one direction. After many frustrating attempts, I finally figured out that if I utilized both sides of the L293D chip, I would trigger the steering engine to go both Left and Right. The only downfall of this approach is that you have to use a total of 6 pins on your Raspberry GPIO board just to steer the car.
The last thing I wanted to add to the car was crash detection. Again after many hours of research I decided to use the Ultrasonic sensors. I purchased a 5 pack from Amazon and waited for them to arrive. Once they came in, I wired them up and mounted them to the front of the car.
I used the roof that I cut off the car to mount to the front engine housing. I hot glued it so I wouldn't have to screw into it and possibly mess up the engine. When mounting the senors I used hot glue, but I didn't glue directly to the sensor, I glued to the 4 wires that are coming off the sensor. I am not sure if it would have hurt it to glue the actual sensor, but I didn't want to take a chance of messing up the sensor. I did add a few LED's to the front board so I could make sure that I was getting the pulses that I wanted.
With everything hooked up, I VNCed into the Raspberry pi where I ran my Python code. I use the sensors to grab feed back then react accordingly to the distance from the object. I haven't totally tested it yet, and on occasion the sensors do not react fast enough and my car ends up running into obstacles. I am hoping to take it up to a flat open parking garage sometime this week and let it roam around and see how long it can go before it crashes.
Things I still want to do with it:
- Add camera support so I can use it to map an area
- Maybe add a third sensor a little higher on the front, just in case it comes to an obstacle that is off the ground.
- Make the sensors more reliable so it can crawl around the inside of the house (this is just to watch my cats go crazy and attack it)
Things I still am trying to figure out:
- How to connect to my Raspberry Pi when it doesn't have WiFi support. Meaning, when I take it to a parking garage, I need someway to interface with it, (which I am currently doing via VNC and my laptop), when the Pi and the laptop are not on the same network. Can I do this with Bluetooth?
- Come up with better Python code that is more reliable and actually make this learn its path.


Comments
Please log in or sign up to comment.