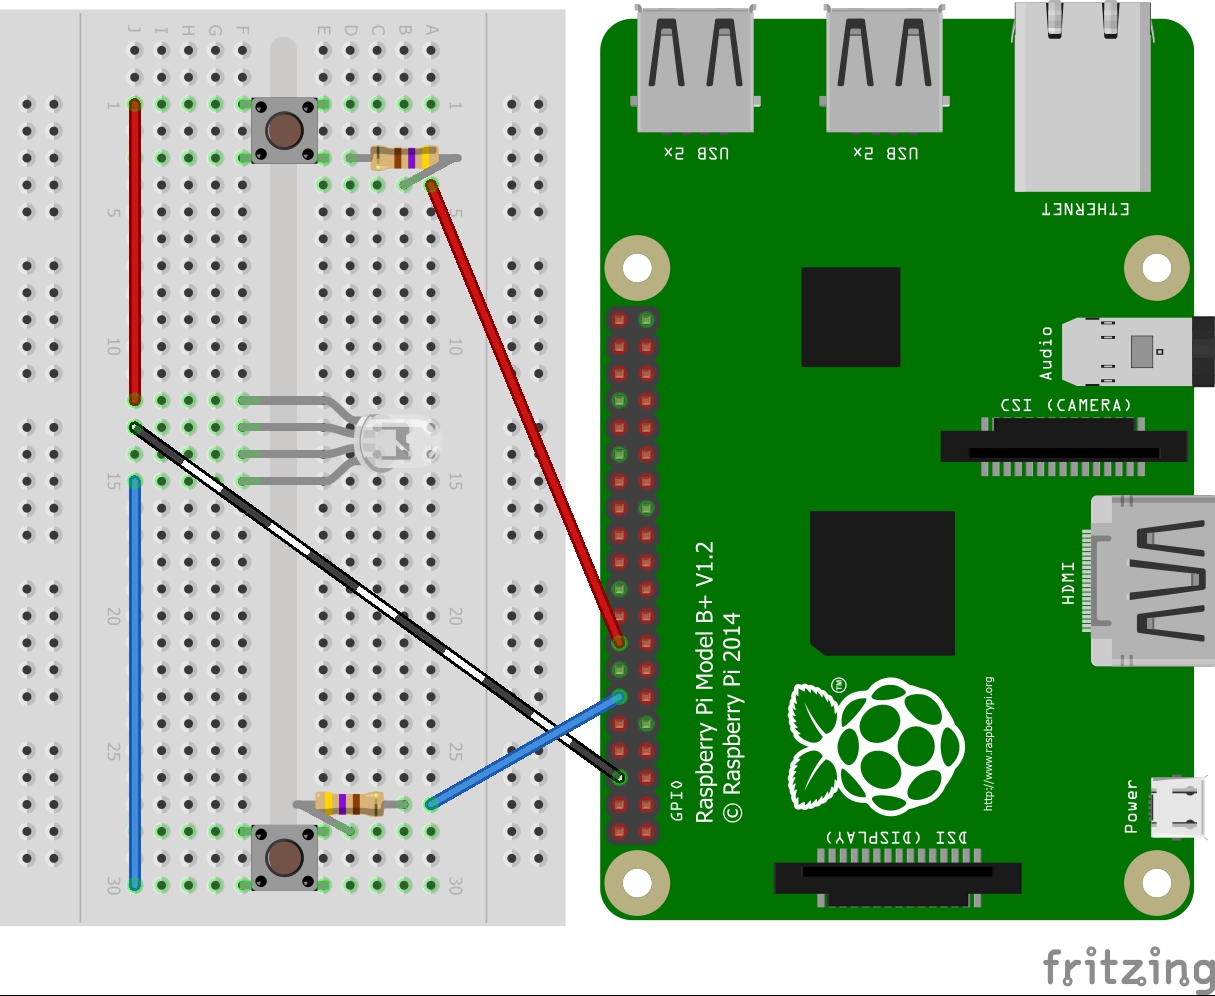
Hello! I created a RGB light controlled by two buttons on a half sized breadboard using the Raspberry Pi B+, although any Pi should do. This is an easy project that can be easily modified into multiple variations.
I use Cayenne MyDevices to remotely control my Raspberry Pi, but this is optional. No programming is needed for this project, just make sure that GPIO pins 18 and 23 are on.
ConstructionCopy the Schematics on to your breadboard and make sure everything is plugged in properly. The ground wire (depicted in black and white) should be on row 13.
Turning On Pins 18 and 23After logging into Cayenne, add your Pi if you have not done so already. To do this go to Add new/Device/Widget/Single Board Computers/Raspberry Pi. Then, open up your Pi's dashboard and it should look like this:
On the blue menu bar next to Overview click "GPIO" to give you remote access to your Raspberry Pi.
On the right column there are two buttons. On is GPIO 18 and the other is GPIO 23. Switch them from "IN" to "OUT" and from "LOW" to "HIGH." You are ready to test your Pi!
Testing Your RGB LEDPressing the bottom button should turn the LED blue, pressing the top button should turn the LED red. Press both -- you have purple!
Not working?
- Is your Pi connected to the internet?
- Have you connected your LED properly?
- Are you connected to the right pins?
You can add a third button so you can control a third color as well. I could do this because I do not have a third button. You can change it from RB to RG or GB, depending on how you wire the connections. I hope you enjoyed this project!


_3u05Tpwasz.png?auto=compress%2Cformat&w=40&h=40&fit=fillmax&bg=fff&dpr=2)
Comments
Please log in or sign up to comment.