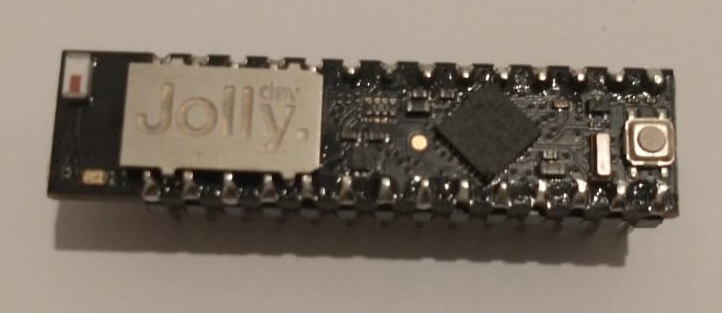
After some years of leaving Arduino UNO behind with nostalgia for good experiences. Thanks to the "Jolly" project, your trusty old UNO can be given a new life. The complete information can be found at jolly-dev.com, there you can purchase your module if you want to try this new option
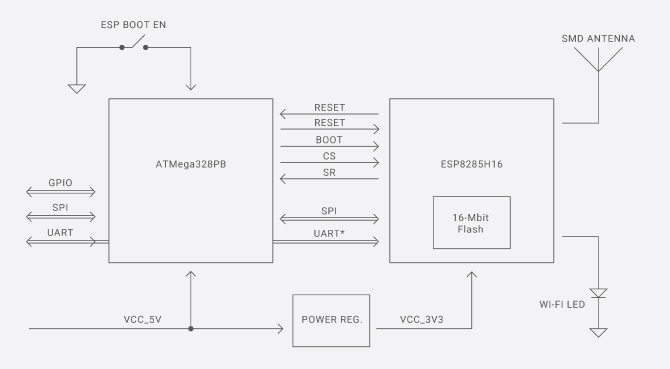
Jolly is a new electronic module for makers and Arduino UNO lovers. This Arduino Uno-compatible module has integrated Wi-Fi, to infinitely extend the potential of your projects into the new world of IoT.
The first thing is to make sure you have your UNO handy, find it and make sure it turns on without problems, you can load the Blink example to make sure the USB driver is up to date on your computer.
Make the changeWith the help of your favorite tool remove the Amega328P from the UNO carefully. Although it is not expensive, we do not want to generate one more bit of electronic garbage. Then mount the Jolly Module in the PDIP socket.
If you are familiar with how to add boards in the Arduino IDE you should have no problem getting started. If you moved away from programming or are starting these are the steps to follow to install the Jolly AVR platform.
You can find all the information on GitHub tech-jollydev. Make sure you have Arduino IDE 1.8.13 or higher installed.
- In the File Menu select the preferences option.
- In Preferences activate the Show verbose output during options because they will help us in the firmware update process or when loading a sketch in the module.
- Add the following two links to the Additional Boards Manager URLshttps://tech-jollydev.github.io/package_jolly_index.json https://espressif.github.io/arduino-esp32/package_esp32_index.json
- The next step is to add the Jolly Module in the board manager. You can do it by entering Menu > Tools > Board Manager. Or also if you have the IDE 2.0.0 you can do it directly in the icon on the right.
- In the board manager type "Jolly" and when selecting it choose to install.
- After installing in the Board Manager the Jolly Module will be ready to be used. Normally you can select the card and the COM port to work with it.
- Done, in the bottom corner of the IDE window you can see "Jolly" is now connected.
To know more options about the firmware and how to load it visit the repository on GitHub tech-jollydev.
Testing the new WiFi functionalityTo test the Tune UP of the UNO, the "ScanNetworks" Sketch was used, found in the Menu File> Examples> Examples for Jolly > WiFi > ScanNetworks, It is important that you note that the serial monitor BaudRate is 115200, knowing that we are working with the specifications of the ESP modules.
After testing the first example with WiFi operation on Arduino UNO, it is a good time to share this wonder called Jolly Module with the community. Maybe resume some old stopped projects or start new things that maybe have been planned with more sophisticated cards like ESP8266, ESP32, Arduino MKR1000 or others.
For more information visit the direct links to the Jolly Module project found in the content. I thank and give all the credit to its creators and to the creators of Arduino UNO and Arduino IDE.


_ztBMuBhMHo.jpg?auto=compress%2Cformat&w=48&h=48&fit=fill&bg=ffffff)


Comments
Please log in or sign up to comment.