


Hardware components | ||||||
 |
| × | 1 | |||
 |
| × | 1 | |||
 |
| × | 1 | |||
Software apps and online services | ||||||
| ||||||
| ||||||
 |
| |||||
 |
| |||||
Hand tools and fabrication machines | ||||||
| ||||||
Story
Useful links
Initial user centered design : https://www.slideshare.net/Abhiloki/main-projectidea
Minimum viable product : https://www.slideshare.net/Abhiloki/noise-monitoring-and-anc
Final product : https://www.slideshare.net/Abhiloki/final-presentation-iot
Overview
In this busy world, we are always surrounded by unwanted sound, often termed as noise, and this has become hazardous and is called as Noise Pollution. The tendency of human body to bear the noise is limited. The human body on long term exposure to noise can lead to various mental and physical health hazardous. The idea for this problem, is providing an application to user, so that he can measure the noise around, and decide whether its hazardous for him or not. We even have a noise cancellation system, which uses noise cancelling algorithm to mitigate the noise so that the user is not affected by the noise around.
Prevention model
Causes
Noise pollution can cause hypertension, high stress levels, tinnitus, hearing loss, sleep disturbances, and other harmful effects. Sound becomes unwanted when it either interferes with normal activities such as sleeping, conversation, or disrupts or diminishes one's quality of life.
•UPTO 23db : NO DISTURBANCE.
•30 - 60db : STRESS TENSION etc.,
•60 - 90db : DISTURBANCE IN SLEEP, HIGH BLOOD
PRESSURE.
•60 - 120 : HEARING IMPAIRMENT••ABOVE 120 : PAINFULL EFFECTS IN LONG RUN.
Noise calculation in decibels
Nd=20log10(V2V1)+10log10(Z1Z2)
Where:
Ndb is the ratio of the two power expressed in deciBels, dB
V2 is the output voltage level
V1 is the input voltage level
Z2 is the output impedance
Z1 is the input impedance
Noise monitor application.
This is the android application which recognise the sound in decibels and gives you the analysis of the frequency. and through this application we connected our application to ibm waston iot. so with the help of ibm streaming analysis the noise captures with the frequencies.
Hardware and Internet Connectivity
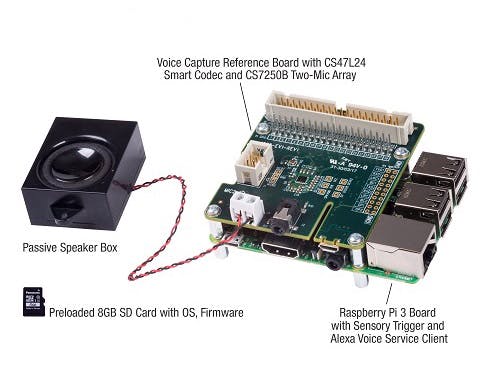
The main task of RaspberryPi is to load the noise cancellation algorithm when the user is using the headphones. The RaspberryPi even sends out measured noise signal values to IBM Watson, which can help to record the history of noise recorded by the person using the headphones. The Pi board will always be needed to be connected to Internet so that the data can be transferred to IBM Watson for future computations.
So, we are going to use raspberry pi with microphone and speaker. we are using some algorithms to cancel the noise. The algorithms are adaptive algorithms which is least mean square algorithm and fxlms and adaptive filter algorithm, with these algorithms we are going to make noise cancellation raspberry pi.
1) calculate filter output.
2) calculate error signal.
3) update filter coefficient.
for (int i = 0; i < M; i++)
Y += (W[i] * X[i]); //This calculate filter output and send back to the error microphone.
E = D - Y; //This calculate error output from the error microphone and send back to the adaptive filter signal
for (int i = 0; i < M ; i++)
W[i] = W[i] + (mu * E * X[i]); //update filter coefficients and cancel the amplitude coming from the original sound.
for (int i = 0; i < I; i++)
Input[i] = rand() / (float)RAND_MAX;
for (int i = 0; i < I; i++)
for (int j = 0; j < M; j++)
if (i - j >= 0)
Desired[i] += Input[i - j] * H[j];
Node-red
Firstly you need to create a flow for the raspberry pi to connect to IBM Watson. Raspberry Pi allows developers to easily connect to various platforms specially IBM Watson. The Node Red was accessed by us using the web page interface. The link contains the IP address of RaspberryPi board with 1880 port number. ex:192.168.xx.xxx:1880/
The first module is the Inject module, where the developer can decide the interval for injecting data into the command. The next module is the execution , where we insert the function and its deciding parameters. The exec module takes the input from inject module as parameters and then gives the output on running the function mentioned. After the command module, we have the debug module, where we get the output in that module. To get the data in IBM Watson, we add a function module, connected to exec command and debug command. The function command is used to converting the output received from exec module, to IBM Watson input type. The IBM Watson streaming analysis accepts input in the streamlined syntax format. Hence the function module is used for converting the output generated to Watson required input. Once we received the required input from the function module, we pass it to the Watson module by connecting these 2 modules.
IBM Watson Streaming Analysis
After the deployment you can see the analysis and frequency of the random data which we have given in the code in the ibm streaming analysis.
We get the link using the Watson module in NodeRed, and this provides us with the output as the below image. The image below receives the data on interval of every 3 seconds, which can be changed in the Inject module, in NodeRed.
Team
the circuit diagram for active noise cancellation.


Comments
Please log in or sign up to comment.