


Hardware components | ||||||
 |
| × | 1 | |||
 |
| × | 1 | |||
Welcome to Part-5 of this series where we explored the E1200 Internet router. We began with basic hardware tinkering to get access to the Linux terminal and went on to control the onboard LED. If you haven't read the previous projects, I would highly recommend you check out those before starting out with this project. The links to the previous projects are listed below.
Exploring the humble Internet Router - Part 1
Exploring the humble Internet Router - Part 2
Exploring the humble Internet Router - Part 3
Exploring the humble Internet Router - Part 4
In this project, we would be building our own custom OpenWRT image from scratch instead of downloading it off of the website as we did before. This way we have much more control of the firmware image and the Linux kernel. We can tune them as we wish. The other reason why we would want to build a custom image is that we can gain access to the Linux kernel sources that were used during the build. Why would you need the kernel sources? Read on!
OpenWRT is based on the Buildroot build system. This should be familiar if you have ever configured your own kernel and filesystem. So, configuring and building OpenWRT should be similar.
Let's start by cloning the git repository for OpenWRT onto your PC as follows.
user@Laptop:$ git clone https://git.openwrt.org/openwrt/openwrt.gitThis should clone the repository into a folder named OpenWRT. We then change into the directory and run the following commands to pick a specific version of OpenWRT.
user@Laptop:~/openwrt $ git branch -a
user@Laptop:~/openwrt $ git tag
user@Laptop:~/openwrt $ git checkout v21.02.1
We then update the feeds using the following commands.
user@Laptop:~/openwrt $ ./scripts/feeds update -a
user@Laptop:~/openwrt $ ./scripts/feeds install -a
The very same instructions are also listed on the OpenWRT website. Now, we are ready to start our custom configuration process. We start the configuration for OpenWRT as follows. That should lead you to a menu as shown in the image below.
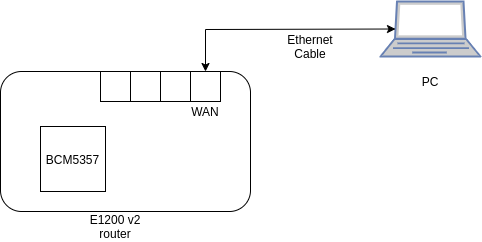
user@Laptop:~/openwrt $ make menuconfigEach option can be added/removed from the image by pressing the spacebar on your keyboard. As an example, the first config item was selecting the processor and target profile. The processor was the BCM5357 and the target was the E1200 v2 router. I select those options in the main menu as shown below. As you can see, the X indicates that this option has been selected.
You can also add all the packages that we have installed in the previous projects. For example, I am a big fan of the nano editor. I add it to the image by going to the Utilities --> Editors and selecting nano. Remember we only have 8Mb of flash memory on the router out of which about 5Mbis taken by the kernel leaving us with 3Mb to add our packages. So, be careful in choosing the packages.
I have also unselected a few packages that I thought would not be needed like the Wireless drivers and the DHCP server (removed these as the wireless radio does not work on this router when using OpenWRT). The Linux kernel that goes into the image can also be configured. We do that as follows. This is similar to the configuration above.
user@Laptop:~/openwrt $ make kernel_menuconfigOnce the configuration is done, we can start the build by typing in the following command. The build should then start. It would take a while when run for the first time.
user@Laptop:~/openwrt $ make -j $(nproc)Once the build is done, our custom firmware images will be located deep in the bin folder (~/openwrt/bin/targets/bcm47xx/mips74k/). As you can see below, the folder has a lot of files. But what is of interest to us is the file name ending with.bin. These are the firmware images.
We match the router name with the file name and search for it as follows.
As you can see in the image above, we grepped for the word "e1200" and we found 3 files. The one that we need is the third one as we are using version 2 of the router. We can now upload this image to our router from the OpenWRT configuration webpage as we did in project-2. We go to the webpage by visiting 192.168.1.1 in our browser and visiting the firmware upgrade page under the System menu.
We then select our custom-built image and start the upgrade process by clicking the "Flash image" option. This process should take a few minutes and once that is done, we can access the terminal as before using the UART-TTL cable. Once we click the flash image button, a new window pops up giving us an option to keep the current setting. If we check the box here, the setting from the previous image (SSH settings, passwords, etc.) will be preserved over the upgrade. If we uncheck, the new image we will be a fresh install. We would have to set up everything from the beginning.
Now that we have a custom-built firmware image. Let's try out building a kernel module for this router. A kernel module is a program that runs in kernel space. Here, we will build a simple hello world module. The code for this program is in the Project-5 folder of the GitHub repository. It is named hello.c. As you can see below this module is just a simple program that outs "Hello, world!"
#include <linux/init.h>
#include <linux/kernel.h>
#include <linux/module.h>

MODULE_AUTHOR("Dheeraj Reddy");
MODULE_DESCRIPTION("Hello, world module for the E1200 v2 Router");
MODULE_LICENSE("Dual MIT/GPL");
MODULE_VERSION("1.0");

static int __init helloworld_init(void){
    printk(KERN_INFO "Hello, World!\n");
    return 0;
}

static void __exit helloworld_exit(void)
{
printk(KERN_INFO "Goodbye, world\n");
}

module_init(helloworld_init);
module_exit(helloworld_exit);
The first few include statements are the kernel header inclusions. Usually, on a desktop system, we would find the kernel headers in the /usr/src folder as shown below. My PC is currently running linux-5.4.0-89 and so we find the headers for that version here.
user@Laptop:~/ ls /usr/src/
linux-headers-5.4.0-89/          linux-headers-5.4.0-90/
So, if you compile the hello.c program above using the compiler on your PC, it includes the header files from here. However, we aren't compiling this for the PC and need to compile this program for the router. Therefore, we need to point to the correct header files for the kernel running on the router. We do this by pointing the makefile to change the directory to the kernel source of the router. The sources are built under the openwrt folder as shown below.
user@Laptop:~/openwrt/ $ ls build_dir/target-mipsel_74kc_musl/linux-bcm47xx_mips74k/linux-5.4.143The include folder has all the kernel headers. Now, we create a makefile to build our kernel module and also include the correct headers. The makefile is in the GitHub repository.
ifeq ($(ARCH),mips)
KDIR ?= /home/linuxdev/openwrt/build_dir/target-mipsel_74kc_musl/linux-bcm47xx_mips74k/linux-5.4.143
The makefile has the line shown above to detect the architecture and point to the header file location we saw before. We now compile the kernel module as follows.
user@Laptop:~/openwrt/ $ make ARCH=mips CROSS_COMPILE=mipsel-linux-muslsf-gcc- Two key things to remember here is that we pass in MIPS for the architecture as our processor is based on the BCM5357 which has an MIPS architecture and we use the cross compiler downloaded in Project-3 to compile this module.
Once that is done, we will have a hello.ko file in the directory which we need to transfer to the router. We do this using SCP.
user@Laptop:~/openwrt/ $ scp hello.ko root@192.168.1.1:/home/
hello.ko                          100% 8032    92.5KB/s   00:00
We now log in to our router and insert the kernel module into the kernel as follows.
root@Openwrt:/ insmod hello.koNow we check the last few lines of our kernel log messages as follows and you can see our module has printed to the log.
root@Openwrt:/ dmesg | tail -n5
[   66.277679] device eth0 entered promiscuous mode
[   66.487955] br-lan: port 1(eth0.1) entered blocking state
[   66.493572] br-lan: port 1(eth0.1) entered forwarding state
[   66.852551] IPv6: ADDRCONF(NETDEV_CHANGE): br-lan: link becomes ready
[ 1081.139616] Hello, World!
That is all for this project! Stay tuned for further projects where we will explore TFTP protocol and file transfers.


Comments
Please log in or sign up to comment.