


Hardware components | ||||||
| × | 1 | ||||
| × | 1 | ||||
| × | 1 | ||||
 |
| × | 1 | |||
 |
| × | 1 | |||
| × | 1 | ||||
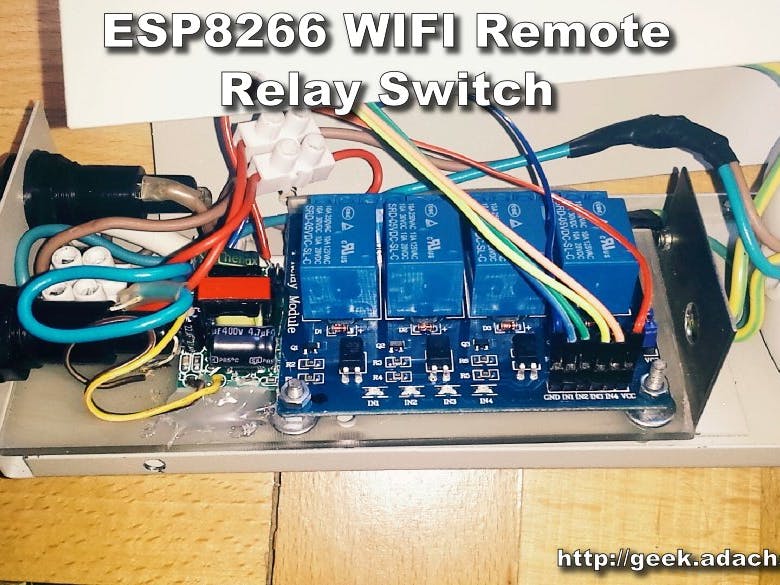
In this tutorial I will show you how to convert an old power strip into WiFi remote control. This will allow us to control electrical devices from the Internet via HTTP. For example, we will be able to turn on and off a heater, fan or light over the Internet. To build it I will use a popular electronic circuit, ESP8266 D1 mini. ESP8266 is a good platform for IOT (the Internet of things).
See this project here: ESP8266 WIFI Remote Relay Switch
Step 1: Components- ESP8266 D1 mini
- Power strip
- Relay Module 250V 10A
- AC-DC buck step-down module 220V turn 5V
- Button switch
- Some wires
At the beginning I removed the broken switch and cleaned everything.
I measured and cut the plexiglass board for electronic circuits. For cutting, I used a hot wire foam cutter from a previous project. Follow the link to see how I built this tool.
I drilled mounting holes for the plexiglass board. Then I mounted the plexiglass board inside the power strip.
The next step is assembling the plexiglass board and electronic circuits together. In this project, I only use one relay to control the power strip.
Because my power strip is made of metal, I'm afraid there might be a problem with the WiFi connection. That's why the ESP8266 is assembled inside a plastic case and screwed to the power strip.
I had a problem with flashing firmware. My version of the ESP8266 D1 mini has something wrong with the RST pin, it does not work. That's why, I disconnect the USB cable from the computer instead of using the RST button. In this article, step by step, I described the entire software flashing procedure - SONOFF - ESP8266 update firmware with Arduino IDE.
Download source code: ESP8266_on_off.ino Before you upload the software to ESP8266 setup your WiFi connection.
#define WIFI_SSID ""
#define WIFI_PASSWORD ""
- Open serial monitor in Arduino IDE.
- Get your server IP from serial monitor.
- Now open WWW page in your browser.
Now we can control the power strip using the web browser; we can also use the button on the plastic box.


_3u05Tpwasz.png?auto=compress%2Cformat&w=40&h=40&fit=fillmax&bg=fff&dpr=2)
Comments
Please log in or sign up to comment.