Hey, what's up, Guys! Akarsh here from CETech.
Tired of waking up in the middle of a sound sleep just because your room temperature is too low or too high because of your Dumb AC. Then this project is for you.
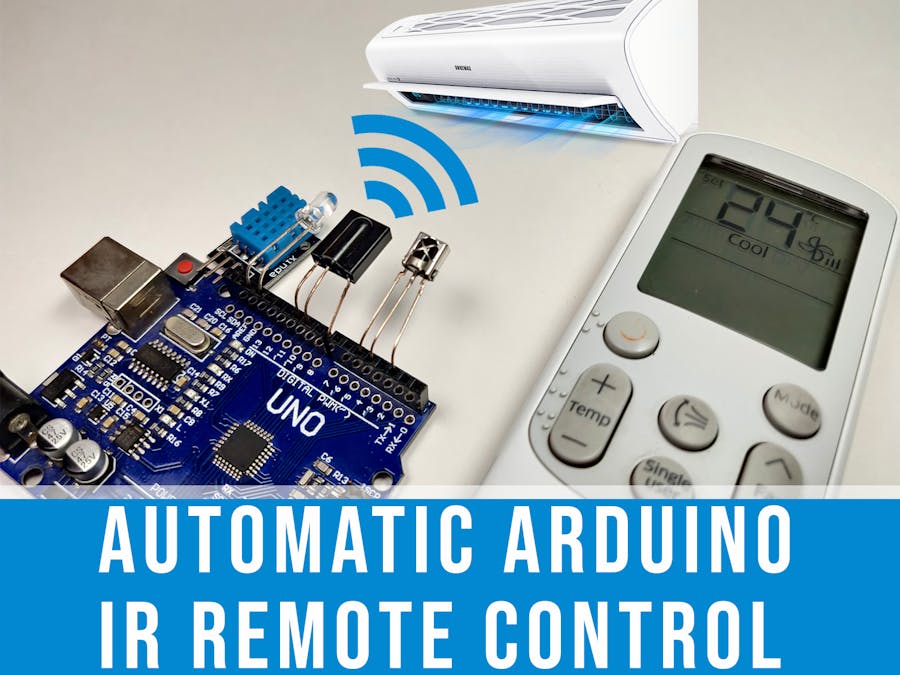
In this project, we are going to make our AC's a bit smart by making it switch ON and OFF automatically according to the room temperature.
We will be using Arduino UNO, DHT 11, IR receiver, and IR transmitter. We will be kind of mimicking the operation of the AC remote but it will be done automatically.
Towards the end of the article, we will be doing simple connections between these components and followed by the codes.
Let's start with the fun now.
Get PCBs for Your Project ManufacturedYou must check out PCBGOGO for ordering PCBs online for cheap!
You get 10 good quality PCBs manufactured and shipped to your doorstep for 5$ and some shipping. You will also get a discount on shipping on your first order.
PCBGOGO has the capability of PCB assembly and stencil manufacture as well as keeping good quality standards.
Do check them out if you need to get PCBs manufactured or assembled.
Looking at the Components1) DHT11:-
The DHT11 is a commonly used temperature and humidity sensor. The sensor comes with a dedicated NTC to measure temperature and an 8-bit microcontroller to output the values of temperature and humidity as serial data. The sensor is also factory calibrated and hence easy to interface with other microcontrollers.
The sensor can measure temperature from 0°C to 50°C and humidity from 20% to 90% with an accuracy of ±1°C and ±1%. So if you are looking to measure in this range then this sensor might be the right choice for you.
This Sensor has 4 pins but as one pin is of no use that's why its breakout board has only 3 pins which are Vcc, GND, and Data pin whose configuration is shown in the image above.
2) IR Transmitter(IR LED):-
The IR LED is same as the normal LED. IR LED stands for “Infrared Light Emitting Diode”, they emit light with the wavelength of up to 940nm, which is the infrared range of electromagnetic radiation spectrum. The wavelength range varies from 760nm to 1mm. These are mostly used in the remote control of TVs, cameras, and different types of electronic instruments. The semiconductor material used to make these LEDs are gallium arsenide or aluminum arsenide. Mostly used in the IR sensor as it is the combination of an IR receiver and an IR transmitter (IR LED).
3) IR Receiver:-
The TSOP sensor has the ability to read the output signals from home remotes like a TV remote, Home theatre remote, AC remote, etc. All these remotes will work with a frequency of 38kHz, and this IC can pick up any IR signals to process them and provide the output on pin 3. So if you are looking for a sensor to analyze, re-create, or duplicate the functions of a remote then this IC will be the perfect choice for you.
This component is available in several different variants but all those have 3 pins which are Vcc, GND and Signal pin whose configurations are shown in image above
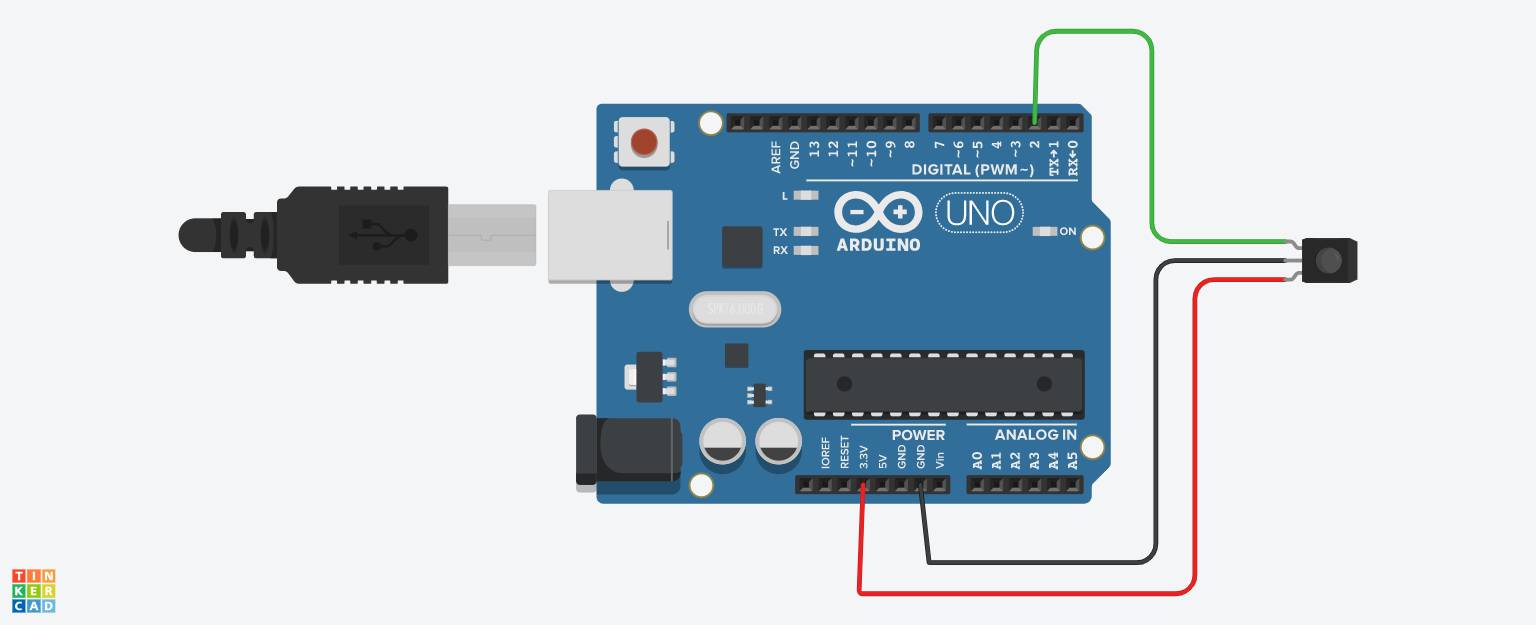
Connecting Arduino and IR ReceiverConnections for this project will be done in two parts. Here in the first part we will be connecting the Arduino UNO board with IR receiver to record the IR code for ON/OFF operations as sent by the original AC remote.
For this step, we require - IR receiver and Arduino UNO
1. Connect the Vcc pin(generally the middle pin) of the IR receiver to the 3.3V pin of the Arduino UNO.
2. Connect the GND pin of IR receiver to the GND pin of Arduino UNO.
3. Connect the Signal pin of IR receiver to Pin No. 2 of Arduino UNO.
After these connections are done move on to the coding part.
Coding the Arduino to Record IR Code Sent by AC RemoteSimilar to the circuit part this coding part will also be divided into two segments. In this segment, we will be coding the Arduino board to receive and record the IR code sent by the AC remote.
1. Connect the Arduino UNO with your PC.
2. Move on to the Github repository for this project from here.
3. From there get all the libraries available in the libraries folder and add them to the Arduino libraries folder in your PC.
4. Copy the IR_code_Receive code, paste in the Arduino IDE and upload the code after selecting the correct board and COM port.
5. After the code gets uploaded head over to the Serial Monitor which would say "Ready to receive IR Signals".
6. Move the AC remote closer to the IR Receiver and then press the ON button you will see a sequence of numbers flashing on to the serial monitor. Save those numbers somewhere as they are the keys that differentiate the signals sent for different operations.
7. Similarly, save IR Code after pressing the OFF button.
After this step we can remove these connections as this circuit is no more required.
When you are done with it move on to the second segment of the Connections part.
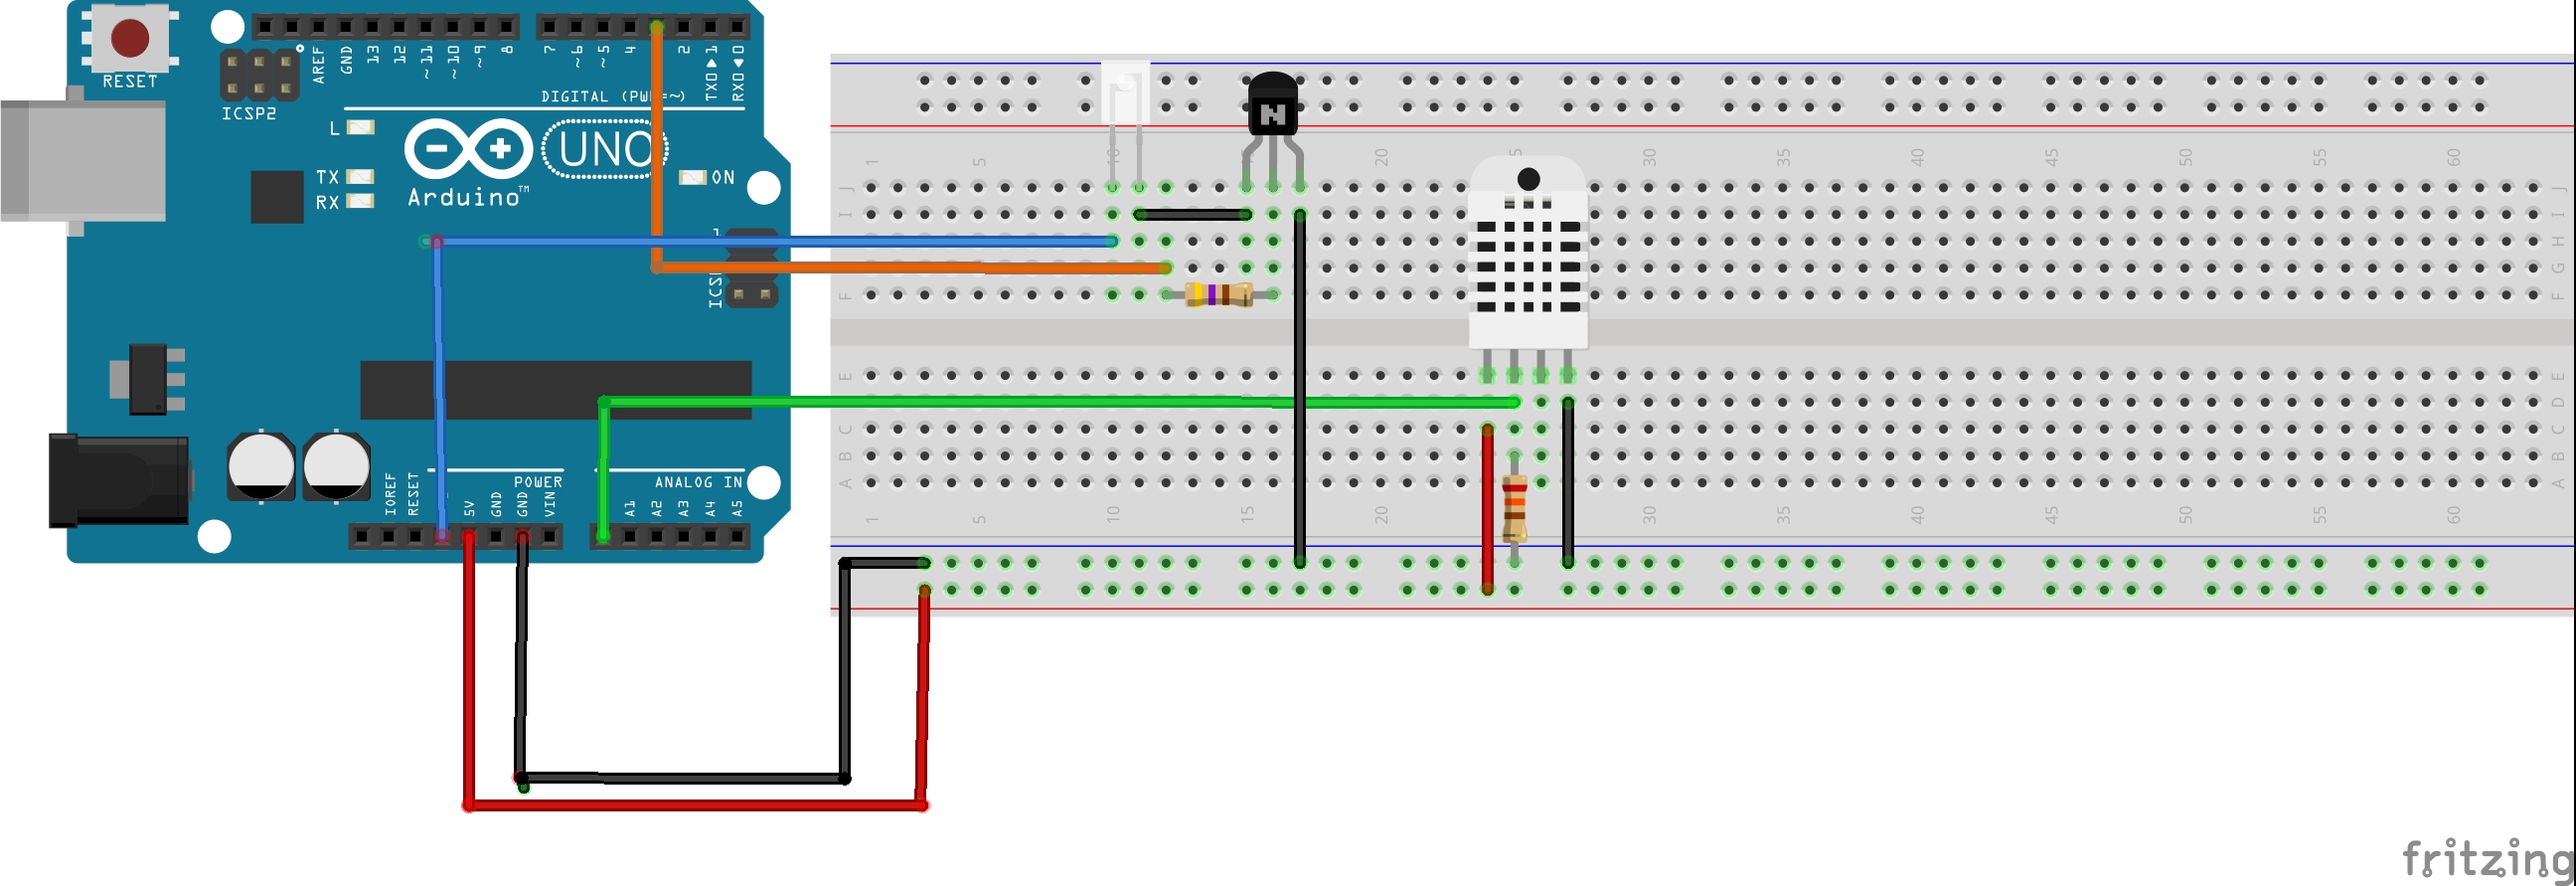
Making the Main Controller CircuitIn this segment of connections part, we will be connecting Arduino, DHT11, and IR Transmitter in order to send switching commands to the AC automatically according to room temperature.
For this circuit we require=Arduino UNO, DHT11, IR LED, 2N2222 Transistor, 470-ohm resistor.
1. Connect the Vcc pin of DHT11 to the 5V pin of Arduino and GND pin of DHT11 to the GND pin of Arduino.
2. Connect the signal pin of DHT11 to the A0 pin of Arduino. We are using an analog pin here as a DHT11 sensor gives output in the analog form.
3. Connect the 2N2222 Transistor's base pin(middle pin) to the Pin No. 3 of the Arduino board through a 470-ohm resistor.
4. The Emitter pin of the transistor which is the left pin while looking at the curved side should be connected to the GND and the collector pin of the transistor which is the rightmost pin while looking at the curved side needs to be connected to the negative terminal of the IR LED. The negative terminal of the IR LED is the shorter leg.
5. Connect the positive terminal or the longer leg of the IR LED to 3.3V supply.
After these connections are done we can move on to the next segment of the coding part.
Coding the Arduino to Send Switching SignalsIn this part, we will be coding the Arduino to make for sending ON and OFF signals to the AC when certain temperature conditions are met.
1. We need to go to the Github repository used in the previous coding step again. To reach there click here.
2. From there we need to copy the IR_AC_control_code and paste it into the Arduino IDE.
3. In the code the IR keys for my AC remote are already present you need to modify them with the IR key values stored in the previous steps.
4. I have written the code in such a manner that the OFF signal is sent when the temperature goes down below 26 degrees and again turns ON when the temperature reaches above 29 degrees. It can be changed as the user wants.
5. When the suitable modifications are done hit the upload button after connecting the Arduino to your PC.
Precaution:-
Though the user can change the temperature range as they wish while selecting a temperature range always maintain a difference of 3 - 4 degrees between ON and OFF temperatures in order to avoid frequent switching as it may damage the AC.
Sit Back and RelaxAs soon as the code gets uploaded you can see the temperature readings of your room on the serial monitor. It keeps updating after a certain delay.
You will be able to see that as the temperature sensed by the DHT11 sensor goes down below the OFF temperature value defined in the code, the AC will switch OFF automatically and after some time as the temperature goes above the ON temperature value, AC switches ON again.
Now the only thing you need to do is to Relax as your AC will do the rest of the job.
That's if from this demonstration do give it a try.


_ztBMuBhMHo.jpg?auto=compress%2Cformat&w=48&h=48&fit=fill&bg=ffffff)


Comments
Please log in or sign up to comment.