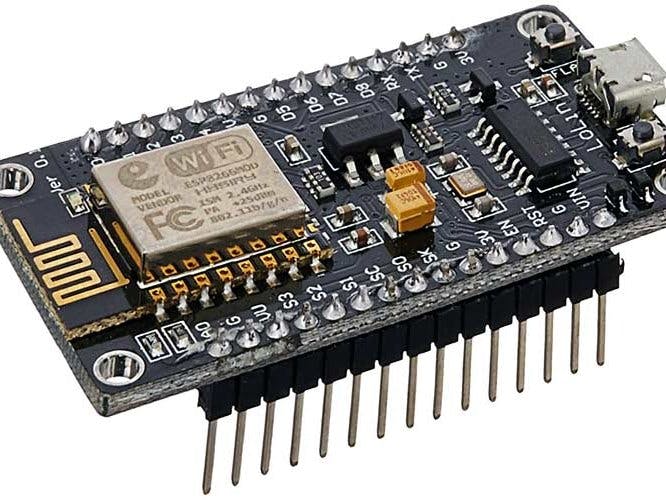
Get Started With NodeMCU (ESP8266)
NodeMCU is a low-cost open source IoT platform.
It initially included firmware which runs on the ESP8266 Wi-Fi SoC from Espressif Systems, and hardware which was based on the ESP-12 module. Both the firmware and prototyping board designs are open source. The firmware uses the Lua scripting language. The firmware is based on the eLua project, and built on the Espressif Non-OS SDK for ESP8266. It uses many open source projects, such as lua-cjsonand SPIFFS. Due to resource constraints, users need to select the modules relevant for their project and build a firmware tailored to their needs.
In this article,
- Setting up the Arduino IDE for NodeMCU.
- Create a blink sketch and upload.
Before proceeding we must know about the pin details of this development board.
- Operating Voltage: 3.3V
- Input Voltage: 7-10V
- Digital I/O Pins (DIO): 16
- Analog Input Pins (ADC): 1
- UARTs: 1
- SPIs: 1
- I2Cs: 1
- Flash Memory: 4 MB
- SRAM: 64 KB
- Clock Speed: 80 MHz
- USB-TTL based on CP2102 is included onboard, Enabling Plug n Play
- PCB Antenna
Ok lets get stated !!!!!!!
Setting up the Arduino IDE for NodeMCU.Step - 1
Connect the board to computer. And update the driver of your board.
For that, Press Windows Key + X and then click Device Manager
you can see a device under Other devices with a marking of yellow triangle. That means the driver for that device is not installed.
Right click on that device and click Update Driver Then click Search automatically for.....
After the installing of driver the device goes under the Ports.
Step - 2
Install the Arduino IDE from the Arduino IDE from Arduino cc or in the software part of this article If already installed skip this step.
Step - 3
Open then Arduino IDE and go to File>Preferences. Then add the below URL to Additional Board Manager URLs
http://arduino.esp8266.com/stable/package_esp8266com_index.jsonAfter that click ok
Step - 4
Next go to Tools > Board > Board Manager. Make sure your computer is connected to internet. After some loading you can type NodeMCU in search bar.
You can see esp8266 by ESP8266 community. Click on that and click install button. After installing click close button. Then close the Arduino IDE and again Open it.
Now the Arduino IDE is ready to program NodeMCU.
Create a blink sketch and upload.Step - 1
In void setup() part set the pin D0 as output pin. The pin D0 is connected to on board LED. You must write the pin as "D0" and not "0". Because in NodeMCU "D0" is representing digital pin 0. It is same as the pin GPIO16.
void setup(){
pinMode(D0,OUTPUT);
}
Step -2
Next program the loop part. set the "D0" as "HIGH" for 1 second. Then set "D0" as "LOW" for 1 second.
void loop(){
digitalWrite(D0,HIGH);
delay(1000);
digitalWrite(D0,LOW);
delay(1000);

}
Sketch is completed.
Step - 3
Next we need to upload the code to NodeMCU.
Go to Tools > Board. Then scroll down and select "NodeMCU (ESP -12E Module)"
Then again go to Tools > Port. And select the correct port. If you don't know the correct port, please disconnect the NodeMCU and go to Tools > Port. And note down the name of ports. Then connect the NodeMCU and check the name of ports. You can see one another port. And that is port of your NodeMCU.
Then click upload button or ctrl + U
You can see the the uploading progress on status bar.
NodeMCU will start blinking when the upload process is completed.
Instagram : five_volt_player
Facebook : Akshay Joseph
Github : akshayjoseph666
Contact : akshayjoseph666@gmail.com
Share your experience and suggestions on the comment box.
Previous articles :
Interfacing Bluetooth Module (HC-05) with Arduino Uno , Automatic Water Tap,Automatic Hand Sanitizer,Interface Ultrasonic sensor with Arduino Uno,Control Servo motor with Arduino Uno and Pushbutton,Control Servo motor with Arduino Uno and POT,Servo Motor Interface with Arduino Uno,IR Controlled Home Appliances With Saving Previous State,Touchless Hand Wash Timer, COVID -19 Social Distancing Reminder


Comments
Please log in or sign up to comment.