build your r2d2! or should I say, ardu-d2r2d2 is a cute little droid! and most fans of star wars would love to have him as a toy, or a model. so if you are an arduino nerd and a star wars fan, you can build these very easily! I built this using simple materials that I found in my house.
actually its been only a month since I started watching star wars- and by the time I completed episode one, I knew that I just had to make r2! so I began the work a week or two later. and its been about 2 or three years since I started doing robotics, so it only took me about 2 or 3 days to build r2. though my droid does not look like the original one, it pretty much does the same things- but not repair! it only moves in a straight line and has an rgb led on its head. so now where does the arduino come in? the head rotates using the sweep servo program. so now, lets begin our work! now we can start building our bot.
HOW TO BUILD r2d2
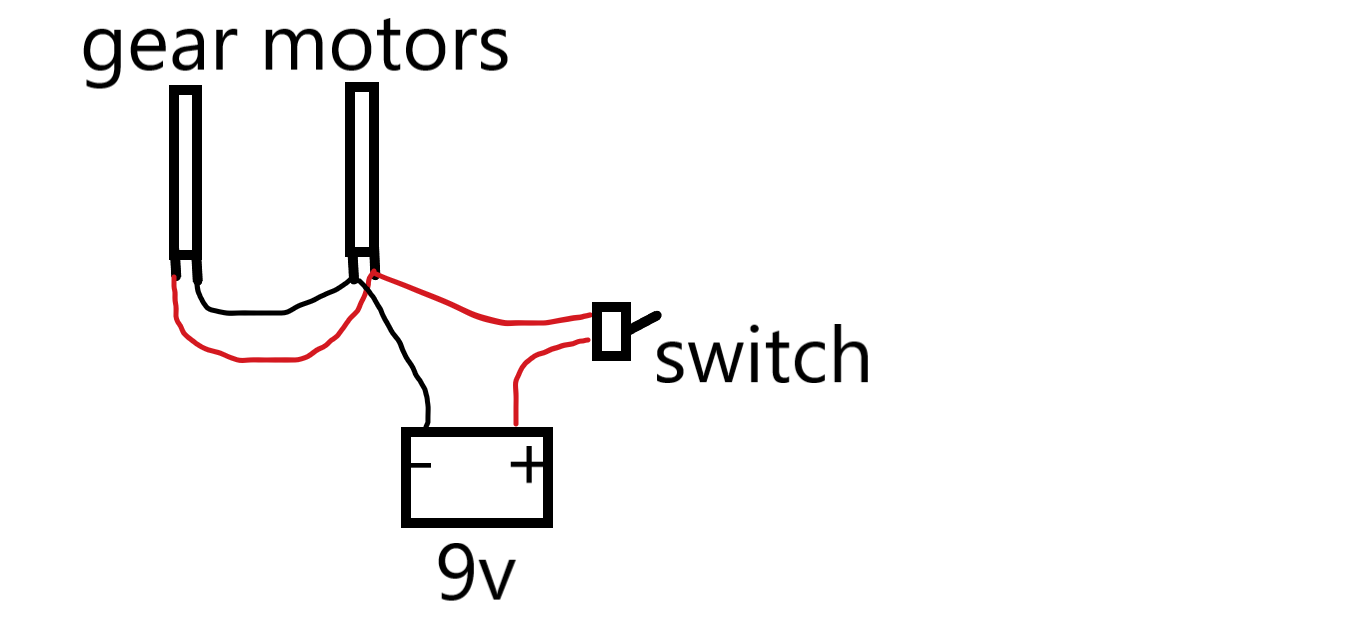
first take a large cylindrical tin, say an ice cream tin. remove the lid and keep it aside. On the outer side of the cylindrical lid, stick one gear motor in an appropriate position. If you have dual shaft motors then drill a hole for the extra shaft and stick the motor using glue. Opposite to this motor, stick the other motor in the same way. Attach the wheels. Above the two motors, drill two holes each For the wires. Wire the motors as shown in the diagram. Place the battery inside the tin. on the back part of the tin(opposite direction of the direction in which the wheels move) drill another two holes and fix the switch outside. Alternately keep the switch inside and wire it. Your engine is now ready. make sure both motors run in the same direction.
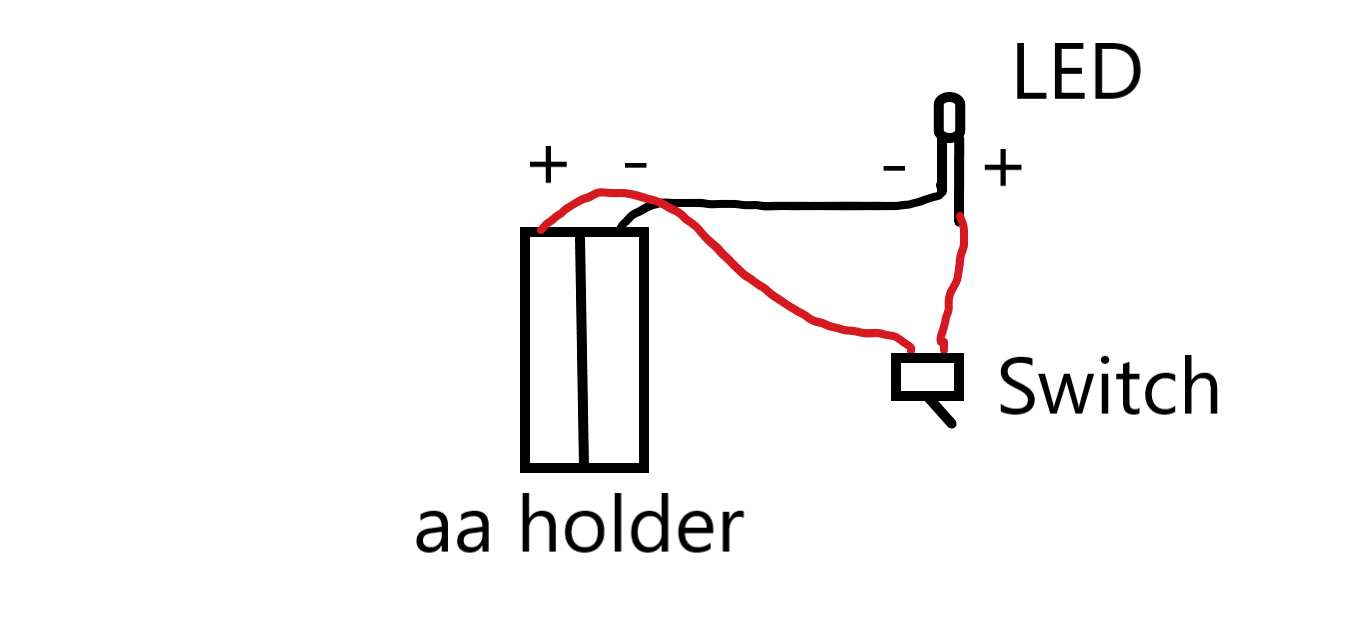
now take the lid. Drill two holes a little after the edge. Now cut some rectangular cardboard pieces of size 3cm x 3.5 or 4 cm. Stick these along the edge as shown in the picture, in such a way that there are triangular, or trapezium or any other similar shaped gaps in between. Fill these gaps using cardboard cut into the required shapes. Then, on one cardboard rectangle in the front side, make a hole as to stick the rgb led. Glue it in. Attach wires to the led and extend them through the holes. Now close half of the top part with an appropriately cut piece. For the other half, cut the required piece and cello tape this piece onto the other piece in such a way that the tape acts as a hinge and will serve as an openable hatch, just in case of any repair. Now place the AA cell holder inside the tin and do the required connection with the led as given in the diagram. stick the switch outside near the other switch and make holes for the wire. Now test the led. If you do not have a cell holder you can use a button battery with the same connections.
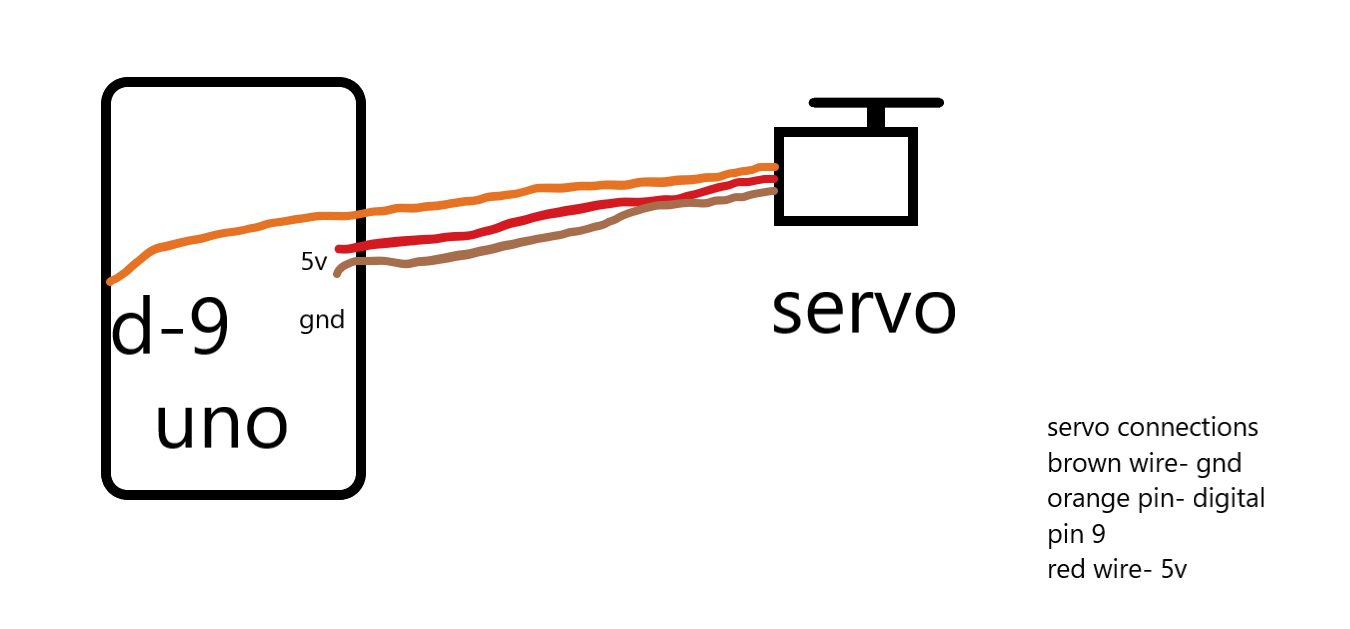
let us now start the work on the rotating head. Program and wire your arduino as given below. Stick an ice cream stick inside the tin So that the servo can be stuck on that. next drill a hole near the bottom so that the barrel of the barrel jack can be placed inside while the connector stays outside. Connect the Arduino to the jack and place it inside. Now back to the servo. Stick the lid on the servo. If the groove of the lid prevents rotation, reduce the friction by applying cello tape or insulation tape. Now test it. Your ardu d2 is ready!😀
Now decorate your bot! Have fun!


_ztBMuBhMHo.jpg?auto=compress%2Cformat&w=48&h=48&fit=fill&bg=ffffff)


Comments
Please log in or sign up to comment.