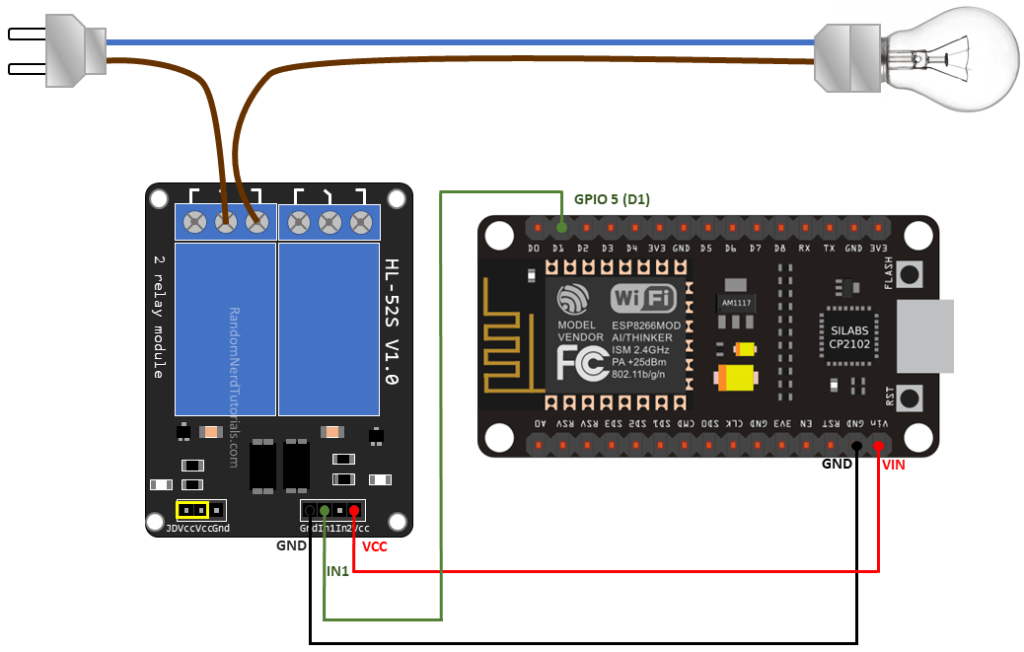
In this tutorial I will show you how to make ESP8266 webserver that controls relay using MicroPython firmware. If you didn't see my previous post about how to coonect MicroPython firmware with ESP8266 click here to continue.
Components that I have used
1. 5v Relay module
2. A/C bulb
3. Bulb holder
4. NodeMCU
5.Jumper wires
Thanks UTSOURCE.net to offer electronic components for my projects
Creating the main.py file on your board1. Press the new file button to create a new file
2. Press the Save file button to save the file in your computer
3. Then a new window will open and save that file with a name as per your wish. and don't forget to add ".py" extension with that file.
4. After that, you should see that file with boot.py file. if you did't see that file with boot.py file press the Reset button of your NodeMCU board and click the link button to un link and again click it for make link. then you should see that file with boot.py file. You can check the tutorial video from You Tube.
Download the code in my website also check the code how it will work behind. I have written each line of code explanation.


_qM2soP8k8n.jpg?auto=compress%2Cformat&w=48&h=48&fit=fill&bg=ffffff)


Comments
Please log in or sign up to comment.