


Hardware components | ||||||
 |
| × | 1 | |||
| × | 1 | ||||
 |
| × | 1 | |||
 |
| × | 1 | |||
 |
| × | 1 | |||
 |
| × | 1 | |||
Software apps and online services | ||||||
 |
| |||||
 |
| |||||
In this tutorial, I will show you how to make ESP8266 data logging to IOT cloud. This data logging system is vast and can be applied in Research Centres, Scientific Labs, Operation Theatres, Patient monitoring system and many more. Here I used LCD display to display the data in a monitor also you can visualize and can analize the data through your IOT Cloud.
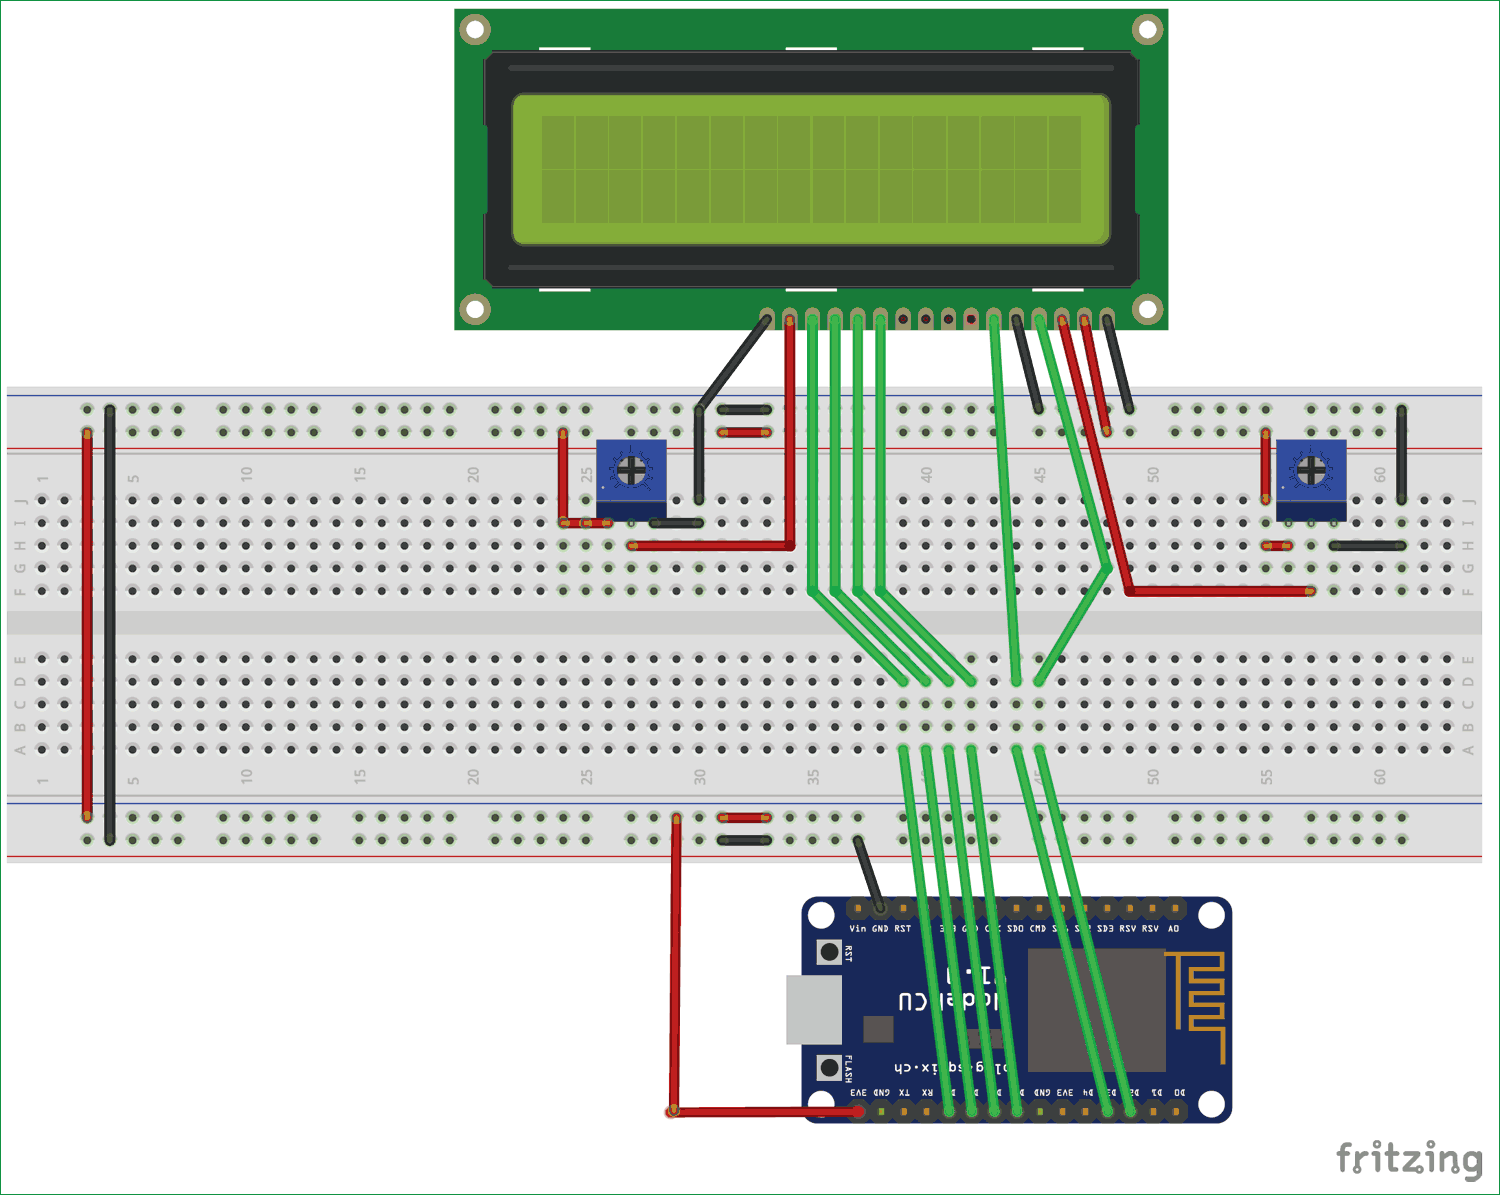
DH11_______ Node MCU
Vcc______ VV
IN1______D4
GND______GND
Here I have made small box to fit the LCD display also power the NodeMCU board through a 9V battery.
I have used Google spread sheet to log the data into cloud.So before going to the program, We need to make sure some credentials that will be used in the code.
Thanks UTSOURCE.net to offer electronic components for my projects
You can check my previous tutorial about Home Automation with python.
The First step will be getting the Google Script ID from Google Sheet. For this, you need to follow the below steps. Make sure If you have been using more one Email ID in one browser please make sure to use your frequently using ID. If you want to use other ID log in a New private window.
- First you need to Login to the Gmail with your Email ID and Password
- Next, Go to the App Icon In Top Right Corner.
- Now choose Sheets as well as you can see there.
- Create a New Blank Sheet.
- Just rename this created Spreadsheet Project to any name you want.
- In this tutorial I have one sheet, also you can add more sheet, then change the sheet name as per your wish.
- Now got to ‘Tools’ and click on “<> Script Editor”.
- The You can rename this Google Script File to any name you want.
- Now Copy and Paste the Google script code that I have given in bottom of the article.
- Then edit the Sheet name and Sheet ID in the code. You can get the Sheet ID from the Sheet URL just like shown below. https://docs.google.com/spreadsheets/d/xxxxxxxxyyyyyyzzzzzzzzzz/edit#gid=0, where “xxxxxxxxyyyyyyzzzzzzzzzz” is your Sheet ID. you have to got this link fom your spread sheet tab.
Now it’s time to get the major credential i.e. Google Script ID which will be written in the Arduino Program. If you make mistake in the copying Google Script ID then the data won’t reach to Google Sheet.
Getting the Google Script ID- Go to ‘Publish’then click on ‘Deploy as Web App…’
- The “Project version” will be “New”. Select “your email id” in the “Execute the app as” field. Choose “Anyone, even anonymous” in the “Who has access to the app” field. And then Click on “Deploy”. Note that When republishing please select the latest version and then Deploy again.
3. You will have to give the Google permission to deploy it as web app. Just click on “Review Permissions”.
4. Then choose your Email ID
5. Click on “Advanced”.
6. And then click on “Go to ‘your_script_name’(unsafe)”.
7. Click on “Allow” and it will give the permission to deploy it as web app.
8. Now you can see new window with the name of “Current web app URL”. Under this name, you can find a URL that URL contains Google script ID copy that and save it privately. it will be used in your code.
the format is like <https://script.google.com/macros/s/____Your_Google _ScriptID___/exec>.
If didn't comfortable with steps follow my tutorial from YouTube
Upload code
Now is the time to Upload the code. Select the correct COM port and board type for upload the code. Then you can the result is printing on LCD display and Google spread sheet. you can get the data to make analyze and decisions even spread sheet provides some graph and chart feature to make analyze.
Hope you have like this project.
You can subscribe my YouTube channel to get the projects in video version
. also don't forget to share this project among your group😀.


Comments
Please log in or sign up to comment.