


Hardware components | ||||||
 |
| × | 1 | |||
 |
| × | 1 | |||
 |
| × | 1 | |||
 |
| × | 2 | |||
 |
| × | 1 | |||
 |
| × | 1 | |||
 |
| × | 1 | |||
 |
| × | 1 | |||
 |
| × | 1 | |||
Software apps and online services | ||||||
 |
| |||||
Hand tools and fabrication machines | ||||||
 |
| |||||
 |
| |||||
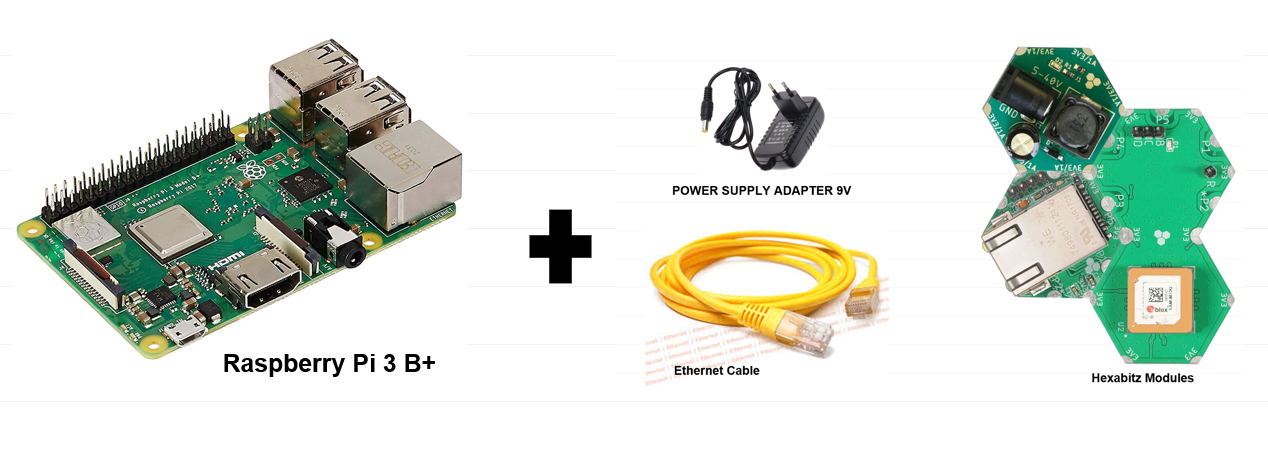
The project aims to GPS data transfer and display by integrating a GPS module and an Ethernet module. By utilizing an Ethernet cable, we will seamlessly transmit GPS data to the Raspberry Pi, where it will be processed and displayed in a user-friendly format.
You can create a remote data monitoring system using Raspberry Pi, Ethernet and GNSS module. The system could be set up to monitor and transmit data from a remote location such as between front of car and the raspberry pi at the dashboard. The Raspberry Pi could be connected to the GNSS module via Ethernet and programmed to transmit the data over the internet to a central server for analysis or at the same Raspberry Pi.
Or you can create a multi-sensor monitoring system using a Raspberry Pi and Ethernet. The system can be designed to monitor multiple sensors such as temperature, humidity, pressure, light levels and a GNSS module. The Raspberry Pi can be connected to the sensor array via Ethernet and programmed to collect data and transmit it to a central server for analysis or processing within the Raspberry Pi itself before sending it. This type of system can be useful in industries such as agriculture, where monitoring environmental conditions is critical to crop growth and productivity. The weather can also be predicted in advance based on the region in which the system is located.
We can also use the GNSS module to build a clock interface based on UTC data.
Using a GNSS module to set the correct time for the Raspberry PI without a network. Learn more: https://www.haraldkreuzer.net/en/news/using-gps-module-set-correct-time-raspberry-pi-3-a-plus-without-network
Key Features:
1. Enhanced Data Transfer: Our system ensures reliable and high-speed data transfer between the GPS module and Raspberry Pi through the use of Ethernet technology.
2. Real-time Tracking: With our project, users can track their location in real-time, making it ideal for navigation systems, fleet management, or outdoor activities.
3. Seamless Integration: The integration of the GPS module with the Raspberry Pi allows for easy integration into existing projects or systems.
4. User-friendly Display: The collected GPS data will be presented in a visually appealing format on the Raspberry Pi's display, providing users with clear and concise information.
5. Expandable Functionality: Our project is designed to be expandable, allowing for additional features such as mapping, geofencing, or data logging to be incorporated in future iterations.
Benefits:
1. Cost-effective Solution: By utilizing readily available components like the Raspberry Pi and Ethernet modules, our project offers a cost-effective alternative to traditional GPS systems.
2. Improved Accuracy: The combination of GNSS technology with the processing power of the Raspberry Pi ensures accurate positioning information.
3. Versatile Applications: Our system can be applied in various fields such as transportation, agriculture, or personal tracking devices.
4. Open-source Platform: As an open-source platform, our project encourages collaboration and customization by providing access to its source code.
By implementing this enhanced GNSS data transfer and display system using Ethernet for Raspberry Pi, we aim to provide users with a reliable and user-friendly solution that opens up new possibilities for location-based applications.
What is GNSS?GNSS - Global Navigation Satellite System
GNSS is a general term describing any satellite constellation that provides positioning, navigation, and timing (PNT) services on a global or regional basis. While GPS is the most prevalent GNSS, other nations are fielding, or have fielded, their own systems to provide complementary, independent PNT capability. The main ones to know are BeiDou, Galileo, GLONASS, IRNSS, and QZSS. Learn more Here.
User Datagram Protocol (UDP) refers to a protocol used for communication throughout the internet. It is specifically chosen for time-sensitive applications like gaming, playing videos, or Domain Name System (DNS) lookups.
- Used for simple request-response communication when the size of data is less and hence there is lesser concern about flow and error control.
- It is a suitable protocol for multicasting as UDP supports packet switching.
- Normally used for real-time applications which can not tolerate uneven delays between sections of a received message.
Learn more:
https://wiki.python.org/moin/UdpCommunication
https://www.geeksforgeeks.org/differences-between-tcp-and-udp/
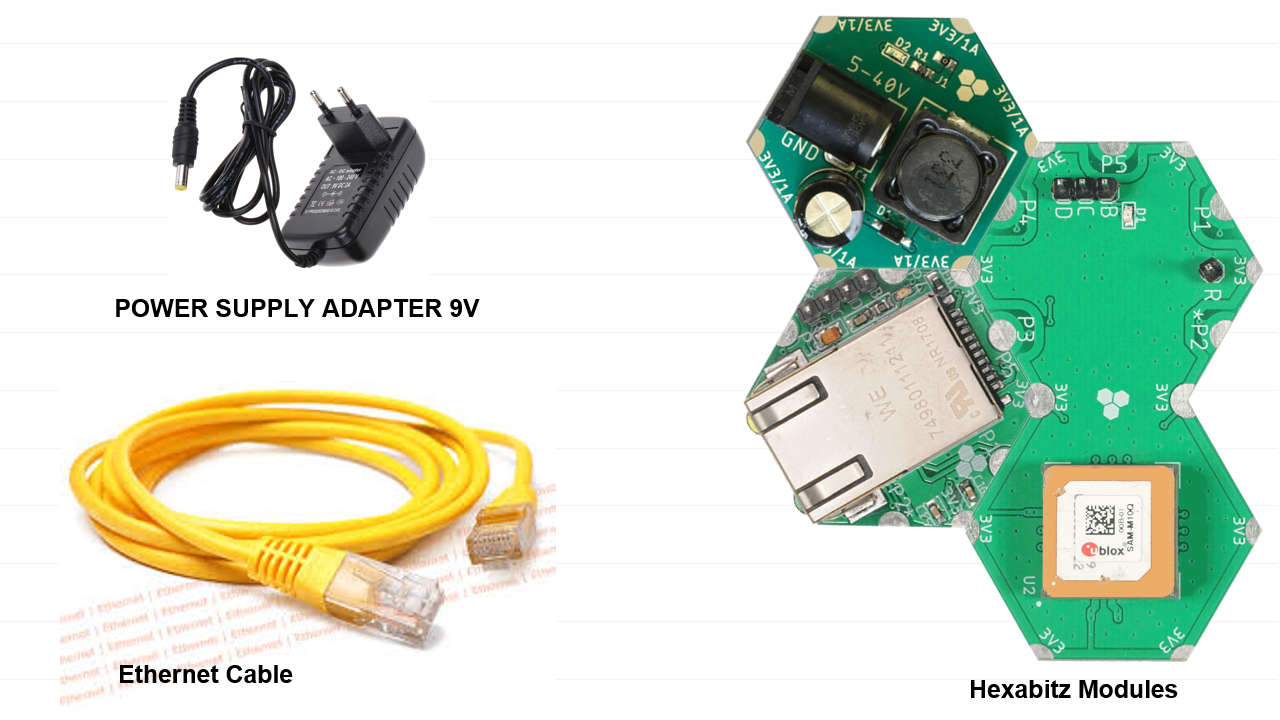
Hexabitz 10Base-T Ethernet Module (H1DR5): 10Base-T Ethernet module plays a crucial role in enabling devices to communicate over Ethernet networks using the 10Base-T standard. It provides the necessary hardware support for data transmission and reception, ensuring reliable and efficient network connectivity.
SAM-M10Q GNSS (H1FR5x): H1FR5x is a SAM-M10Q GNSS module based on the STM32G0 MCU.
This module this a compact and high-performance Global Navigation Satellite System (GNSS) receiver. It is designed to provide accurate positioning, navigation, and timing information for various applications.
The module features a built-in antenna, which eliminates the need for an external antenna. This makes it easy to integrate into devices with limited space or those requiring a simplified installation process.
The SAM-M10Q supports multiple GNSS constellations, including GPS, GLONASS, Galileo, and QZSS. This allows for enhanced positioning accuracy and reliability, even in challenging environments.
With its high update rate of up to 10 Hz, the module can provide real-time position updates for dynamic applications such as vehicle tracking, UAVs, and robotics.
1. Setting up the Raspberry Pi:
Enter the IP addresses into the relevant fields. Your desired IP address will be in the IPv4 field. Your router's IP and DNS server's IP will be in the fields named after them.
Click Apply, close the window and reboot your Pi. Your Pi will now attempt to use your desired IP address at each boot.
2. Plan the array and assemble the hardware:
We prepare the project components and plan our array design by aligning modules side-by-side. Then we solder the modules together using Hexabitz Fixture.
3.Writing codes with STM32CubeIDE software:
Check out this article for writing code with STM32CubeIDE.
· Fixed topology file: Inter-array communication in Hexabitz is done using a routing table stored in a special header (.h) file. This header file describes the number of modules and how they are connected to each other as well as other important information for the array; hence, it is called a topology header file. Currently, you need to make a topology file manually.
After creating the topology for the two modules and determining their configurations, we add the topology for each module. See this link for help in creating a topology file. Then go to project.h and UN-comment the header.
H1DR5 Firmware main.c code:
In this module we adjust the settings for the ethernet:
uint8_t myGateway[4]={192,168,1,100};
uint8_t mySubnet[4]={255,255,255,0};
uint8_t myIP[4]={192,168,1,101};
uint8_t Mac_addres[6]={0x07,0x6,0x2,0x3,0x4,0x5};
Set Local_Mac_addr:
Set_Local_mac_addr(Mac_addres); // Mac_addr ethernetSet_Local_IP:
Set_Local_IP(myIP);Set_SubnetMask:
Set_SubnetMask(mySubnet);Set_Remote_IP:
Set_Remote_IP(myGateway);Set_Local_PORT:
Set_Local_PORT(35);Set_Remote_PORT:
Set_Remote_PORT(34);Set_reseve_mac_and_ip_Remote:
Set_reseve_mac_and_ip_Remote();H1FR5 Firmware main.c code:
- Get coordinates on the Earth's surface (Longtude, Latitude) in degree.
(Longtudeindicator, Latitudeindicator) North(N), South(S), East(E), West(W).
Latitudes are horizontal lines that measure distance north or south of the equator. Longitudes are vertical lines that measure distance east or west of the meridian in Greenwich. Latitude and longitude are both measured in degrees (°)
- Get UTC time(hour, minute, second).
- Get Speed Over Ground(Km/h, Knot).
- Get Height Above Sea Level(m).
GetPosition(&longdegree, &latdegree, &longindicator, &latindicator);
GetUTC();
GetSpeed(&speedknot, &speedkm);
GetHeight(&height);
And this API must call inside while loop in order to process data which comes from GPS
GPSHandel();4. Writing Python Code:
You can start Python3 from the command line (with python3) then
import tkinterIf you get an error message then exit out of Python3 and call
sudo apt-get install python3-tkto install it.
5. Testing the System 🛰️📡🌟🕰️😃🚩🧩🗺️🔎📌📍🌍


Comments
Please log in or sign up to comment.