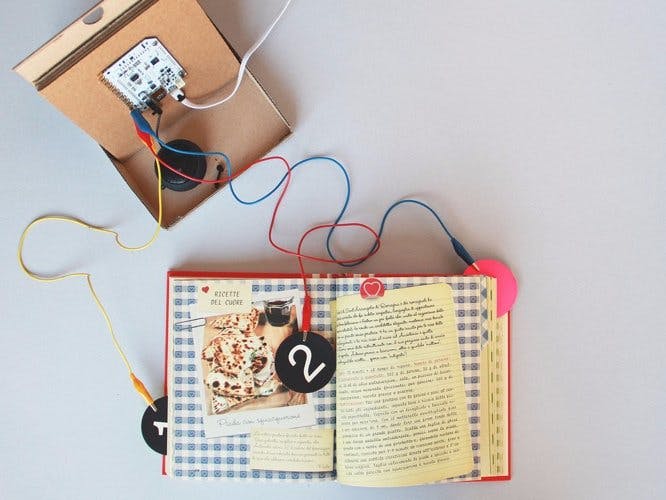
You know when you’re cooking and you’re getting your recipe book all messy? Quite unpleasant, but don’t worry, we have a solution for you! Make an interactive recipe book using the Touch Board Starter Kit. In this tutorial, we’ll explain how to use the sensors creatively to integrate sounds into your cooking. The tracks work as a timer to pace each stage of the recipe. Use Electric Paint and the Touch Board to keep you entertained while you cook!
This project was created in collaboration with Giulia Galli.
MaterialsTo begin you will need:
- 1x Touch Board
- 1x Electric Paint 10ml
- 1x Electric Paint 50ml
- or 1x Touch Board Starter Kit
- 1x mini speaker
- 1x brush
- crocodile clips
- cardboard
- carton
- recording device (like a smartphone)
We are going to start with building a support box for the touch board and the speaker. Download the file here and cut the shape out of the carton.
Using the cutout, shape the box and glue the tabs of it using a glue gun.
Now that the support for the touch board and the speaker is ready, it is time to make some buttons for our sensors.
Use some cardboard to cut the shape of your buttons. We used circles marked with numbers, but it’s up to your creativity what you want your button to be. This is your chance to be creative!
While waiting for the paint to dry, you can use the time to upload a song, food story, chef tips, or whatever else you think you’d like to listen to while cooking to your touch board.
You can search for sounds online, or record yourself reading the cooking instructions with your smartphone. You can use this free online tool to crop your MP3s to the right length.
If you haven’t changed the MP3 files on your touch board before, have a look at this tutorial here.
Once you’ve got your sounds and instructions on your Touch Board, it’s time to place and connect the board within its support box.
Set the touch board on the support box and attach the alligator clips from each sensor to your selected electrodes.
Plug in your speakers, you can keep them underneath the touch board in the support box. Plug in the Micro USB cable to provide the Board with power.
Congratulations, your Touch Recipe is ready to go! Turn your touch board on and give it a test. If you are done with the recipe, you can simply change the sounds on the SD card for new instructions.
If you come up with some crazy designs or new innovations we would love to hear from you! Simply send us your images or videos on Instagram or Twitter or email us at info@bareconductive.com.


Comments
Please log in or sign up to comment.