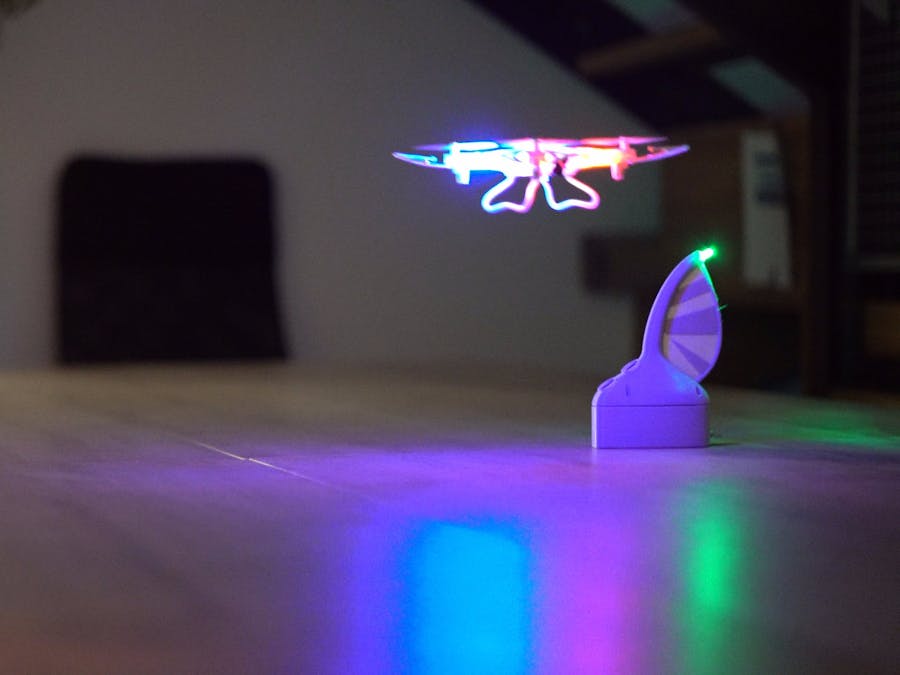
We admit it - we love playing with drones, and we dream of the day when we’ll be able to make one with circuito.io. But until that day comes, here’s a must-have for all drone lovers.
Just like in real-life drone races, we wanted to make something for mini-drone races.
The idea is simple: The RGB LED changes from red to green whenever the ultrasonic sensor detects the drone getting closer. Whoever finishes the course in the shortest amount of time - wins!
The electronicsThe basic circuit goes like this:
HC-SR04 (ultrasonic sensor) > Arduino > RGB LED
Here’s a magic link with these components already selected on circuito.io.
If you’ve never used circuito before, take a short tour of the app: as you can see, on your left hand side, you can select different sensor and actuators that can be added to your circuit. You can also change the controller and the power source.
Give it a try and click Generate once you’re done.
Welcome to your circuito reply!
Here you’ll find 3 sections:
1. The Bill of Materials or BoM is a list of all the parts you need for your project.
Don’t forget that circuito not only guides you how to connect these components, but also adds necessary peripheral parts that your circuit can’t do without.
2. Next you’ll find the Step-by-Step wiring guide, that shows you exactly how to connect all the components of your circuit.
Notice that this circuit uses an Arduino Pro Mini, in order to connect it to the computer you need a FTDI cable or a Sparkfun breakout board. This will provide power and communication to the board via USB.
3. And at last the code section.
Follow these steps:
- Download the code zip file from the circuito reply and extract all files to your computer.
- Open the firmware.ino file with Arduino IDE.
- Make sure that the port and board are set properly
- Upload the code to your Arduino
Was the upload successful?
If not >> go back and check that you connected everything properly. If you’re still having trouble, comment below and we’ll come to the rescue!
If yes (yay!) >> copy the void loop () function from this tutorial and replace it with the original void loop () you got in the sample code. Don't forget to upload the new code to your Arduino.
The code generated by circuito.io is a sample code. It includes different libraries and takes care of all the settings that make the interaction between the components of your circuit and your microcontroller. The code in this tutorial was written specifically for this project by our awesome team.
A bit more about the code:
The hcsr4.ping_cm from the new ping library is set to return -1, meaning the sensor did not discover any obstacle in the max distance defined. To prevent false detections, we edited the condition - if (hcsr04Dist < 30 && hcsr04Dist > 2) so that the -1 won’t trigger the air gate.
The plasticsThe air gates are 3D printed, and you can download their .STL files from the bottom of this page.
There are two parts: the base and the body and you can easily screw them together.
Some technical printing details:
We used the MakerBot Replicator 2X Resolution: 0.2 Infill: 15
And that’s basically it. We’d love to hear your thoughts and ideas for improvement. Feel free to comment or contact us on our facebook page.


_3u05Tpwasz.png?auto=compress%2Cformat&w=40&h=40&fit=fillmax&bg=fff&dpr=2)
Comments
Please log in or sign up to comment.