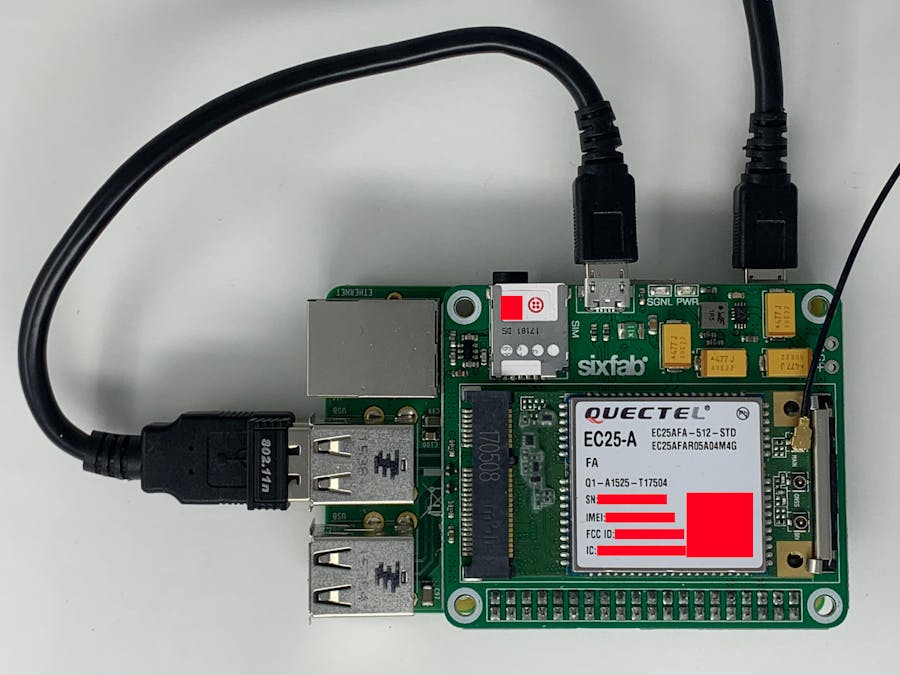
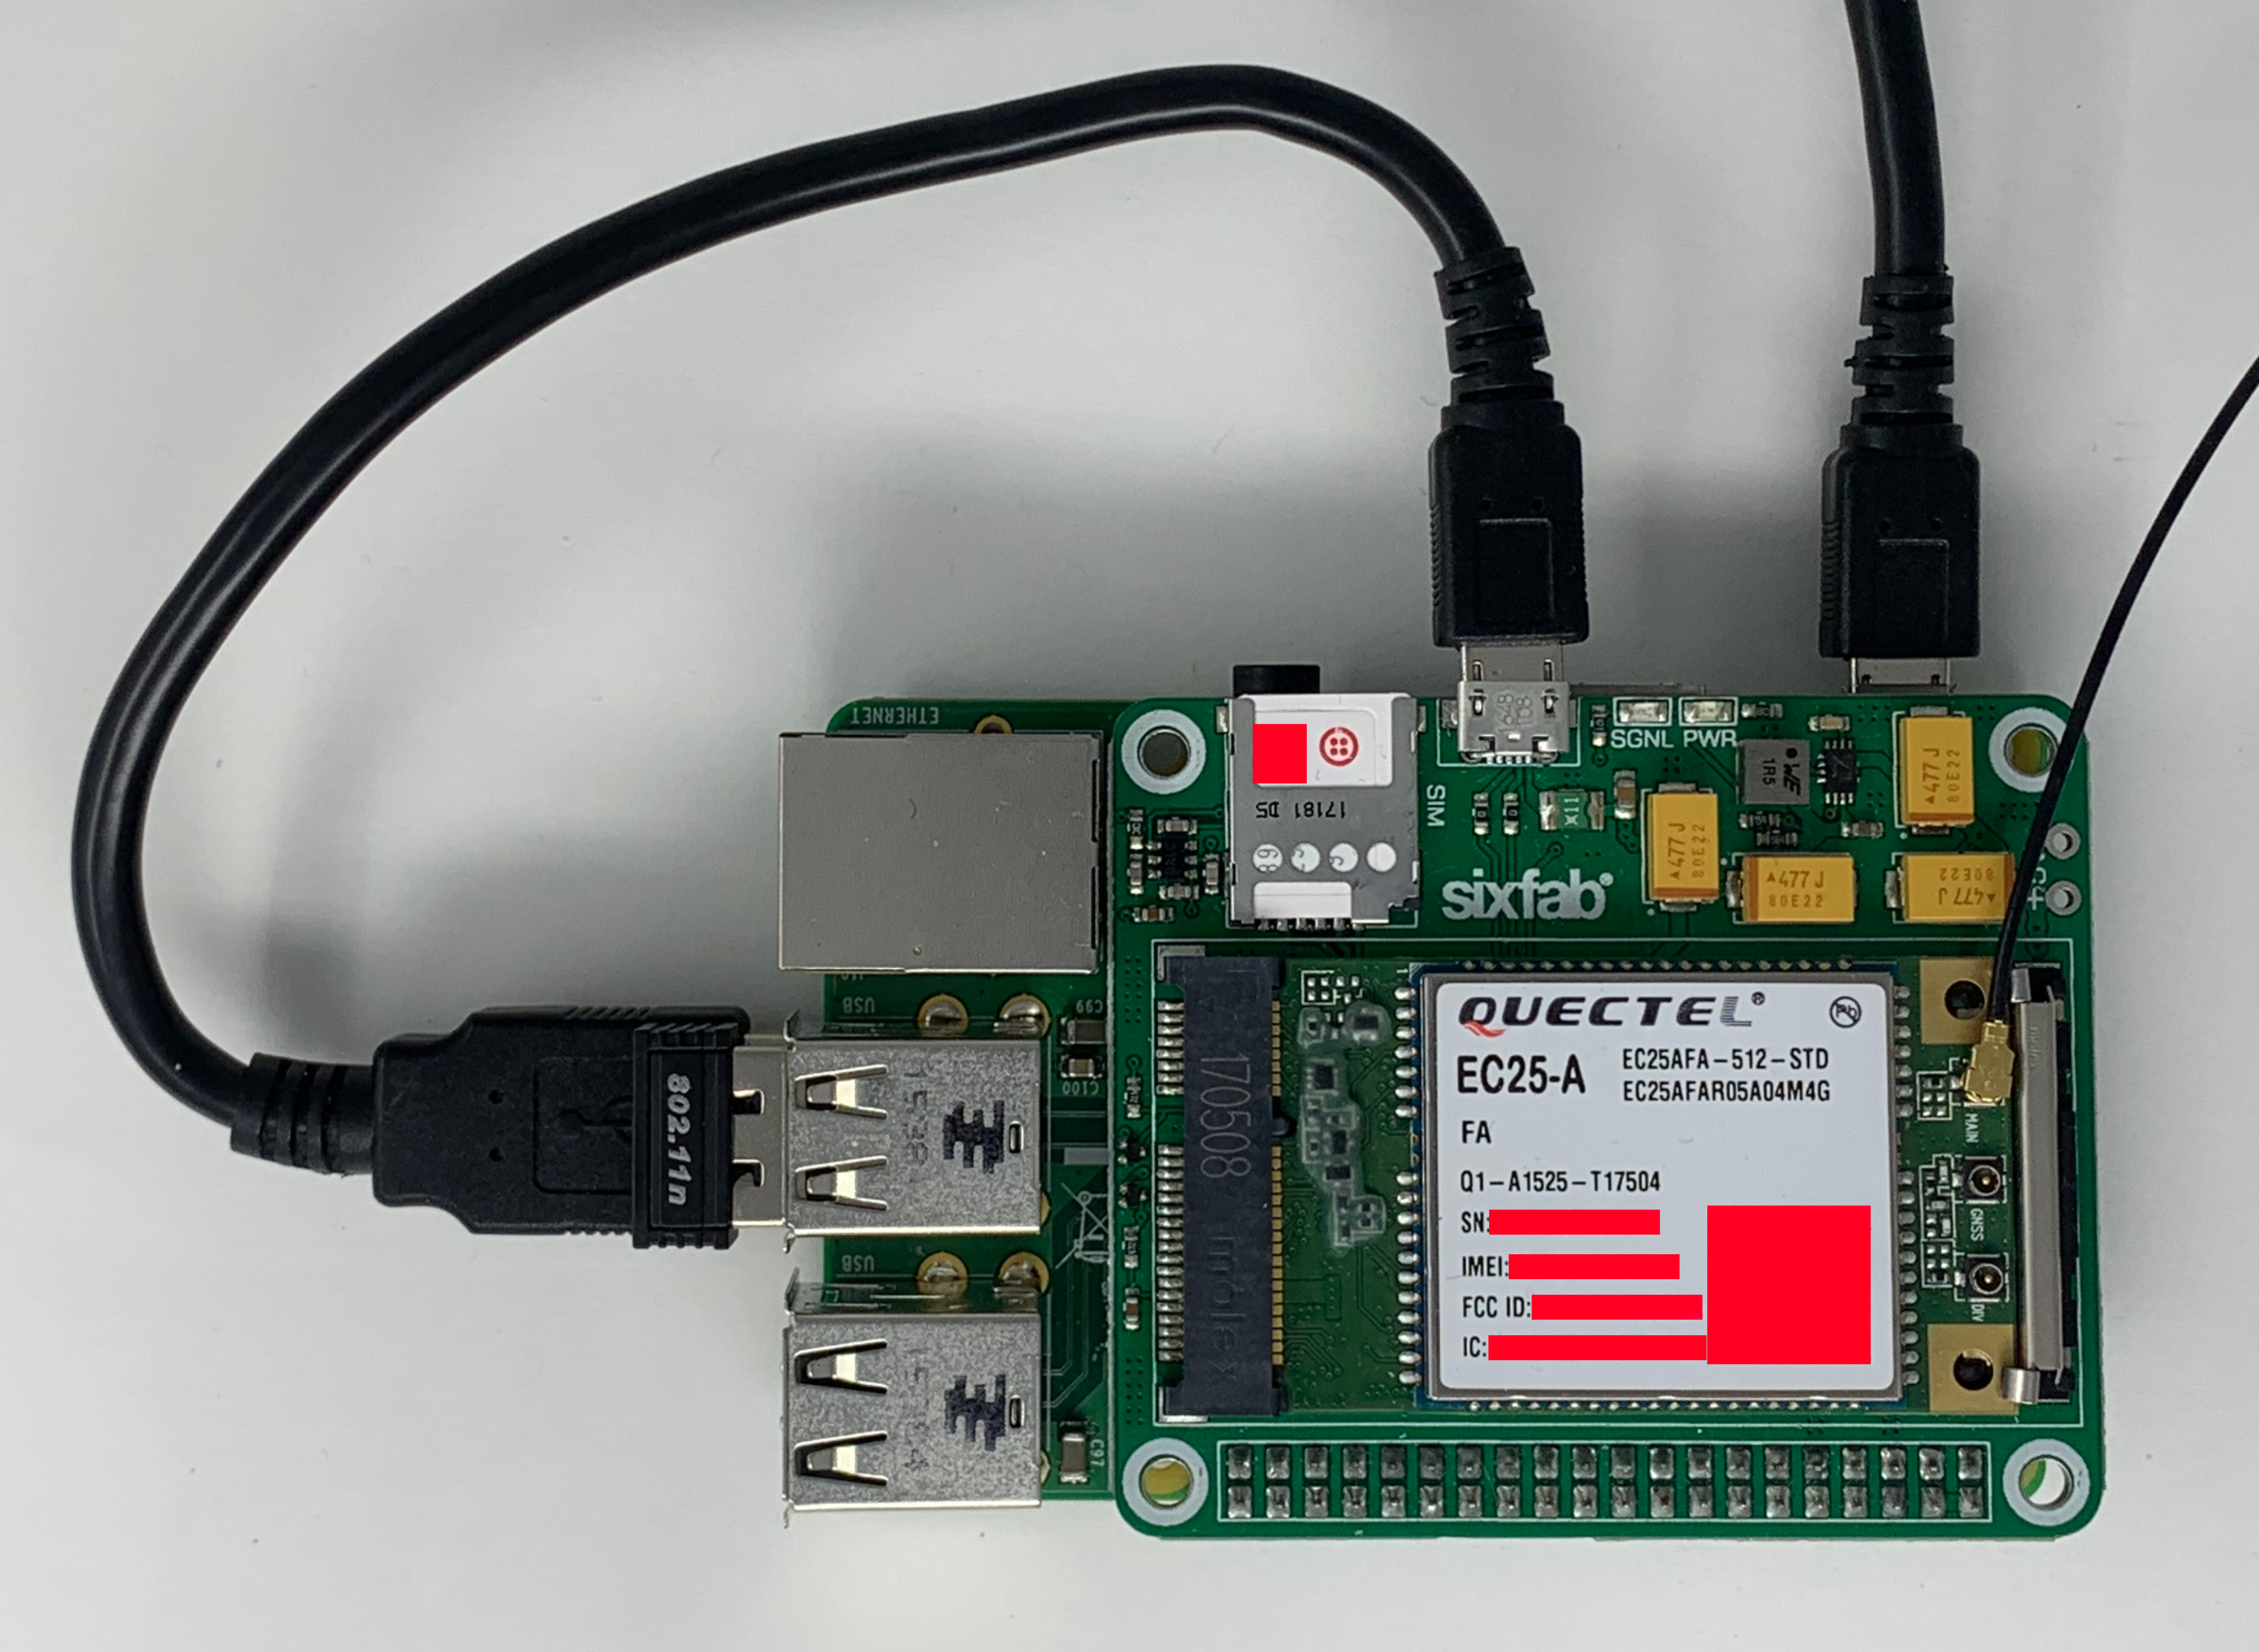
Using these instructions you'll learn how to create an IoT gateway using a Twilio SIM, a Raspberry Pi and the SixFab 3G-4G/LTE Base Shield V2 with a Quectel EC25 modem. This quickstart is intended to demonstrate how to use a Twilio SIM as an IoT waypoint for receiving data as a standalone device or as a gateway for collecting data from multiple IoT devices (mesh-networking). With an IoT gateway we can build programs that can use other Twilio services and 3rd party libraries. Unlike machine-to-machine examples which use the Commands API this paradigm tracks user data packets using the Data Sessions API. This is intended to be used with a single-board computer such as the Raspberry Pi (SBC) running a Linux operating system with the recommended modem below.
Hardware Prerequisites- Raspberry Pi
- SixFab 3G-4G/LTE Base Shield V2
- Quectel EC25
- Micro-USB cable
- Linux operating system
- QMI Interface
Not the quickstart you were looking to complete? See our other Programmable Wireless quickstarts or see all Wireless resources.
Sign up for a Twilio Account and Purchase a SIM CardAlready have a Twilio account and SIM card? Skip ahead to the register and activate step.
Before you can connect with Twilio Programmable Wireless you'll need a Twilio account. Once you've signed up, continue with this quickstart.
First, visit the Programmable Wireless Console. On the Orders page, purchase a set of 3 starter SIMs by selecting the SIM Starter Pack... or make a larger custom order by entering a quantity under the Multi-Size SIM Card product.
Note: Orders of 10 SIMs or more will be delivered with the SIM cards already tied to your account.
Register, Assign a Rate Plan, and Activate Your SIMOnce you receive your SIM shipment, visit the Register a SIM page in the Programmable Wireless Console.
Follow that up by picking a Unique Name for the SIM.
Choose a Rate PlanNext, select a Rate Plan from the options provided by Twilio.
By default, there are Rate Plans added which approximate the usage Twilio sees in the field. Rate Plans let you control every aspect of what your device can do its maximum monthly data usage. We've added some reasonable defaults, but feel free to explore options later.
Activate a SIM CardWhen you're happy with the Rate Plan, 'Activate' the SIM card.
Note: You'll need to activate your SIM for real-world workflows although you can use small amounts of data without activating.
Connecting the PeripheralsInsert the SD card.
Add the SixFab shield to the Raspberry Pi with the Twilio SIM.
Attach the cellular antenna to the Quectel modem.
Connect the Micro-USB cable to the SixFab board.
To set up the WiFi connection plug in the USB WiFi module.
Connect the Micro-USB power supply to the Raspberry Pi and connect to the computer. This is what it will look like when everything is connected.
Since our goal with this setup is a headless Raspberry Pi, we want to start with the lightweight version of the Raspbian operating system on our Pi before we make our changes.
Want to use an already built image incorporating Twilio's modifications and scripts?
- Download Raspbian Stretch LITE 4.14 with Twilio modifications
- Burn an SD card using Etcher
- Skip ahead to the next step
Note: This image will not always be up to date with the most recent Raspbian release - be sure to update the image if you choose to install it. Always check the Raspbian download page for the latest image.
- Navigate to the Raspbian download page and download the newest distribution of Raspbian Lite
- Using the Etcher burning tool (or other option), flash the image to the MicroSD or SD card
After the SD card has been flashed navigate to the volume that named "boot" using your file manager. Inside this volume add a new file called ssh with no extension. This will make sure the operating system is ready to connect when you boot up the Raspberry Pi for the first time.
Next plug the Micro-USB cable into the Raspberry Pi and connect the board to the computer. The operating system will take a few moments to power on. After about a minute use ping to find out the IP address of the board.
ping rasperrypi.local
Copy the address and let's SSH into the board.
ssh pi@xxx.xxx.xxx.xxx
When the prompt appears about continuing to the operating system type in yes to enter via SSH.
Go to the Raspberry Pi's network settings to configure the WiFi connection. If the Raspberry Pi is connected to the internet via an ethernet cable this step can be skipped.
sudo raspi-config
Navigate to Network Options
Click WiFi.
Add the network SSID.
Type in the password for the network.
Click Ok to connect.
Check that the WiFi is connected.
sudo ifconfig
When connected an IP address will be visible where it says wlan0.
Great! We are connected to the internet via WiFi. Next we will download and install a few things.
Update and Install the QMI InterfaceWhen looking into the Raspberry Pi for the first time you will want to do is to update the operating system.
sudo apt-get update
Next install the the Raspberry Pi kernel headers needed for the QMI Interface.
sudo apt-get install raspberrypi-kernel-headers
We now want to see what version of the kernel is installed. Note the version number.
Navigate to the repository for Raspberry Pi firmware updates and locate the header version above on the page. In this case we want to find release 4.14.9.
Copy the kernel commit-id by pressing the copy to clipboard button.
Update the firmware of the Raspberry Pi using the commit number found in the repository relating to the kernel version.
Then reboot the Raspberry Pi.
sudo reboot
SSH back into the Raspberry Pi to continue the installation process.
ssh pi@xxx.xxx.xxx.xxx
Continuing, we need to download the QMI installer file.
wget https://raw.githubusercontent.com/sixfab/Sixfab_RPi_3G-4G-LTE_Base_Shield/master/tutorials/QMI_tutorial/qmi_install.sh
Make the installation file an executable.
sudo chmod +x qmi_install.sh
Run the installation file.
sudo ./qmi_install.sh
After the installation is complete a prompt will appear to restart the board again. Press any button to reboot.
SSH back into the Raspberry Pi to continue the installation process.
ssh pi@xxx.xxx.xxx.xxx
Navigate to the Quectel files that were installed in the previous step.
cd files/quectel-CM
Fire up the modem to connect to the internet using the Twilio APN.
sudo ./quectel-CM -s wireless.twilio.com
Once the executable starts the output should look something like this:
Open a new tab in the terminal and SSH into the pi again.
ssh pi@xxx.xxx.xxx.xxx
Check the network settings again to verify that the modem is connected. The id for the modem should be wwan0.
In the terminal use the following command to turn off the WiFi connection.
sudo ifconfig wlan0 down
Next ping Twilio to make sure the connection is made.
ping -c 3 www.twilio.com
Success!
Commands vs. Data PacketsWith an IoT gateway like this Sixfab example we can build programs that rely on cellular connectivity using the Twilio SIM without the need of using the Commands API. The device could be used as a singular device for collecting data or as a waypoint for other IoT devices for mesh-networking.
When a Command is sent over the network they are logged in the Twilio Programmable Wireless console. When we send data over the network it is logged as a "packet" and is defined as being Downloaded or Uploaded. This information can be found under the Connectivity tab of the Twilio SIM selected. The relative location of the cellular activity is also logged and can be viewed using the interactive Google Maps plugin embedded in the console.
More information regarding account information and packet data can be found within the Programmable Wireless Data Sessions API.
Welcome to cellular IoT!
Where to Next?Now that you have seen how to send and receive Machine to Machine commands with the Wio LTE and your development machine, you're ready to build your first TwilioIoT project. Here are some possible ideas to take it to the next level:
- Try full end-to-end applications with Twilio Wireless Blueprints
- Dig into the Programmable Wireless API
- See all Programmable Wireless Guides and Tutorials
- Saying Happy Birthday to my Grandma with #TwilioIoT
We all do sometimes; code is hard. Get help now from our support team, or lean on the wisdom of the crowd browsing the Twilio tag on Stack Overflow.


Comments
Please log in or sign up to comment.