Intro
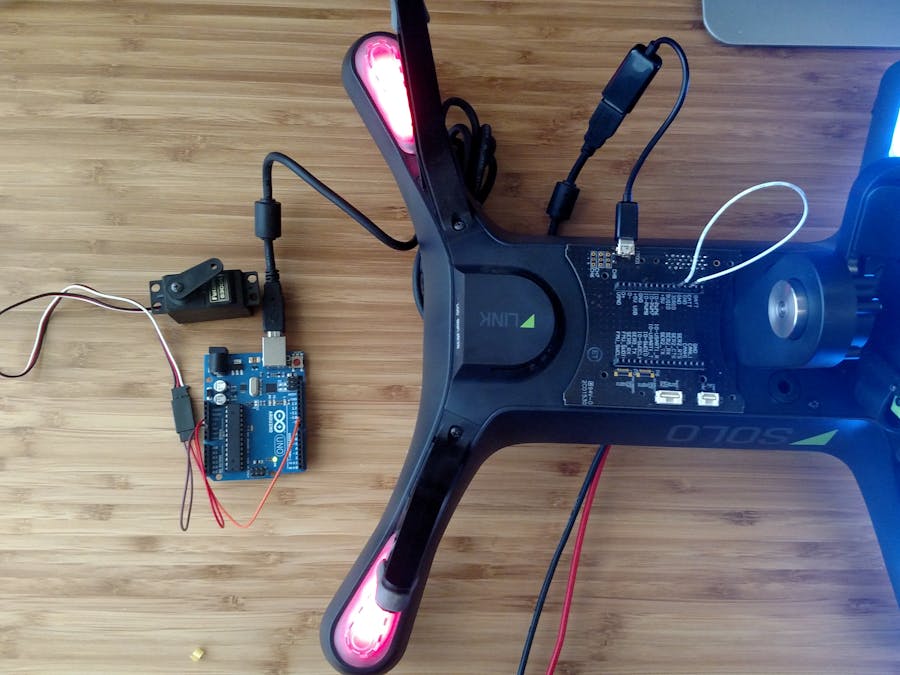
Solo has a great development environment but a lack of I/O. Currently the Accessory port breaks out CAN, Mavlink Serial to Pixhawk, and USB to Sololink(imx6). By using an arduino and firmata can add custom sensors, control servos, blink LEDs, or any other arduino function.
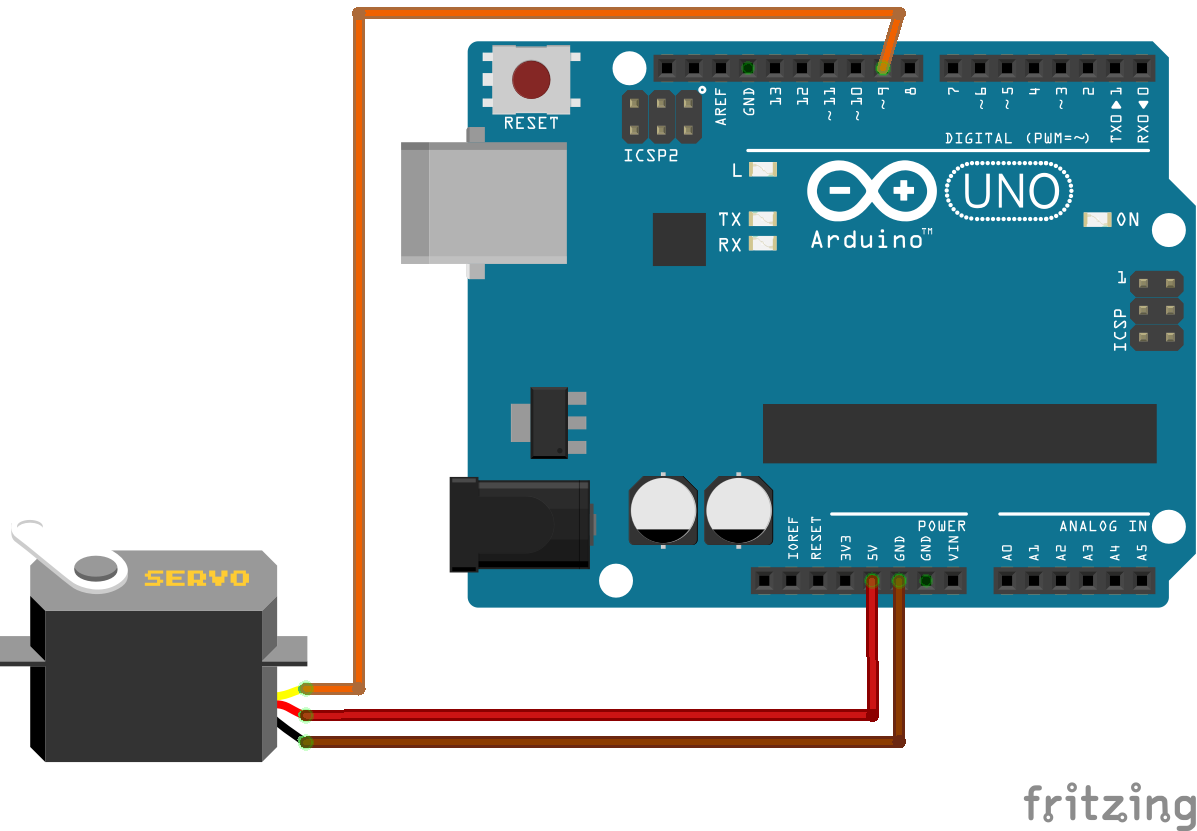
This tutorial will walk you through the steps of using an arduino with Solo to control a servo.
Software Preqs:
- Solo update 1.2.0 or greater
- Arduino IDE
- Filezilla
- Putty or any other SSH Client
Step 1: Upload Firmata Host to Arduino Uno
Open StandardFirmata from the examples tab. Select board and port. Upload!
Step 2: Hardware Setup
Parts
Note: The breakout board is not sold at this point. Please refer to here
Assembly
Power on
Step 2: Download pyMata and Code
Step 3: Transfer Files to Solo
- Connect to your Solo's Wifi network!
Step 4: SSH into Solo
SSH into Solo using your OS's SSH client. For Windows we will use Putty.
Make sure you are still connected to Solo's Wifi!
See the photos captions for more details
Step 5: Install pyMata
Run this command in your SSH session:
cd ./PyMata-master/PyMata-master && python setup.py install
This should be your result
Step 7: Run the example
While your ssh session is still open run:
cd && python SoloServoSweep.py


_ztBMuBhMHo.jpg?auto=compress%2Cformat&w=48&h=48&fit=fill&bg=ffffff)


Comments
Please log in or sign up to comment.