


Hardware components | ||||||
 |
| × | 1 | |||
Software apps and online services | ||||||
| ||||||
Brainium is a new IoT device and service developed by Octonion and Avnet. It is composed out of 3 main parts - an efficient BLE device that collects and transmits on board sensor data, a gateway device that is used to send the data to the server, frontend and backend solution for developing of your IoT project. It is quite interesting for its simplicity, speed of development and Machine Learning support.
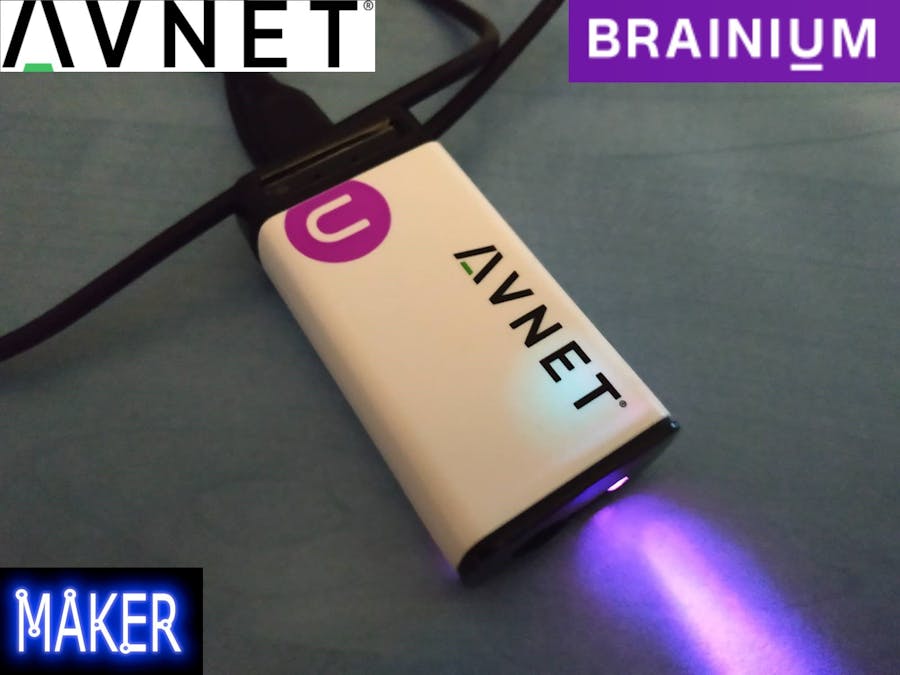
IntroThe device itself is a small box packed with sensors. It has air humidity, temperature, infrared, proximity, magnetic field, sound level, visible light, atmospheric pressure, angular velocity and acceleration sensors. All of data from the device can be displayed on the online portal.
The data needs to get to the Octonion cloud somehow, so it uses a mobile phone or Raspberry Pi as a gateway to the cloud services. You can download an app that connects to the Agile device via BLE(Bluetooth Low Energy) and to Octonion cloud via internet.
The whole Brainium system is also focused on security unlike most IoT devices which are often a security risk. While the gateway application provides only BLE to TCP tunneling, data between device and cloud being sent over TLS 1.2 protocol with ECDSA and AES256. The cryptographic algorithms and device private key is backed by tamper resistant hardware secure element. The device itself is tamper-proof and it gets regular OTA firmware updates.
Brainiums portal for managing and using Agile devices is very easy to access and simple to use. It has lots of features that will help you set up your devices and create AI models for them.
SetupHere's how to set it up.
SignupFirst of all, you need to create an account on Brainium portal. You can do that on this page www.brainium.com/portal. After signing up you will receive an email with your credentials.
Gateway SetupThe next thing to do is to install an app on your mobile device so it can be used as a gateway between Agile device and Octonion cloud. Here are links for Android gateway, iOS gateway and Raspberry Pi gateway respectively:
- https://play.google.com/store/apps/details?id=com.brainium.android.gateway
- https://itunes.apple.com/us/app/brainium-gateway/id1446583825
- https://spa.brainium.com/apps/linux
Now we need to pair our Agile device with Brainium portal. To do so, your phones bluetooth and internet connection needs to be turned on. Turn on your Agile device by pressing the button on it and holding it for more that 2 seconds. Once it turns on it will start blinking with blue light and should automatically connect to your phone. When Agile device shows up in Gateway app keep your phone awake (don’t lock it and keep the screen on). Now open devices tab under equipment in Brainium portal and click on “+” icon in the bottom-right corner to add your device.
Pick the gateway that you’re using and click “Connect devices” button. When you get your Agile device, its firmware might not be up to date. There are two types of updates: mandatory (the user will see a notification right after the pairing and update will start automatically without user approval) and non-mandatory (the user has possibility to choose whether she/he wants to update the device or not). For instructions on how to update firmware of your device you can use FAQ document on Brainium portal.
AlertsOne of great features that Brainium portal has are notifications based on the data that the devices collect. If some values fulfill a specific condition the Brainium platform will send you a notification to our email or display it as an alert on the platform.
To add a notification you first need to create a project. To do that, go to Brainium portal and open tab “Projects”. From there you can click the “+” icon in the bottom right corner and modal will be displayed where you enter project name and optional project image.
Now click on project icon and then you’ll be in the project page. Now you can click on “+” icon in the bottom right corner to assign the agile device to your project. Once you’ve added a device to your project switch to “Data Tracking/Recording” tab where you can create widgets. Create one by clicking on the “Create Widget” button which opens up a modal for creating widgets. Just input widget name, type and visualisation type, click next, select your Agile device you’ve added to the project and click “Finish”. Now you’ve widget to monitor data to your project.
Now we can go back to Devices tab and click on sensor icons of your Agile device. That will open a modal where you can click on “Rules” tab and add notifications. Click on “Add New Rule” button and fill requested fields with your conditions.
Machine LearningIntegrated machine learning support is something that is completely new for IoT platforms. It is implemented in a way that it requires no coding. Although impressive, it is limited in the moment, as you can only use motion tracking data for the data set.
Setting up of the AI model is done in the AI Studio inside the Brainium portal where we define what behaviour we want the model to recognise. In the AI studio we also create the data set that is used for learning. Using their tools we can monitor the learning data set and we can monitor the “maturity” and accuracy of the model. We can also set up alerts based on data that the model analysed.
Our ExampleAs a way to test Brainiums machine learning platform we made a small model which detects “frog jump” and “snake slither” movements of the Agile device. To make your own AI model you need to go to the AI studio and you need to click the + sign to create a new workspace.
There you will define the motions that you want to track and you will supply the model with examples that will be used for machine learning. To get that data you will have to record some data using your Agile device. You will do that by creating a new motion called “frog” and selecting it so we will supply it with data, and clicking the “Record new training set”.
Before starting the recording you will be able to choose how many times you will do the wanted motion during one recording session. Keep in mind that to get a good model, you will have to have some 4 repetitions of each motion and have 4 recording sessions in the data set. To get the best results make sure to make a big enough pause between movements(5 sec pause) and be careful with your gateway so that you can guarantee that the server gets the required data uninterrupted (do not lock the device). Once recording starts, move your Agile device up and down from one place to another like a frog (“jump” it 2-3 times), then stop and wait for 5 seconds. After 5 seconds repeat that process until you’ve done your specified number of motions. Once you’ve done the specified number of motions just leave your device and click on the timer to stop it.
After the recording you can inspect the collected data to make sure that the model is using the correct parts of the recording.
Once you are ready we will create a new motion called “snake”. Again, click on it, and supply it with snake motion data. You will move your device like a snake and make a 5 second pause between motion repetitions. The same as with the frog motion, stop the timer after you’ve completed all motions.
When you are satisfied with the recorded data you can finally create the model. Select all recordings that will be used in model, from both motions and click “Generate Your Model” in the bottom left corner. After the model creation you can inspect its attributes by clicking the “Models details” button. The model fitting will then start, you’ll now need to just sit tight until it’s finished.
When model is fitted, you can hop over to your project nad select Devices tab and again click on sensor icons. This time just click on tab “AI Studio Rules” and select from dropdown menu your AI studio workspace. Then select your model that you’ve created for snake and frog movements.
Now we need to create a widget to display what movement has been made with your Agile device. Go to “Data Tracking/Recording” tab in your project and click on “+” icon in the bottom right corner to add a new widget. Input a descriptive widget name (e.g. Movements or Motions) and the widget type “Motion”. Click next and then select from the dropdown menu your device. Once you’ve finished creating widget, just click on the button “Start tracking” in the top left corner so you will start receiving data from your Agile device. I the modal check the checkbox next to your device to tell your device to send data.
Just do the same motions you did when recording them for model generation and Brainium protal will log the motion names (“forg” or “snake”) into the widget you’ve created.
All done 👌🏻.
You've just made your first Agile AI motion reader.
SummaryAlthough still development, Brainium platform around these Agile devices has plenty of potential in the IoT world. Its rapid developments tools and its interest in security and machine learning are more than enough to catch the interest of both the business and the Maker communities. We as a Maker association encourage devices and platforms like this since they speed up the development process and straighten the learning curve of development.
Links/SourcesBrainium FAQ/User Manual
https://brainium.blob.core.windows.net/public/docs/Brainium_User_Manual_1.8.pdf
Brainium official site


Comments