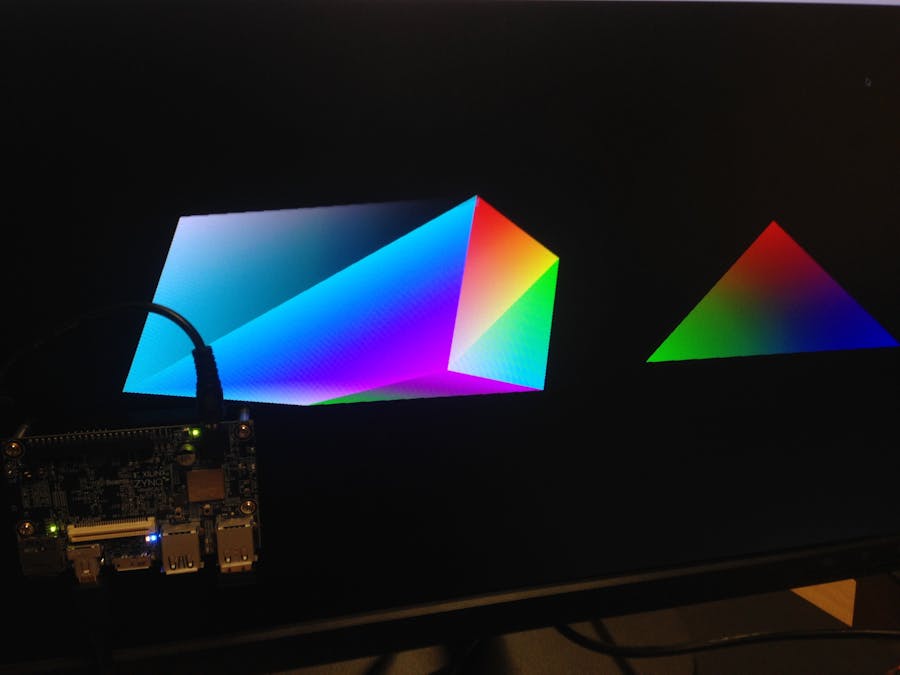
This project describes the primary method to build the PetaLinux on an Ultra96 board using the PetaLinux BSP file to run Graphics Processing Unit (GPU) and DisplayPort (DP) on a Zynq Ultrascle+MPSoC devices. Firstly, the hardware should be configured in Vivado to enable the DP and generated specific HDF file. Secondly, using the HDF file with PetaLinux BSP file to build boot and Linux images. Finally, loading files on SD card and running on Ultra96 board.
Hardware configurationThe main point in this section is set dual lower GT lanes DP.
1. Download xilinx-ultra96-reva-v2018.2-final.bspand unzip the file two times (follow Adam Taylor https://www.hackster.io/adam-taylor/two-methods-of-building-petalinux-for-the-ultra96-77c8e0 )
2. Open Vivado project under Hardware folder:
Double click on Zynq UltraScale+ MPSoC and check:
I/O configuration -> high speed -> DisplayPort
1. Now, generatethe bitstream and export hardware project including it and lunch the SDK.
2. Get the hdffile and move to your project folder.
plx_DP/xilinx-ultra96-reva-2018.2/hardware/xilinx-ultra96-reva-2018.2/xilinx-ultra96-reva-2018.2.sdk/design_1_wrapper.hdf
PetaLinuxIn this section, we will create the PetaLinux project based on BSP file. Open terminal on Linux machine and follow these instructions:
Xilinx published in ug1209 example of a triangle-based cube application. You can follow it to write in OpenGLES and this example based on X windows system. You should download the example file from (download).
1. Copy the tricube folder to :
<PetaLinux-Project>/project-spec/meta-user/recipes-apps/tricube
2. Modify petalinux-image.bbappendfile in:
<plnx_project>/project-spec/meta-user/recipes-core/images/petalinux-image.bbappend
MAGE_INSTALL_append = " peekpoke"
IMAGE_INSTALL_append = " gpio-demo"
IMAGE_INSTALL_append = " tricube"
3. Enable GPU Libraries and other packages in RootFS
Run:
petalinux-config -c rootfs
Navigate to and enable the following packages:
Filesystem Packages ---> libs---> libmali-xlnx ---> libmali-xlnx
Filesystem Packages ---> libs---> libmali-xlnx ---> libmali-xlnx-dev
Petalinux Package Groups >packagegroup-petalinux-x11 >packagegroup-petalinux x11
Petalinux Package Groups >packagegroup-petalinux-x11 > packagegroup-petalinux-x11-dev
4. Add the OpenGLES application created in the earlier section:
User Packages ---> [*]tricube
5. Build the Linux images using the following command:
$ petalinux-build
6. Generate the boot image:
$ petalinux-package --boot --fsblimages/linux/zynqmp_fsbl.elf --pmufw images/linux/pmufw.elf --atfimages/linux/bl31.elf --fpga images/linux/system.bit --u-bootimages/linux/u-boot.elf
Prepare the SD card and copy the files into boot and rootfs partitionsIn Linux machine, insert the SD card and open the terminal.
$sudo fdisk -l
Locate the sd-card from the size, in my case the name od dev is sdb
Desk /dev/sdb: 14.9 GiB
$sudo fdisk /dev/sdb
:p
:o
:n
:
:
:
:+1024M
: y (if ask about signature)
:t
:c
:n
:p
:
:
:
: y (if ask about signature)
:t
:
:83
:w
$sudo fdisk -l
Desk /dev/sdb1: …… cW95 FAT32 (LBA)
Desk /dev/sdb2: …… 83 Linux
$sudo umount /dev/sdb1
$sudo mkfs -t vfat -F 32/dev/sdb1
$sudo mkfs -t ext4 /dev/sdb2
$sudo dd if=images/linux/rootfs.ext4of=/dev/sdb2
$sudo mkdir boot
$sudo mount /dev/sdb1 boot/
$sudo cp images/linux/BOOT.BINboot/
$sudo cp images/linux/image.ub boot/
$sudo sunc
$sudo umonut /dev/sdb1
$sync
Test design on Ultra96 boardInsert the sd-card in Ultra96 board, plugin the power, connect the DP with monitor and run it.
Open terminal on Ultra96 board and type:
$export DISPLAY=:0
$tricube


Comments
Please log in or sign up to comment.