


_Owo51ooXAa.png?auto=compress%2Cformat&w=40&h=40&fit=min&dpr=2)
LoRa® is the physical layer or the wireless modulation utilized to create a long-range low-power communication link. Typically, it is built around battery powered radio units attached to sensors which achieve years of life without recharge.
LoRaWAN™ is a wireless protocol that is intended for use in building IoT networks. IoT devices (“nodes”) send small data packets to any number of “gateways” that have several-kilometer range. The gateways then use more traditional communications such as wired Internet connections to forward the messages to a Network Server which validates the packets and forwards the application payload to an Application Server.
The nature of the LoRa® network potentially allows IoT devices to run for years on small batteries, occasionally sending out small packets of data, waiting for a short time for response messages, and then closing the connection until more data needs to be sent. Remote devices can also be set up so that they are always listening for messages from their applications, though this obviously requires more power and may be more appropriate for devices that are, say, plugged in to a wall socket.
Of course, there is much more to LoRaWAN™ than is described here. The LoRaWAN™ protocol is defined and managed by the LoRa Alliance. There is a great deal of information available from the Lora Alliance, including this Overview.
RAKwireless is the pioneer in providing innovative and diverse cellular and LoRa connectivity solutions for IoT edge devices. Create the industry leading market-oriented and easy-to-use lego-like IoT building blocks of the highest quality for sensor, compute and connectivity to accelerate diverse IoT applications from prototype to commercial…: https://www.rakwireless.com/en/
What’s the RAKLoRa Development Kit?
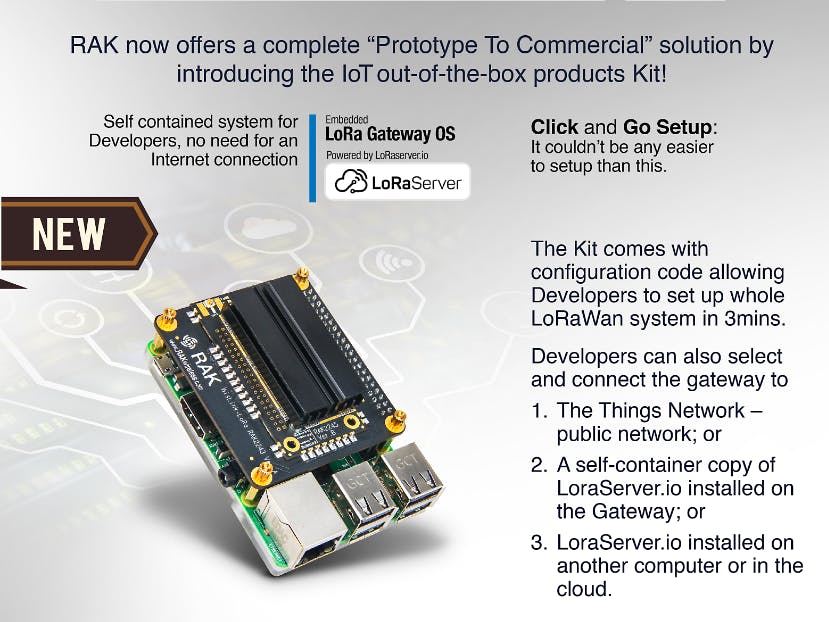
RAK LoRa Development Kit is a set of RAK LoRa devices which has been customized for quick and easy commissioning of a complete system. It can be used easily by anyone who wants to study, experience, research, develop, test or deploy LoRa, even if they know nothing about LoRa.
RAK LoRa Development Kit includes the following components mainly:
· A RAK LoRa Gateway. This may be RAK2243 + Raspberry Pi;
· A RAK LoRa Server OS image. You can download it from www.rakwireless.com by using the verification code which has been placed in the box of RAK LoRa Development Kit you bought.
· A RAK LoRa node. It may be RAK811.
OK, let’s goGet started with the RAK LoRa Development Kit
What do you need to prepare?1. A RAKLoRa Development Kit.
2. A PC,
3. A Server OS image if you want to use an independent LoRa Server.
This PC will be used as LoRa Server and Application Server after installing a new system automatically. Please note that it will erase the old data and Windows Operating System from this PC.
Note: Maybe you can install the system into a virtual machine, but it may leadto an unfriendly user experience, so we don’t recommend this way. Just do it asyou like.
4. A PC with tools for SSH and AT command.
If your PC is Windows OS, Putty is a program commonly used for SSH communication over an Ethernet connection.
This PC will be normally used to configure LoRa Gateway through SSH.
The LoRa Node can be configured through AT command through serial port, so you need to connect your PC and the LoRa node with serial port cable.
Note: The Ethernet IP address of the LoRa Gateway is 192.168.10.10 by default.
Three ways to use the RAK LoRa Development KitIn this tutorial, there are three different ways in which the RAK LoRa Development Kit can be installed:
Case1: I know very little about LoRa, but I want to set up aLoRa network quickly for learning, experiencing, testing, or using in 3 minutes!.
In this method, your own private Lora Server will be installed on the Raspberry Pi along with the Gateway software
The provides a self-contained and portable system to learn about Lora, LoRaWAN, and the operation of the servers.
Case2: I want to set up a LoRa networkquickly with an independent LoRa Server, not an integrated one.
In this method, the LoRa Server will be installed on a spare PC by removing Windows and replacing it with a Linux operating system
Case3: I want to set up a LoRa networkquickly, but I want to use The Things Network (TTN) as my LoRa Server.
In this method the gateway will forward data sent from the Node to the TTN servers.Your gateway will be part of the global TTN community. Your node can connect via your Gateway or other gateways connected to TTN.
OK, Let’s have a look at these cases now.Case 1: I know nothing or few things about LoRa, but I want to set up aLoRa network quickly for learning, experiencing, testing, or using, in 3minutes.
Really? in 3 minutes?
Oh, yes! What you read is right! You can set up a LoRa network by yourself in 3 minutes using the RAK LoRa Development Kit, even if you know nothing about LoRa.
Now, do as the following steps to setup your LoRa network:
Step 1: Power on the RAK LoRa Gateway;Step 2: Send several AT command to the LoRa node fromPC as follow:
1) Connect your PC and the LoRa node with serial port cable;
2) Set the dev_eui, app_key, and app_eui into the LoRa node through AT command as follow:
“at+set_config=dev_eui:1111111111111111”
“at+set_config=app_key:ecbb8ac2bdf563dbe505d2f850219c17”
“at+set_config=app_eui:2222222222222222”
(actually, you can set app_eui freely, because it isn’t needed by loraserver.io, but you must set a 16 bytes value for LoRa node)
3) Join the LoRaWAN™ network through AT command “at+join=otaa”. If you see “at+recv=3, 0, 0”, it indicates that the LoRa node has joined the LoRaWAN™ network successfully.
4) Try to send some data to the Application Server.
For example:
“at+send=0, 2, 000000000000007F0000000000000000”
Step 3: Nothing else. That’s all! Congratulations!You’ve set up a LoRa network successfully.
If you want to check the data on the website of LoRa Server and LoRa Application Server, please do as follow:
1) Connect your PC and the LoRa gateway with an Ethernet cable and configure your PC’s IP address of LAN to 192.168.10.100, if you don’t know how to configure it, please google or Baidu;
2) Open the browser and type http://192.168.10.10:8080, you will see the login page of LoRa Server as follow:
Login the LoRa Server. The default username and password are both “admin”.
3) You can see the following page:
4) Enter “Box-app”, there are three pre-configured devices, and you have got their dev_eui and app_key from the box of the RAK LoRa Development Kit or this tutorial:
You can check the status and data of LoRa node by clickthe “Device name” of LoRa node which you are using on this page.
Note: There is a RAK LoRa Gateway in the RAK LoRa Development Kit you bought. By default, a LoRa Server and a LoRa Application Server have been integrated into this LoRa Gateway too. When you power on this RAK LoRa Gateway, it will do some configurations automatically to finish all the steps of LoRa Gateway, LoRa Server, and LoRa Application Server. Normally, people call this feature “plug and play”.
Case 2: I want to set up aLoRa network quickly with an independent LoRa Server, not an integrated one.
Just do the following steps:
Step 1: Build a LoRa Server by installing the RAK LoRaServer OS.
1) Make a startup disk using the RAK LoRa Server OS image into an USB disk or a CD-ROM, if you can’t make it, please Google or Baidu;
2) Install the OS from USB disk or CD-ROM as follow. Actually, it is a normal process of installing an Ubuntu OS, so if you have any issues in the process of installing, you can find the solution on Google or Baidu;
3) Enter BIOS and configure the boot way, “CD-ROM Drive” or “Removable Devices”;
4) When beginning to install, it will remind you to choose the language as the following picture, and we recommend you to choose “English”.
5) Select “Install Ubuntu” to install the customized OS which is based on Ubuntu and includes a LoRa Server and an Application Server. We call it “the LoRa Server OS” in this tutorial.
6) Wait for loading…
7) After loading, select the language again and “Continue” to the next page.
8) In this page, please don’t select any of the check boxes.
9) In the following page, you need to select “Erase disk and install Ubuntu” and click the “Install Now” button.
CAUTION: Before proceeding, you should note that this will delete all your programs, documents, photos, music, and any other files along with the Operating System.
10) A pop-up dialog, just click the“Continue” button.
11) Select the time zone by typing the name of the time zone or selecting in the map directly. Then “Continue”.
12) Select the keyboard layout as follow.
13) After these steps above, you will seethe following page. Now it begin to install the LoRa Server OS, and this step will take several minutes or more, just wait patiently.
14) When it finishes, you should “Restart Now” in the following page.
15) After restarting, you will see the login page as follow, it means that you have installed the LoRa Server OS successfully! Just select the user “rakwireless” and type the default password“rakwireless” to enter the OS.
16) Now, Configure the IP address of your LoRa Server, and remember it because you will use it in the next step when configuring your LoRa Gateway.
17) What? Don’t know how to configure the IP address? Just google or Baidu “How to configure IP address for Ubuntu”.
Step 2: Configure your LoRa GatewayThe following instructions apply to any of the following RAKwireless gateway models RAK2245, RAK7243, RAK2248, RAK831, RAK833, etc.
In this tutorial, we’ll use “RAK2245 Pi Hat + Raspberry Pi + LoRa Gateway OS” which is included in the RAK LoRa Development Kit.
Just do as follow:
1) Login the Raspberry Pi through SSH, the default username and password are both “admin”.
Note: By default, the IP address of the LoRa Gateway Ethernet IP address is 192.168.10.10, and you can connect to it through wire using a PC and SSH.
For example:
Note: If you don’t know how to use SSH, please google or Baidu.
2) After that, you will see the following page, which indicates you have login successfully.
3) Enter the command “sudo gateway-config” and the login password to configure the gateway. This command has been shown in the page.
4) Now, you should see a configuration page as follow:
Note: In this tutorial, you may only use the option 1, 2, 3, and 7.
5) If you want to connect the LoRa Gateway to a WiFi network, just do as follow:
Enable WiFi:
Scan WiFi:
Check services:
Agent on:
Connect WiFi as follow (notice what you need to enter isn’t the SSID):
After entering the password, if you see “connected …”, it indicates the LoRa Gateway has connected WiFi successfully.
Then quit the WiFi configuration page:
6) When you power on this LoRa Gateway firstly, it works on EU868(EU_863_870) and points to the internal LoRa Server by default. If you want to check the detail, you can select the option 3;
7) Now, you can see the detail of the“global_conf.json” file:
Note: Please record the “gateway ID” at the top of file. See the following picture? It is really important to remember it!
8) Now, let’s modify the IP address of the LoRa Server which the gateway points to, just do as follow:
Firstly, select the option 2 “Setup RAK831/RAK2243 LoRa concentrator”.
Then, select the Server-plan 2 “Server is LoRa Server”:
Select the channel-plan 5 to set the EU_863_870 frequency.
9) Enter the IP address of the LoRa Server you want to use.
Note: “127.0.0.1” is the default IP address, and it indicates the internal LoRa Server. You can enter the IP address of your independent LoRa Server which has been setup in the step 1.
10) After enter the IP address of your independent LoRa Server and “OK”, you will need to press “OK” twice more as follow:
1) Login the PC installed the LoRa Server OS.
2) Open the browser and type http://127.0.0.1:8080, you will see the login page of LoRa Server as follow:
3) Login the LoRa Server. The default username and password are both “admin”.
4) Click the “Gateways” in the left menu of the page. There is already a LoRa Gateway which has been added, but it is only used to show as a demo and you can also delete it.
5) Create a new item for your LoRa Gateway by Click the “CREATE” button in the upper right corner of the following page.
6) Then, you can see the following page and just fill them as follow except “Gateway name”, “Gateway description”, and “Gateway ID”. “Gateway name” and “Gateway description” can be filled in with any contents you want, but you must fill in “Gateway ID” with the Gateway EUI/ID which you got in the step 2.
7) If your LoRa Gateway has connected with the LoRa Server (ping successfully), you can see the following state page.
8) Congratulations! That means your LoRa Gateway has been online now!
Step 4: Configure your LoRa Application Server to adda LoRa node.
Actually, you can skip this step by using the pre-configured LoRa node content which we have been placed in the LoRa box you bought, including dev_eui, app_eui, and app_key, just for testing.
If you want to create a new LoRa node in your Application Server, please do it as follow:
1) Click “Application” in the left menu of the following page.
2) Click the existed application name, like “AppModal868” in the above page, to enter the following page, then click the “CREATE” button to add a LoRa node.
3) Fill in “Device name” and “Device description” freely. Fill in “Device EUI” or click to generate randomly.Select a item for “Device-profile” and select the check box “Disable frame-counter validation”. Then click “CREATE DEVICE” in the lower right corner.
For example:
Note: Remember the value of Device EUI you have set, because it will be used on your LoRa node as dev_eui.
4) Set Application Key. You can also click to generate randomly. Then click “SET DEVICE-KEYS”.
Note: Remember the value of this key you have set, because it will be used on your LoRa node as app_key.
5) OK, you’ve added a LoRa node successfully now.
6) Once a LoRa Node, which has been set with the dev_eui and app_key generated above, joins and sends data, you will see the contents on the following pages.
What? There is no existed Applications item like the following page showing or you want to add a new Applications item? Just do something as follow to create a new application before creating a new LoRa node. Otherwise, just skip to the step 5.
Click “CREATE” to add a new application. You can see the following page and fill in “Application name” and “Application description” with any contents freely, select an item for “Service-profile”. Then you need to select the “Custom JavaScript codec functions” item for “Payload Codec”to decode the received uplink payloads from bytes to a meaningful data object and to encode downlink data objects to bytes.
For example:
Note: When you select “Custom JavaScript codec functions” item for “Payload Codec”, you need to copy the following contents to the first source code edit box on the above page:
// Decode decodes an array of bytes into an object.
// - fPort contains the LoRaWAN™ fPort number
// - bytes is an array of bytes, e.g. [225, 230, 255, 0]
// The function must return an object, e.g.{"temperature": 22.5}
function bin2String(array)
{
return String.fromCharCode.apply(String, array);
}
function bin2HexStr(arr)
{
var str = "";
for(var i=0; i<arr.length; i++)
{
if (i != 0)
{
str +=", ";
}
var tmp =arr[i].toString(16);
if(tmp.length== 1)
{
tmp ="0" + tmp;
}
str +="0x";
str += tmp;
}
return str;
}
function Decode(fPort, bytes)
{
var myObj = {"DecodeDataString":"", "DecodeDataHex":""};
var tostring=bin2String(bytes);
var tosHextring=bin2HexStr(bytes);
myObj.DecodeDataString = tostring;
myObj.DecodeDataHex = tosHextring;
return myObj;
}
Then copy the following contents to the second source code edit box:
// Encode encodes the given object into an array of bytes.
// - fPort contains the LoRaWAN™ fPort number
// - obj is an object, e.g. {"temperature": 22.5}
// The function must return an array of bytes, e.g.[225, 230, 255, 0]
function Encode(fPort, obj)
{
return [];
}
Step 5: Set your LoRa node to join the LoRaWAN™network.In this tutorial, we use RAK811 as LoRa node to show how a LoRa node could join the LoRaWAN™network.
1) Set the dev_eui and app_key, whichyou got in the step 4, into the LoRa node through AT command.
For example:
2) Join the LoRaWAN™ network through AT command.
“at+recv=3, 0, 0” indicates that the LoRa node has joined the LoRaWAN™ network successfully.
3) Try to send some data to the Application Server.
For example:
“at+recv=1, 0, 0” indicates the LoRa node has sent the data successfully.
4) Now you can see the contents sent byLoRa node on the LoRa application page as follow.
Case 3: I want to set up aLoRa network quickly, but I want to use TTN as my LoRa server.
Just do as the following steps:
Step 1: Configure your LoRa Gateway1) Login the Raspberry Pi through SSH, the default username and password are both “admin”.
Note: By default, the IP address of the LoRa Gateway Ethernet is 192.168.10.10, and you can connect to it through wire using a PC and SSH.
For example:
Note: If you don’t know how to use SSH, please google or Baidu.
2) After that, you will see thefollowing page, which indicates you have login successfully:
3) Enter the command “sudo gateway-config” and the login password to configure the gateway. This command has been shown in the page:
4) Now, you should see a configuration page as follow:
Note: In this tutorial, you may only use the option 1, 2, 3, and 7.
5) If you want to connect the LoRa Gateway to a WiFi network, just do as follow:
Enable WiFi:
Scan WiFi:
Check services:
Agent on:
Connect WiFi by entering the WiFi password (NOTE: not the WiFi SSID):
After entering the password, if you see “connected …”, it indicates the LoRa Gateway has connected WiFi successfully.
Then quit the WiFi configuration page:
6) When you first power on this LoRa Gateway, it
· works on EU868(EU_863_870);
· points to the internal LoRa Server by default.
Now, let’s change the gateway to no longer point to LoRa Server but connect to TTN. To do these:
Select the correct Frequency Plan for the country you are located
7) OK, that’s OK.
8) Let’s see the global_conf.json file to check:
Note: Do you see the gateway ID in the end of this file as shown as the following picture? It is important to remember it!
Step 2: Register your LoRa Gateway to TTN LoRa Server.1) Login to https://www.thethingsnetwork.org/, and open your Console panel;
2) Click on “GATEWAYS”, and “register gateway”:
3) You’ll see the following page:
4) Fill in them as follow:
Note: Remember to select the check box “I’m using the legacy packet forwarder”, and type the Gateway EUI which you have got in the step 1;
5) After the above operations, click“Register Gateway” in the bottom right corner of this page to register your gateway;
6) If register successfully, you will see the following page:
Please notice the “Status” item in the above page, “connected” indicates that your gateway has connected with TTN LoRa Server successfully;
Step 3: Add a LoRanode on TTN LoRa Application Server.
1) Login https://www.thethingsnetwork.org/, and open the Console panel:
2) Click on “APPLICATIONS”, then you can see the following page. Click “add application”:
3) Fill in the following items, and click “Add application”:
4) You’ll see the following page, and click “Devices” as follow:
5) Click “register device”:
6) Fill in them:
Note: You can generate a Device EUI automatically by click.
7) After clicking “Register”, you will see the following page. Please remember “Device EUI”, “Application EUI”, and“App Key”, because you will use them to configure your LoRa node in the step 4.
1) Configure the LoRa node through AT command:
“at+set_config=dev_eui:xxxxxxxxxxxxxxxxx”
“at+set_config=app_eui:xxxxxxxxxxxxxxxxx”
“at+set_config=app_key:xxxxxxxxxxxxxxxxx”
2) The “Status” indicates that the LoRa node has joined successfully:
3) Send some data from LoRa node to TTN:
LoRa node sends data:at+send=0, 2, 000000000000007F0000000000000000
Then you can see the data on TTN as follow:
Postscript Note
This tutorial is simplest for LoRa beginners, and the default OS of the LoRa Gateway is LoRa Gateway OS which is based on Yocto.
If you want to use Raspbian OS on the LoRa Gateway, please see the next tutorial. It is an advanced tutorial for the RAK LoRa Development Kit.
AcknowledgementsThe LoRa Server and the LoRa Application Server of the RAK LoRa Development Kit are based on a great open source project which is made by Orne Brocaar.
You can find more about it in the Loraserver official website:
You can find the open source project on Github here:

_Owo51ooXAa.png?auto=compress%2Cformat&w=60&h=60&fit=min&dpr=2)


_M6kErcYJ84.png?auto=compress%2Cformat&w=40&h=40&fit=fillmax&bg=fff&dpr=2)
Comments
Please log in or sign up to comment.