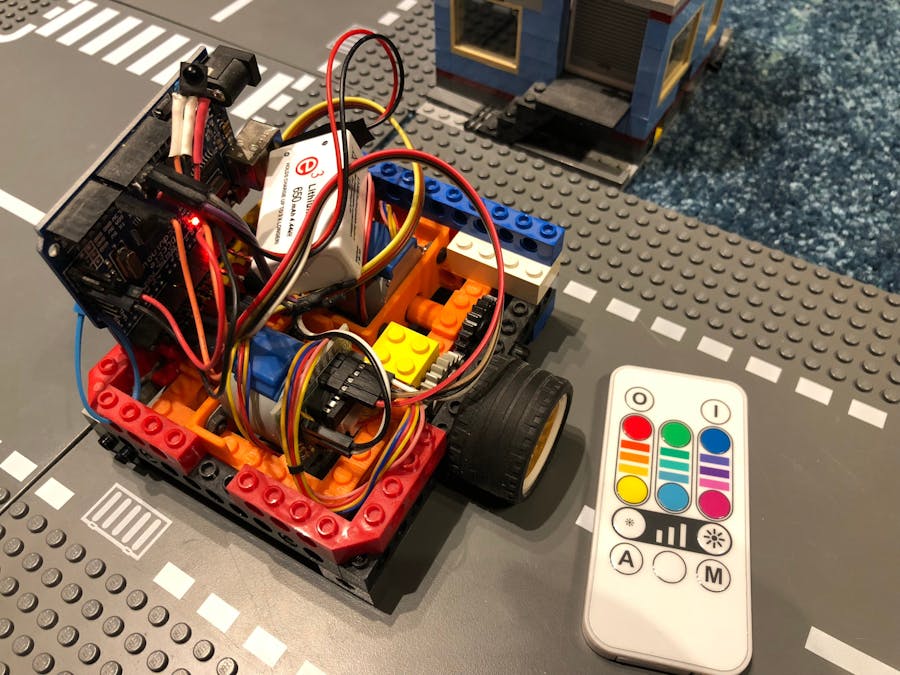
Once upon a time (2015) I was playing around with Lego Mindstorms together with my kids. Inspired by the successes of a friend to inspire his kids, I thought building sumo wrestling robots would be the right thing to do.
There was a problem though. We only had one Lego Mindstorms kit, and it takes two to tango. So, I went in to "dad can build one" mode. I challenged my kids to build and program the Lego robot and I would kick their butt in sumo wrestling with my soon to be built bot! Long story short: my bot lost miserably, it was severely out-powered and pushed into its misery outside of the ring. Kids loved to make fun of how slow my bot was...
Well, since I had build the needed parts and actually had a robotic platform up and running, I thought I use it for something else. I had seen a cute little robot (can't remember what it was called) in a robotics workshop for kids that would allow you to "program" the robot by entering a sequence of moves and then have the robot follow them. I thought this would be a good new life for the sad sumo!
Stepper Motor Lego BrickMost important piece of hardware is the stepper motor Lego brick. I literary had dozens of 28BYJ-48 stepper motors laying around because of another project. So of course I 3D-printed Lego adapters for them! As with any attempt at printing Lego you can get it ok-ish but never to fit as nicely as the originals.
I wanted to make the stepper brick compact and versatile in true Lego spirit. I would say it turned out ok, but not as well as I had hoped. At a footprint of 6x8 it is a lot bigger than desired, limiting the use to quite large Lego builds. Integrating it into a build is fairly convenient thanks to the holes on the sides allowing Lego pin connectors to get a solid interface with other bricks.
I printed the brick in ABS plastic on my old Makerbot Thing-O-Matic, and apart from some bent corners it is quite ok.
Using IR as an interface for the Arduino Uno is just fantastic. Seriously it's great. I kid you not, best thing, since sliced bread, or cheese, you get it. Best. Thing. Ever.
Let me put it this way:
- Cheaper than mechanical buttons (you get 10 receivers for $5 on ebay)
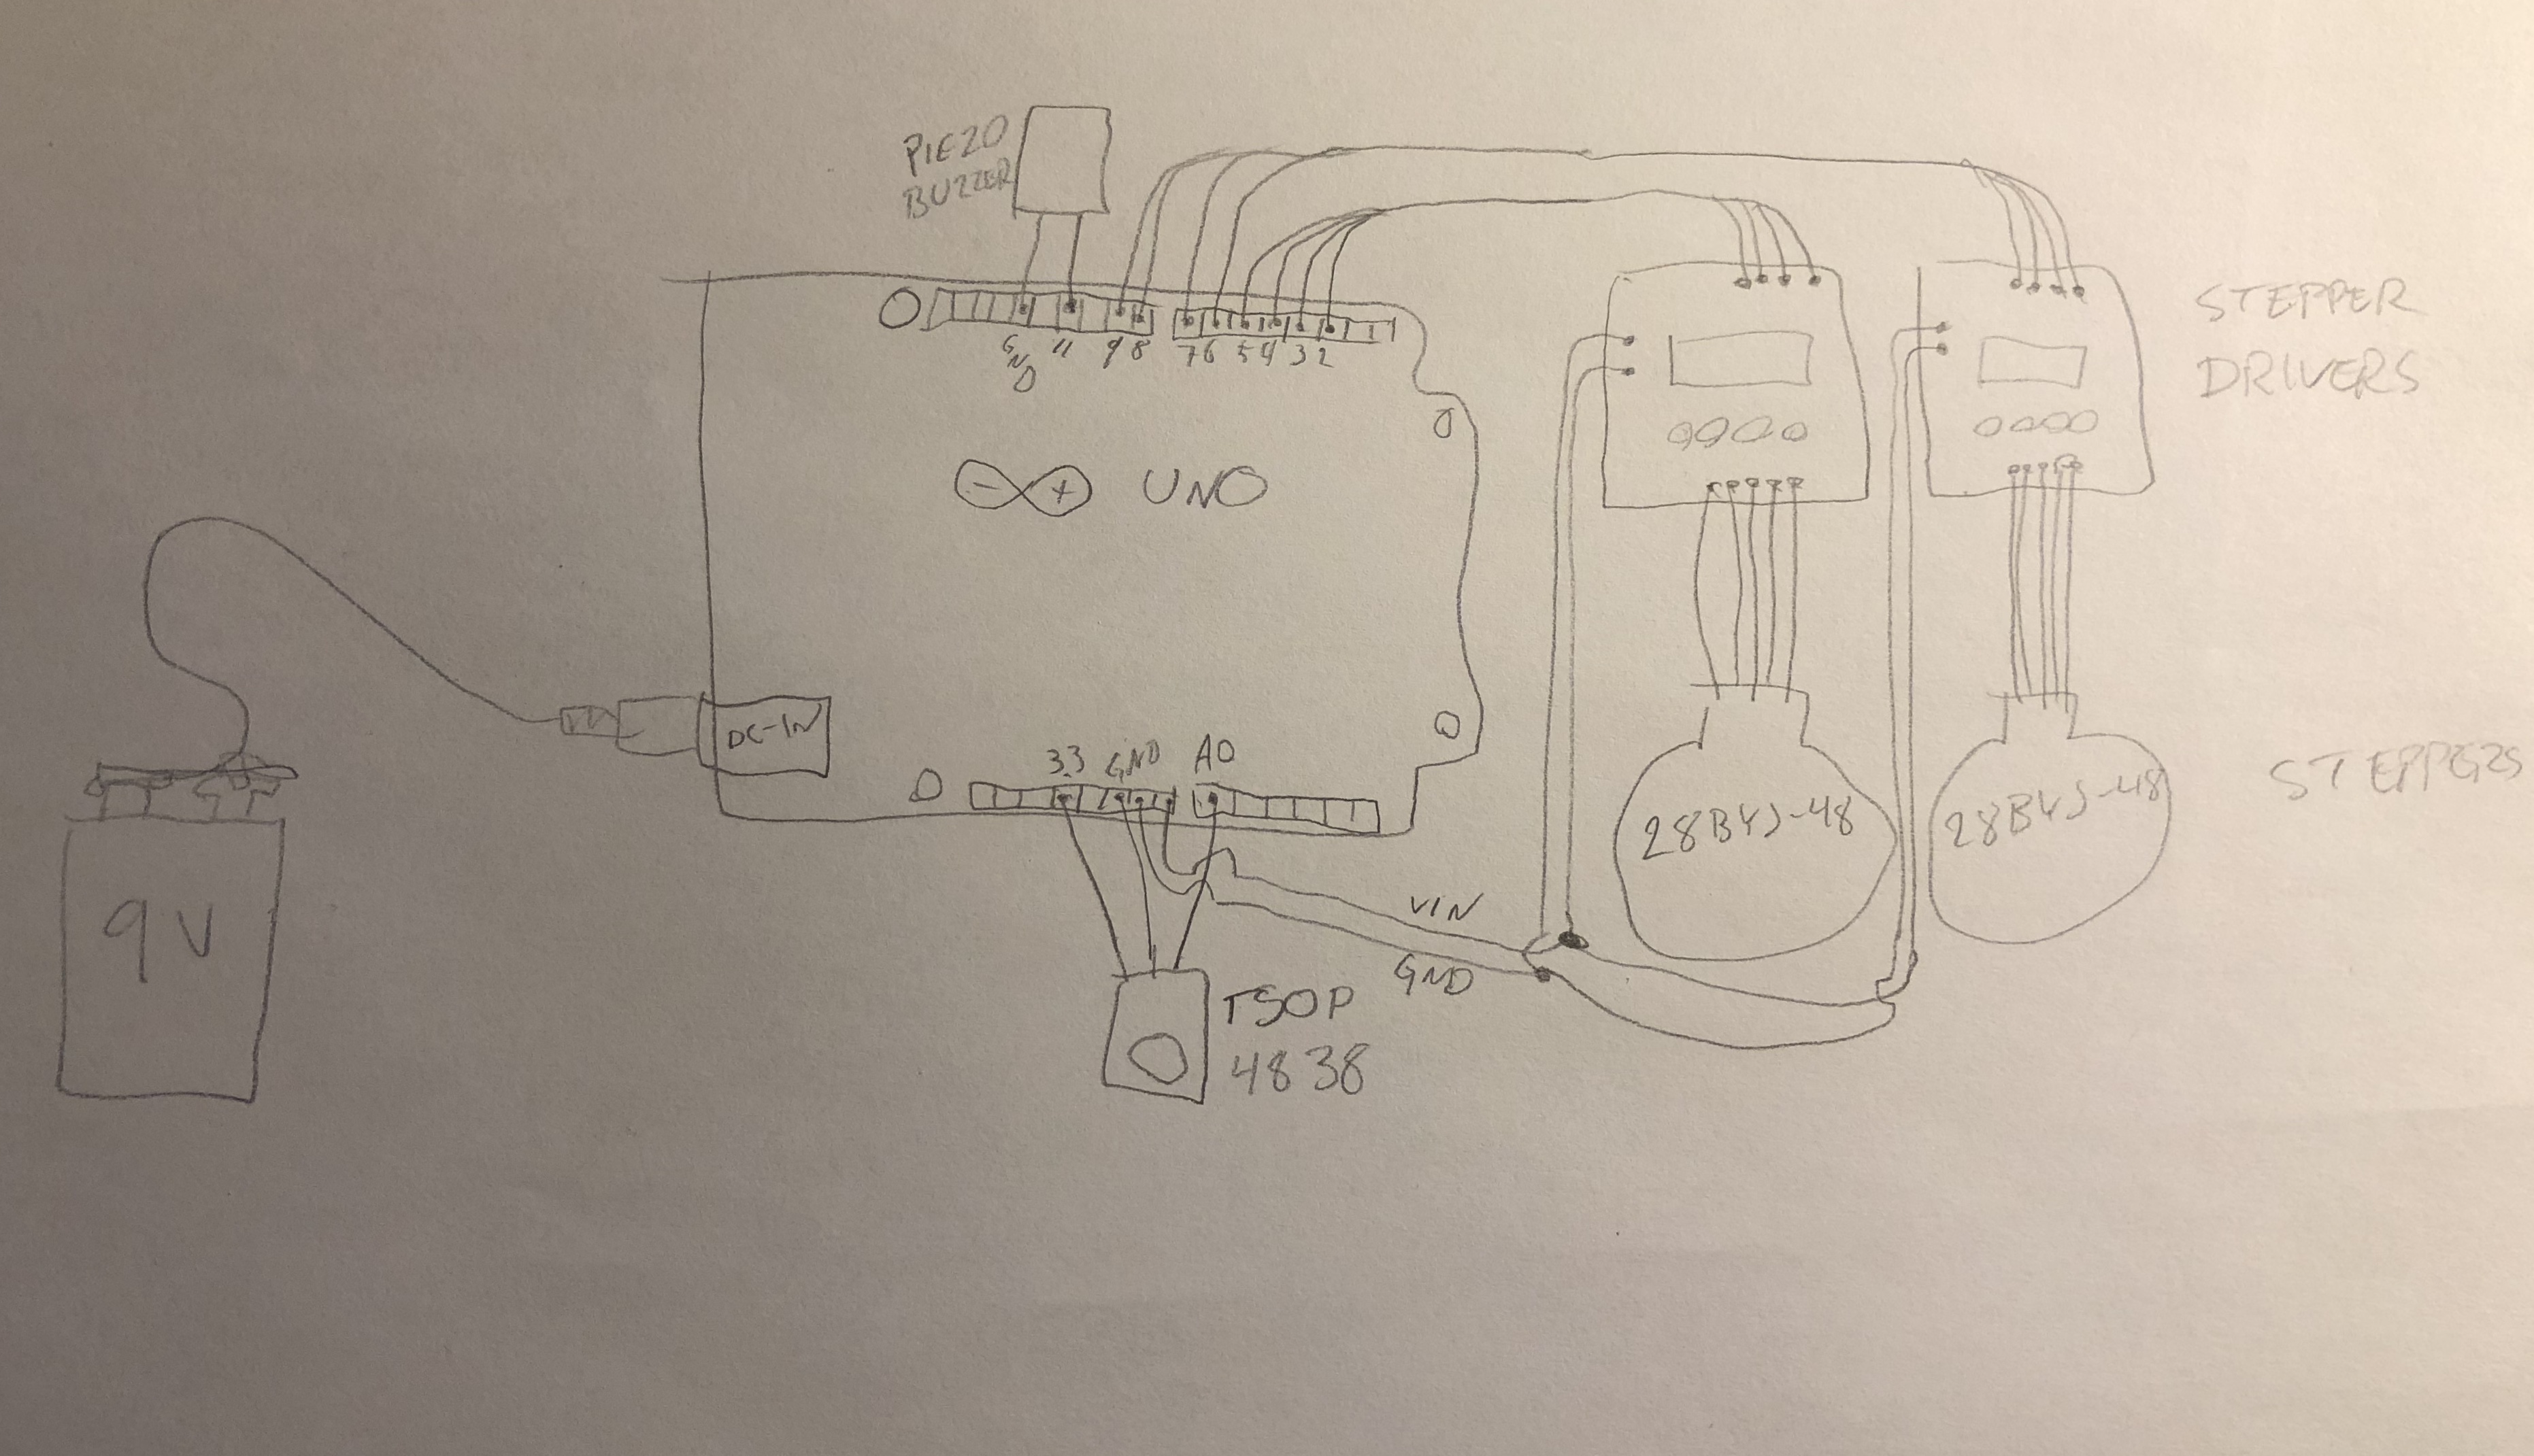
- You can plug the TSOP4838 right into the Arduino board by spreading its legs a little and using A0 pin as input.
- I bet you have at least a few IR-remotes laying round to repurpose or borrow!
Having your build emit sounds is a must. Why?
- What would R2D2 be without sounds?
- It I GREAT to have audible feedback when pressing buttons to you know that you actually pressed the button.
- It is trivial to do, just connect a buzzer to GND and an IO-pin.
- Ridiculously cheap. Just search for "passive buzzer" on ebay.
As for making the actual sounds you can use the existing "tone" functions that are part of the Arduino standard libraries, or you can roll your own code. In this project I wrote my own code for making the beep because the library routine uses a timer that was also used by the IR library. As can be seen in the code, it's not really rocket science.
Conclusions?Well, it's always fun playing with Lego. Building things with Arduino is also fun. Not to mention robotics, that's fun as well. Oh, and 3D-printing stuff. And making things sound like R2D2!
I think I might want to build a more compact Lego motor brick at some point. Would be nice to be able to build a small Lego robot. Like a 4x8 Lego car driving down the Lego streets. That would be nice...
UPDATE: Made a Smaller Version!I couldn't keep myself from making the robot more compact. Same robot, smaller footprint.
The smaller bot was made smaller by reducing the size of the stepper-to-Lego-adapters. The new adapters are 6x4. To make the axis stable it was offset from the motor axis and two 8-tooth gears was added. Since one of the gears needed to go directly onto the motor, I had to make it (and while at it I made the other one as well). 3D-printing a small Lego gear is more than my printer will handle, so I cut them with laser from acrylic instead (yes, I am a lucky bastard that have a laser).
The smaller adapters no longer house the drivers for the steppers, so they had to be somewhere else. Digging in my pile of unused stuff, I found a Nano to use instead of the Uno. Quite conveniently you can solder some ULN2803 driver IC:s right onto the edges of the Nano board. Bending and cutting some legs of course... IR-receiver was soldered to D13-3.3V-A0, and D13 driven low to act as ground :-). The buzzer got to live on the back of the board, soldered to D10-D12. I'd say this counts as a "proper" hack.
Conclusions for this smaller bot? It's smaller. It was fun. It works. It breaks. Don't make gears from acrylic... Need to re-design to not use such small fragile gears.


_ztBMuBhMHo.jpg?auto=compress%2Cformat&w=48&h=48&fit=fill&bg=ffffff)


Comments
Please log in or sign up to comment.