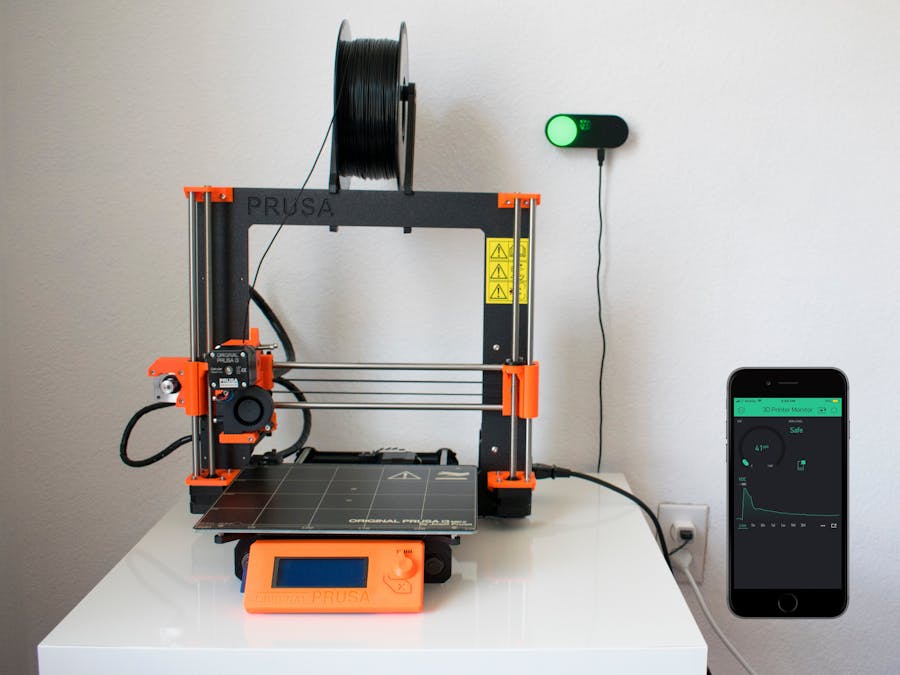
3D printing has become increasing popular and accessible. As they become more desktop friendly and affordable, they are now making their way into residential homes and classrooms.
But is 3D printing really safe in a home environment? 3D printing is a relatively new technology, and its danger is often overlooked. The research on the toxicity of 3D printing is few and far between, but one thing is certain: harmful volatile organic compounds (VOCs) are emitted during 3D Printing.
One of the most toxic VOCs release during 3D printing is formaldehyde - a known human carcinogen. It's release during the melting of ABS plastic, which just happens to be one of the most popular 3D printing material.
This monitor serves two purposes: to alarm the user when the workspace environment becomes toxic and collect VOC emission data.
To collect emission data, the sensor of choice is CCS811, a hot-plate MOX sensor capable of detecting a wide range of VOCs, including formaldehyde. The detected concentration is transmitted via Wi-Fi to a smart phone app, which displays and plots the data.
To inform the user of the toxicity, I used this guideline to create 3 risk levels based on the concentration of VOCs: low, moderate, and high. When the risk level become moderate, the light indicator will change from green to yellow. This is also accompanied by a notification to your phone, which tells you to open a window and ventilate. When the risk level becomes high, the indicator will turn red. This time, in addition to the phone notification, the onboard buzzer will start buzzing to alarm the user to leave the area.
DemoBuilding Instructions:Main Components
Prepare the Components
Cut out three male headers and solder them onto the GND, PWR, and IN pin.
Trim the perf board to toughly 80mm x 35mm. I find it easier and cleaner to do this with a diagonal cutter instead of a saw.
Trim three female header pins to match the male header of the Particle Photon and CCS811.
Wiring
Place the components as shown. Note that the piezo buzzer should be underneath the CCS811.
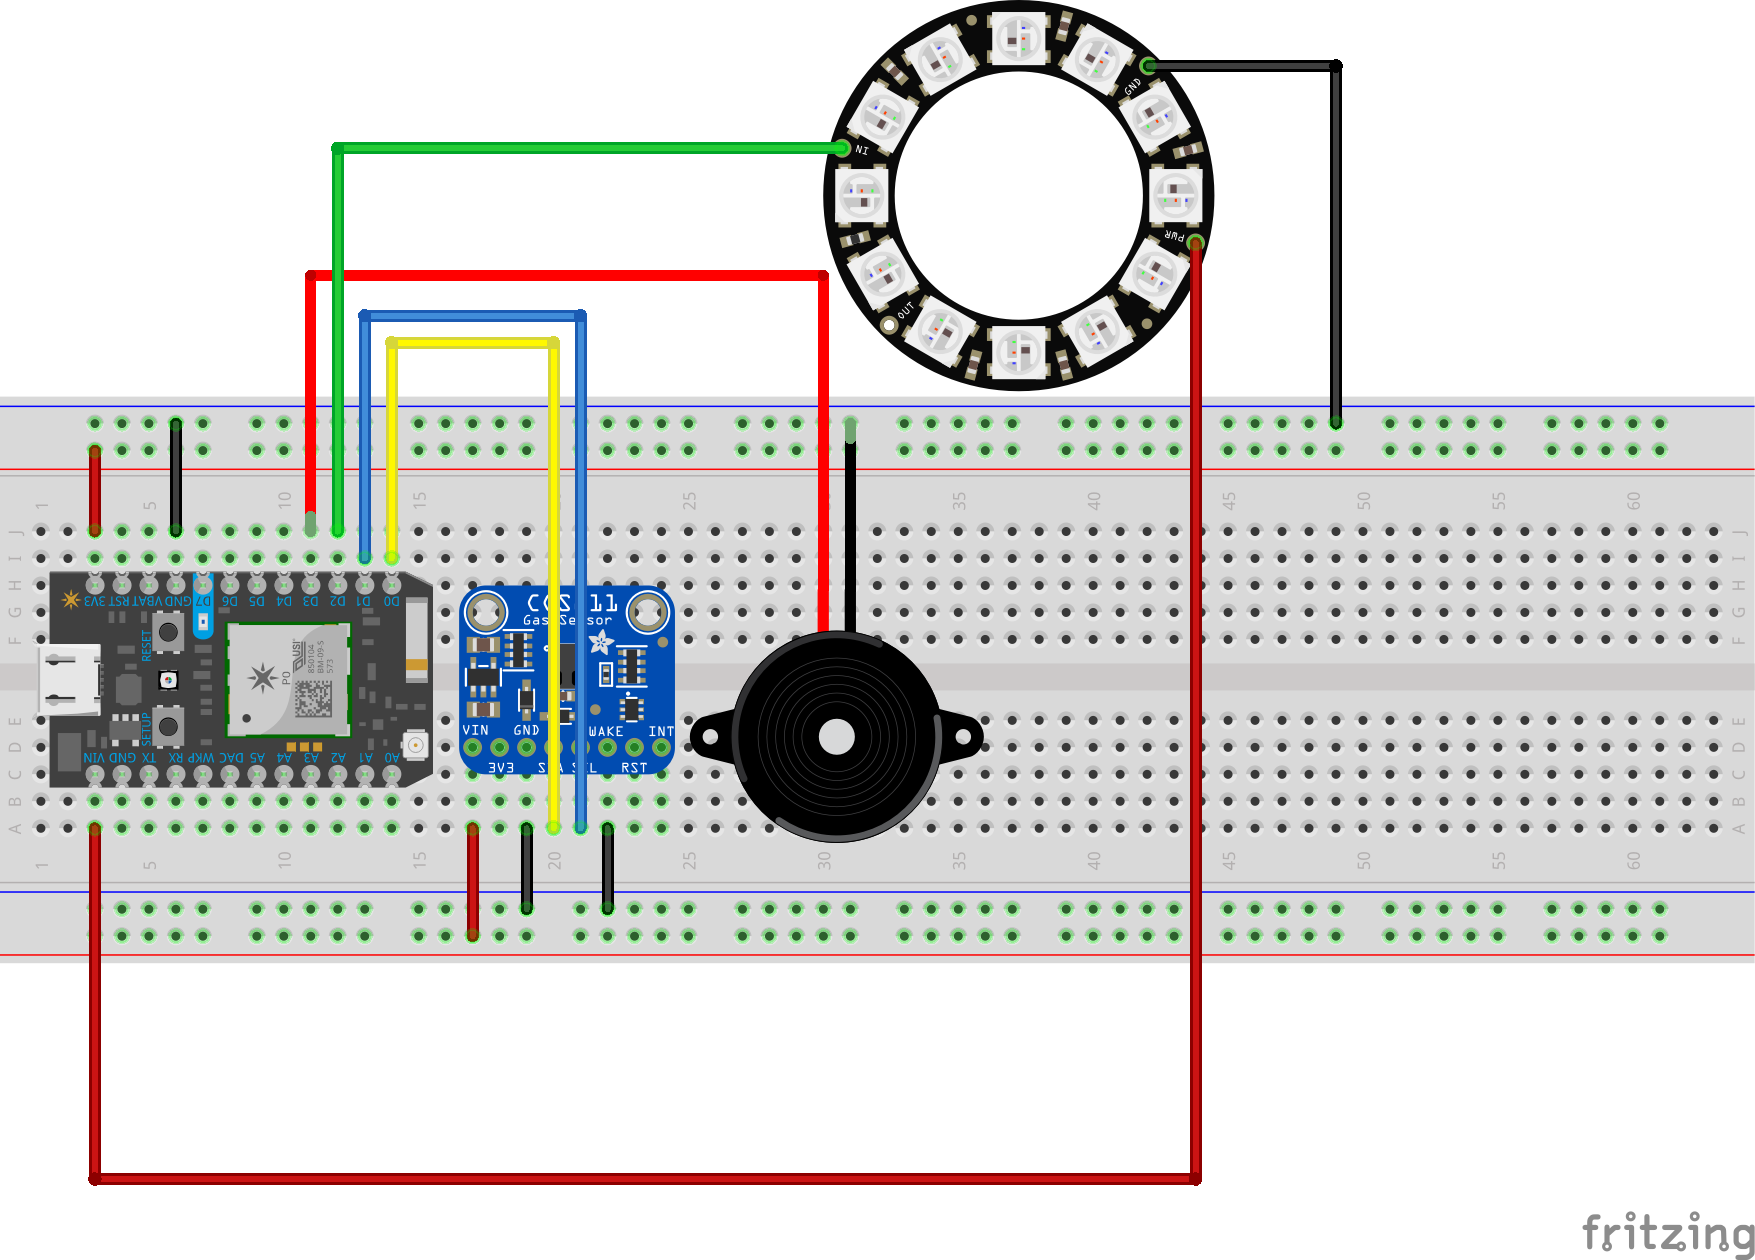
Wire and solder according to the schematic.
Enclosure
3D printer the enclosure and the diffuser with the following settings:
Enclosure - Black PLA, 20% infill, 0.2mm layer height.
Diffuser - White PLA, 100% infill, 0.2mm layer height.
The whole print should take around 2 hours.
Secure the enclosure to the bottom of the enclosure with hot glue. Place the diffuser on the inside of the top cover cutout. The friction should hold it in place, but if it's a bit loose, use clear tape to secure it.
Pop on the top cover and connect the usb cord, you are now ready for coding.
BlynkCreate a new project in Blynk.
Setup the widgets as shown. The settings for the SuperChart will depend on you preference, but you can leave it on default to start.
CodeThe code for this project can be found on my Github. Since it works in the Particle Web IDE, you can just simply create a new project and paste the code in.
char auth[] = "Your Auth Token";
The only thing you need to change is the Auth Token, which should be sent to your inbox when you created you Blynk App from last step.
Here are the libraries you need to include in your project. I use the Spark Fun CCS811 library because I was having trouble getting the Adafruit one to work properly.
Now just upload the code to your Photon and you are finished. Happy printing!
Sensor Calibration.If your CCS811 is brand new, run the sensor for 48 hours to "Burn it in."


Comments