


Hardware components | ||||||
 |
| × | 1 | |||
 |
| × | 1 | |||
 |
| × | 1 | |||
| × | 1 | ||||
Software apps and online services | ||||||
 |
| |||||
| ||||||
| ||||||
Hand tools and fabrication machines | ||||||
 |
| |||||
 |
| |||||
Tracking items and displaying information about them has always been one of the top priorities for developers working on IoT devices. And with the deadline for the ElephantEdge contest coming closer, I wanted to showcase a way to send data to the cloud and analyze to gain deeper insights. For this task, I opted to create a simple bike tracker that is able to send accelerometer, temperature, and location data to Avnet's IoTConnect service.
The device works by first being attached to a bicycle, and then it connects via WiFi to the IoTConnect service (possible through a phone or other cellular connection). It then gathers current sensor data to send at regular intervals, where it is displayed on a dashboard.
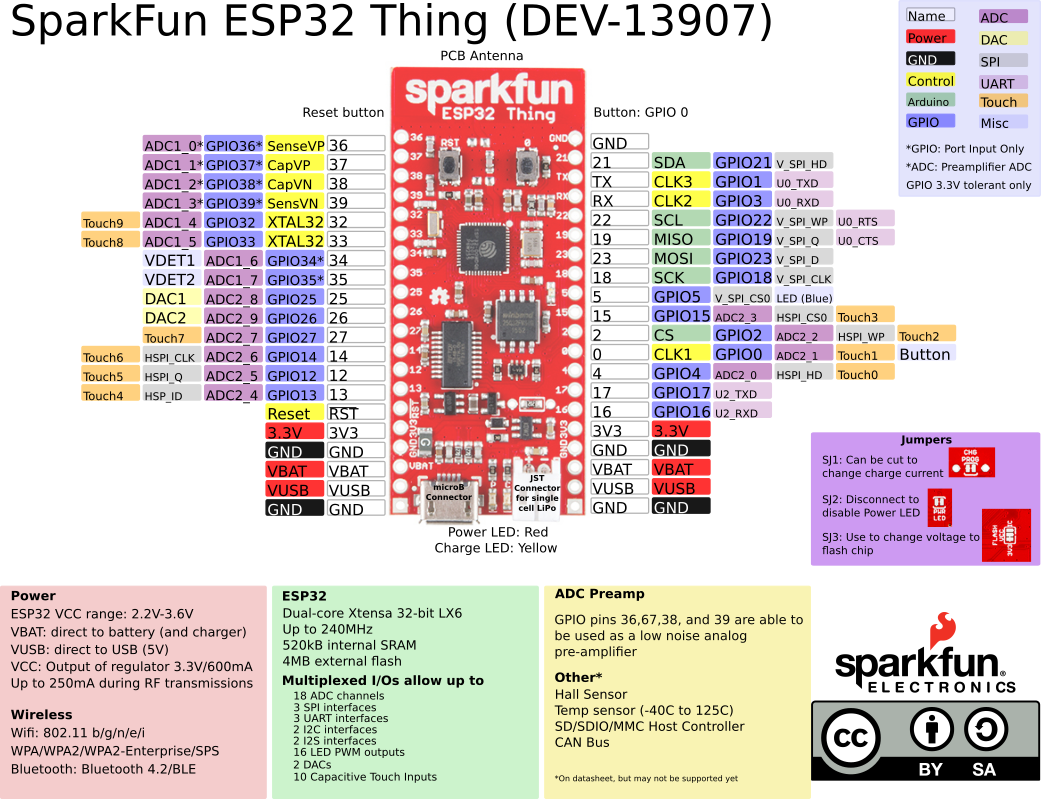
The HardwareFor this system to work, I went with an ESP32 because it has plenty of processing power and is supported by the provided SDK. To measure temperature, I used one of Adafruit's ADT7410 breakout boards, since it has a lot of precision and plenty of accuracy. To get acceleration data, I used a SparkFun LSM9DS1 9DoF Stick due to its small size. Finally, I went with a DFRobot GPS + Enclosure module to keep track of the bike's current location. This sensor communicates over UART instead of I2C, unlike the previous two sensors.
The IoTConnect service is platform by Avnet that is hosted in the Azure Cloud, and it lets developers easily connect their devices, view information, and send out alerts for anomalies. To begin, you'll need to request access to use the dashboard for the ElephantEdge contest. Send an email to elephantedge@iotconnect.io and wait for up to 2 business days to receive a link. Login with your credential at http://avnet.iotconnect.io/ and then you should be redirected to the home page, which has the dashboard. There are some limitations to your license:
- Up to 50k messages total (~1500 per day)
- Expires after 3 monthly renewals
- Up to 3 devices
- Up to 2 users (1 extra)
With that in mind, it's time to connect a device and show some data.
Templates define what a device is able to do, and it speeds up the process of adding multiple identical devices. Head over to the Templates tab and click Create Template. Next, set a unique code for the template, along with a name and description. The ESP32 will use a key, so leave that field as-is. Attributes are the data fields your device will send, so naming and types are important here. For now, add the following attributes:
- Name: t
emperature, Data type: NUMBER, Unit: F - Name:
accelerometer, Data type: OBJECT,
For the nested objects under accelerometer: [{Name: x, Data type: NUMBER}, {Name: y, Data type: NUMBER}, {Name: z, Data type: NUMBER}]
- Name:
location, Data type: OBJECT
For the nested object under location: [{Name: lat, Data type: NUMBER}, {Name: lon, Data type: NUMBER}]
Since data is sent and received to/from the cloud via MQTT, virtually any WiFi-enabled device will work. However, it is much easier to use a predefined SDK, and Avnet provides them for several languages, including Node.js, Java, Python, and C#.NET. There are also two C SDKs for the nRF9160 board or the ESP32/ESP8266.
You'll need to add the ESP32 as a device in the cloud portal, so go to the Devices tab and click the Create Device button. Enter a unique ID (I just called mine esp321) and then fill in the rest of the fields. Use the template that was created earlier for this device, and the ElephantEdge entity as the Entity
For the IoTConnect SDK, go here and download the zip file and then extract it. You'll also need to download the sample code for the ESP32 here and then extract it. Next, copy all of the files (except for the.ino file!) from the iotconnect-C-sdk-ESP-2.2.0-1\ESP_SDK_&_DOC\ESP32SDK\ESP32 folder and paste them into the IoTConnect_ESP_SDK_2.2.0 folder (which should have the IoTConnect_ESP_SDK_2.2.0.ino file already in it). Go ahead and open IoTConnect_ESP_SDK_2.2.0.ino now.
Before editing anything, a couple of changes need to be made. First, change line 89 from client.getAllTwins(); to client.GetAllTwins(); and then modify line 123 from client.dispose(); to client.Dispose(); If you don't, you'll get compilation errors. Second, change line 553 in the IoTConnect.cpp file to void IOTConnectClient::SendAck(String Ack_Data, String timestamp, int messageType){ and add Ack_Json["t"] = timestamp; under line 556. You'll also need to change the forward declaration in the IoTConnect.h file on line 169 to void SendAck(String Ack_Data, String timestamp, int messageType);
After squashing all of those bugs, set your ENV, cpId, uniqueId, ssid, and pass at the top of the ino file. You can find the first two in the IoTConnect portal key vaults module (under Settings), and the uniqueId is what you entered on the Add Device page.
The program starts by creating and initializing objects for each sensor, along with the cloud connection. Next, the ESP32 connects to WiFi and starts the MQTT subscription with IoTConnect. Once in the loop() function, the ESP32 does several things. For one, it reads in UART data from the GPS module and encodes it if valid. It also updates the accelerometer if new information is available. Once the update period has passed, a JSON object is created with the sensor data included, and then it gets sent to the cloud.
Creating dashboards is one of the main features of IoTConnect. I went with four widgets for mine:
- Live data
- Live LineChart
- Device Location
- Acquired Device
These are able to show each data point sent from the tracker, and they can be further customized if wanted.
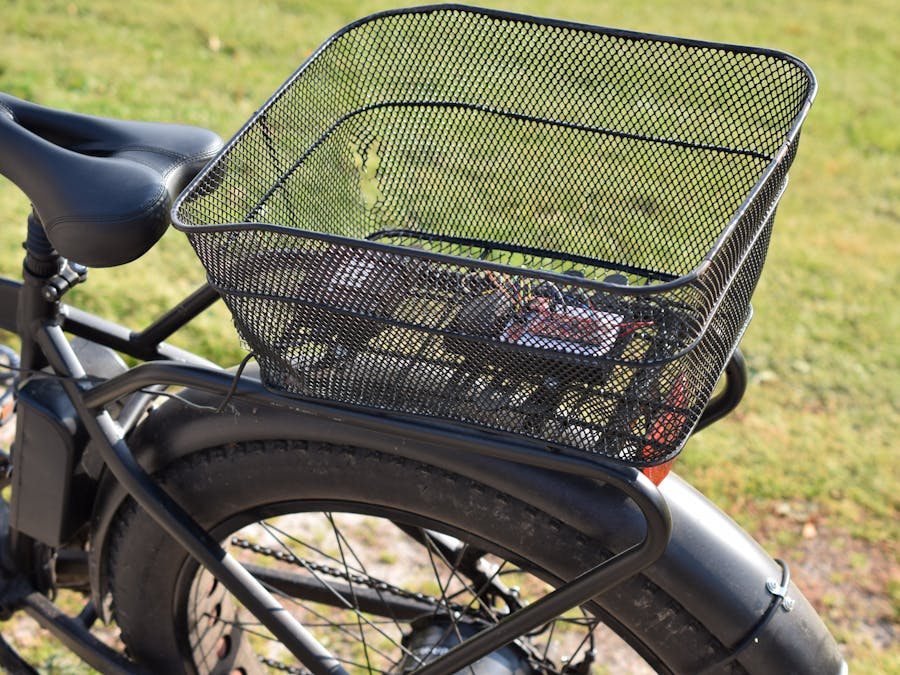
After attaching the tray to my bicycle and then placing the device into it, I plugged in the LiPo battery and went for a test ride.
Since my house's WiFi signal doesn't extend that far, I activated my phone's hotspot feature for the ESP32 to connect to. The device sent out data every two seconds, and it's easy to see where a bump occurred along the way. The location can also be seen (with a random offset so my actual location isn't revealed).
Overall, the system works quite well, and many of the lessons learned from building this can be applied to the ElephantEdge contest.


_3u05Tpwasz.png?auto=compress%2Cformat&w=40&h=40&fit=fillmax&bg=fff&dpr=2)

Comments
Please log in or sign up to comment.