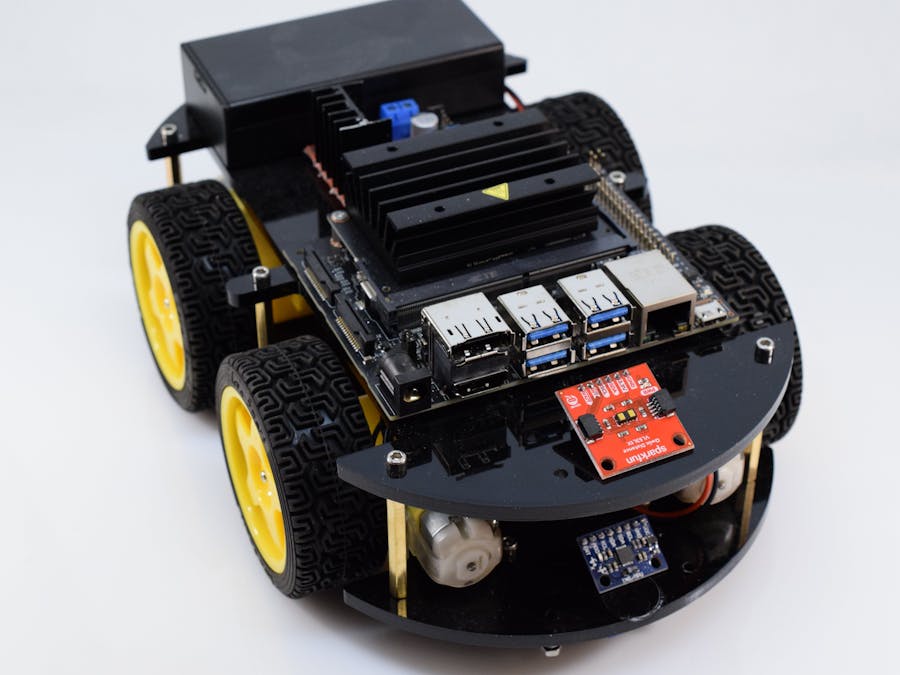
After training your Jetson Nano to recognize how many fingers you’re holding up or whether you’re giving a thumb’s up or thumb’s down gesture, you might be wondering about the next possible project. Nvidia has developed a robotics platform that utilizes the Jetson Nano called the JetBot. It lets users control two motors via I2C and a PCA9685, along with viewing output on an OLED or via the web, and finally, it has support for a camera in order to perform computer vision tasks. On its own, the JetBot is a nice development platform to have fun with and experiment, but it lacks support for many important sensors and has limited capabilities for motor control.
Since I was planning on creating several robotics projects that rely on sensors besides a sole camera, I needed a way to interface them with the JetBot API and GPIO.
For most of them, communication is handled over the I2C bus, so integrating a pre-existing library, such as an Adafruit one, would be an easy way to add another sensor. I also wanted to use four motors with an L298N motor driver, which requires direct PWM control, rather than over the I2C bus.
As mentioned previously, the JetBot uses Adafruit’s PCA9685 16-channel PWM breakout board, but I wanted to use either the L298N or an L293d driver. They are simple H-bridges that take in a control signal to attenuate the power going to each motor via PWM. These drivers are considered “dumb”, since they have no onboard controller. Therefore, setting up four GPIO pins as PWM outputs and connecting them to the motor driver is all you have to do.
In the Python code, there is a file in the JetBot library called robot.py, and it contains the functions to control the robot’s motors. In order to change it to support PWM and not the Adafruit Motor HAT, simply edit lines 23 and 24 to get rid of the first argument in the Motor constructor call. Then, go to motor.py and get rid of all calls to the Adafruit Motor HAT. They will need to be replaced by adjusting the PWM values according to the speed that each channel is set to. Additionally, if a channel’s value is negative, then the motor will need to turn the opposite direction by swapping which pin is high. Finally, once the motor is released, all motors will be set to low to prevent them from running.
In order to add additional sensors, you first need to know what communication protocol they use. For this project, I wanted to add distance sensing via a VL53L1X, which uses a laser’s time of flight (ToF) to measure distances.
Since it interfaces with the I2C bus, adding it would be extremely simple. There is a library called vl53l1x-python by pimoroni on Github that allows for easy interfacing with the sensor, since it contains all of the necessary setup and configurations.
I began by installing smbus2 and vl53l1x with pip. Next, I created a new file called vl53l1x.py that would contain the necessary functions, namely retrieving a distance from the sensor. It begins by importing the library and then setting it up by assigning a new object to an instance of the VL53L1X class. The I2C bus and sensor address are passed in from the Robot class, along with the distance traitlet. Finally, calling get_distance(range) will read a distance at short, medium, or long range.
The underlying function, VL53L1X.get_distance() is a blocking function, which means the rest of the program will have to wait until a distance is returned. This can be mitigated by placing the wrapper function into a thread that can execute in the background while the rest of the program continues. A method decorator is used to call a function whenever the value has been updated, which is useful for applications involving self-driving or other time-sensitive tasks.
Because the motor driver and distance sensor classes both rely on the use of traitlets, it is extremely simple to integrate them with a Jupyter notebook widget. All you have to do is create a new container from the ipython widgets module and pass in the traitlets you wish to have displayed. Finally, call the display() function to show the widget in your Jupyter notebook.
Future Plans and IdeasWith the ability to create custom robots using the JetBot API, the possibilities are nearly limitless. I plan on making several projects that integrate self-driving and autonomy into the a JetBot, which could let it deliver a package or pick up an item, all on its own.


_3u05Tpwasz.png?auto=compress%2Cformat&w=40&h=40&fit=fillmax&bg=fff&dpr=2)
Comments
Please log in or sign up to comment.