
Hardware components | ||||||
 |
| × | 1 | |||
 |
| × | 1 | |||
 |
| × | 1 | |||
 |
| × | 1 | |||
 |
| × | 1 | |||
 |
| × | 1 | |||
 |
| × | 1 | |||
 |
| × | 1 | |||
_3eg1OM9RhZ.png?auto=compress%2Cformat&w=48&h=48&fit=fill&bg=ffffff) |
| × | 1 | |||
 |
| × | 1 | |||
Software apps and online services | ||||||
 |
| |||||
I use this lamp near my bed and changing the intensity is the best feature. I also control this lamp wirelessly by the Push Button Kit which is near the bedroom's door. This way I can turn the lamp on and turn off the big ceiling light off.
All modules have pre-build firmwares so no coding is necessary, but you can play with a code if you like. The firmware is flashed by multi-platform GUI tool BigClown Playground.
I've also added support to be paired with wireless Motion Detector Kit so if you pair this kit with Night Lamp, motion turns the light on. You can also add a Lux Meter Tag to the Night Lamp and the Motion Detector turns the lamp only when there is a dark in the room.
I've made this project as flexible as possible so you can start just with Night Lamp, then you can extend it with Button Module, Encoder Module, Lux Meter Tag and optionally pair with Push Button Kit and Motion Detector Kit.
This tutorial doesn't need gateway or Raspberry Pi. The radio devices pairs and communicates directly to Night Lamp.
You can have many Push Buttons and Motion Detectors paired with a single Night Lamp.
Night Lamp can be controlled by:
- Button at the Core Module itself
- Button Module placed on Core Module
- Encoder Module placed on Core Module
- Push Button Kit
- Motion Detector Kit with optional Lux Meter Tag conencted to Night Lamp
You will need
- Core Module
- Power Module
- 5V Adapter
- RGBW LED Strip 144 LEDs / meter
- Encoder Module with encoder knob
- Enclosure 301 (you can download STL and edit/print yourself)
- Light diffusor from some IKEA lamp - from glass or paper
- You will need Windows, Linux or macOS computer to flash pre-built firmware
Optional parts
Connect all the modules on top of each other. It does not matter in what order you put modules together unless you use our enclosures with holes for USB connector.
Do not put batteries or enclosures on Button or Motion kit yet, we do that later after pairing.
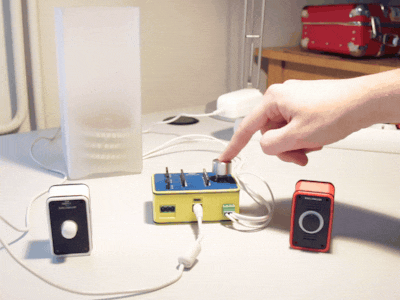
Download BigClown Playground multiplatform GUI tool. This tool can flash firmware. It also contains gateway for Radio Dongle and Node-RED but we will not use them because Radio Kits talks directly to Night Lamp.
- Run the BigClown Playground
- Connect Core Module for Night Lamp over USB to your PC and wait until the FTDI driver is installed
- Go to the Firmware tab and choose bcf-night-lamp firmware
- Choose the correct serial COM port and press "FLASH FIRMWARE" button
- After flashing, the Core Module will turn on red LED for 2 seconds
Optionally flash firmware to the other radio modules. If you've ordered Core Module together with a kit, it is already pre-programmed. Hovewer we suggest to update them to the latest firmware version:
- Push Button Kit - firmware: bcf-radio-push-button
- Motion Detector Kit - firmware: bcf-radio-motion-detector
See troubleshooting section or visit BigClown forum If something goes wrong.
Step 3: Pair NodesThis step is necessary only if you have Push Button or Motion Detector Kit.
- Remove batteries from all wireless nodes you would like to pair
- Power-up the Night Lamp
- Press and hold encoder or button on the Night Lamp for 3 seconds
- The LED strip turns red
- Put the batteries to the single node you would like to pair
- When paired, the LED strip changes color from red to last set.
- To pair other module repeat again from step "Press and hold encoder..."
After pairing the modules. You can press the Push Button to turn on and off the Night Lamp.
The Motion Detector has this behavior:
- Motion detection is send immediatelly, next motion is send after 60 seconds. This is to save batteries if there is motion too often.
- The Night Lamp is turned on by Motion Detector only when the light is turned off. Right now the light turns on for 60 seconds
- Optionally if you add Lux Meter Module to the Night Lamp, then the Motion Detector turns lamp on only if it is illuminance under 500 lux.
The Push Button and Motion Detector Kit also sends temperature and battery voltage level, so you can extend the project and use the LED strip to show temperature graph or warn you when the batteries are weak.
Also you can user more effects on the LED strip because it is using WS2812B LEDs which are addresable. So you can add configuration if you like warm or cold white color, add turn-on and off rolling effects etc.
For more logic and IoT control it is possible to pair modules to the Radio Gateway which is connected to the Raspberry Pi with bc-raspbian that contains all the services already pre-installed. Then you can create more complex rules in Node-RED, Blynk and also control the lamp from your phone.
- Check out other BigClown projects.
- Take a look at the Module Overview.
- Learn about MQTT and BigClown MQTT topics to control LEDs and relays.
- Try other integrations with Grafana, Blynk, IFTTT, Ubidots and others.
- Use your Raspberry PI or other single board computer (SBC) as a server.
- Flash other firmware or write your own firmware for the Core Module.
- Check the Core Module pinouts and add your own buttons, relays and sensors.


Comments