Hardware components | ||||||
_ztBMuBhMHo.jpg?auto=compress%2Cformat&w=48&h=48&fit=fill&bg=ffffff) |
| × | 1 | |||
| × | 1 | ||||
| × | 1 | ||||
 |
| × | 1 | |||
 |
| × | 1 | |||
 |
| × | 2 | |||
Hand tools and fabrication machines | ||||||
| ||||||
| ||||||
| ||||||
 |
| |||||
| ||||||
This project aims to build a water robot that can be controlled by the smart phones via Bluetooth. The idea was created before a science fair exhibition were some of my talented students were intending to design a special kind of robot (unlike traditional well known land robots). After brainstorming, we reached this model which has two out breaking features:
1. Ability to move in water
2. Ability to be controlled by anyone's smartphone.
Building the frame
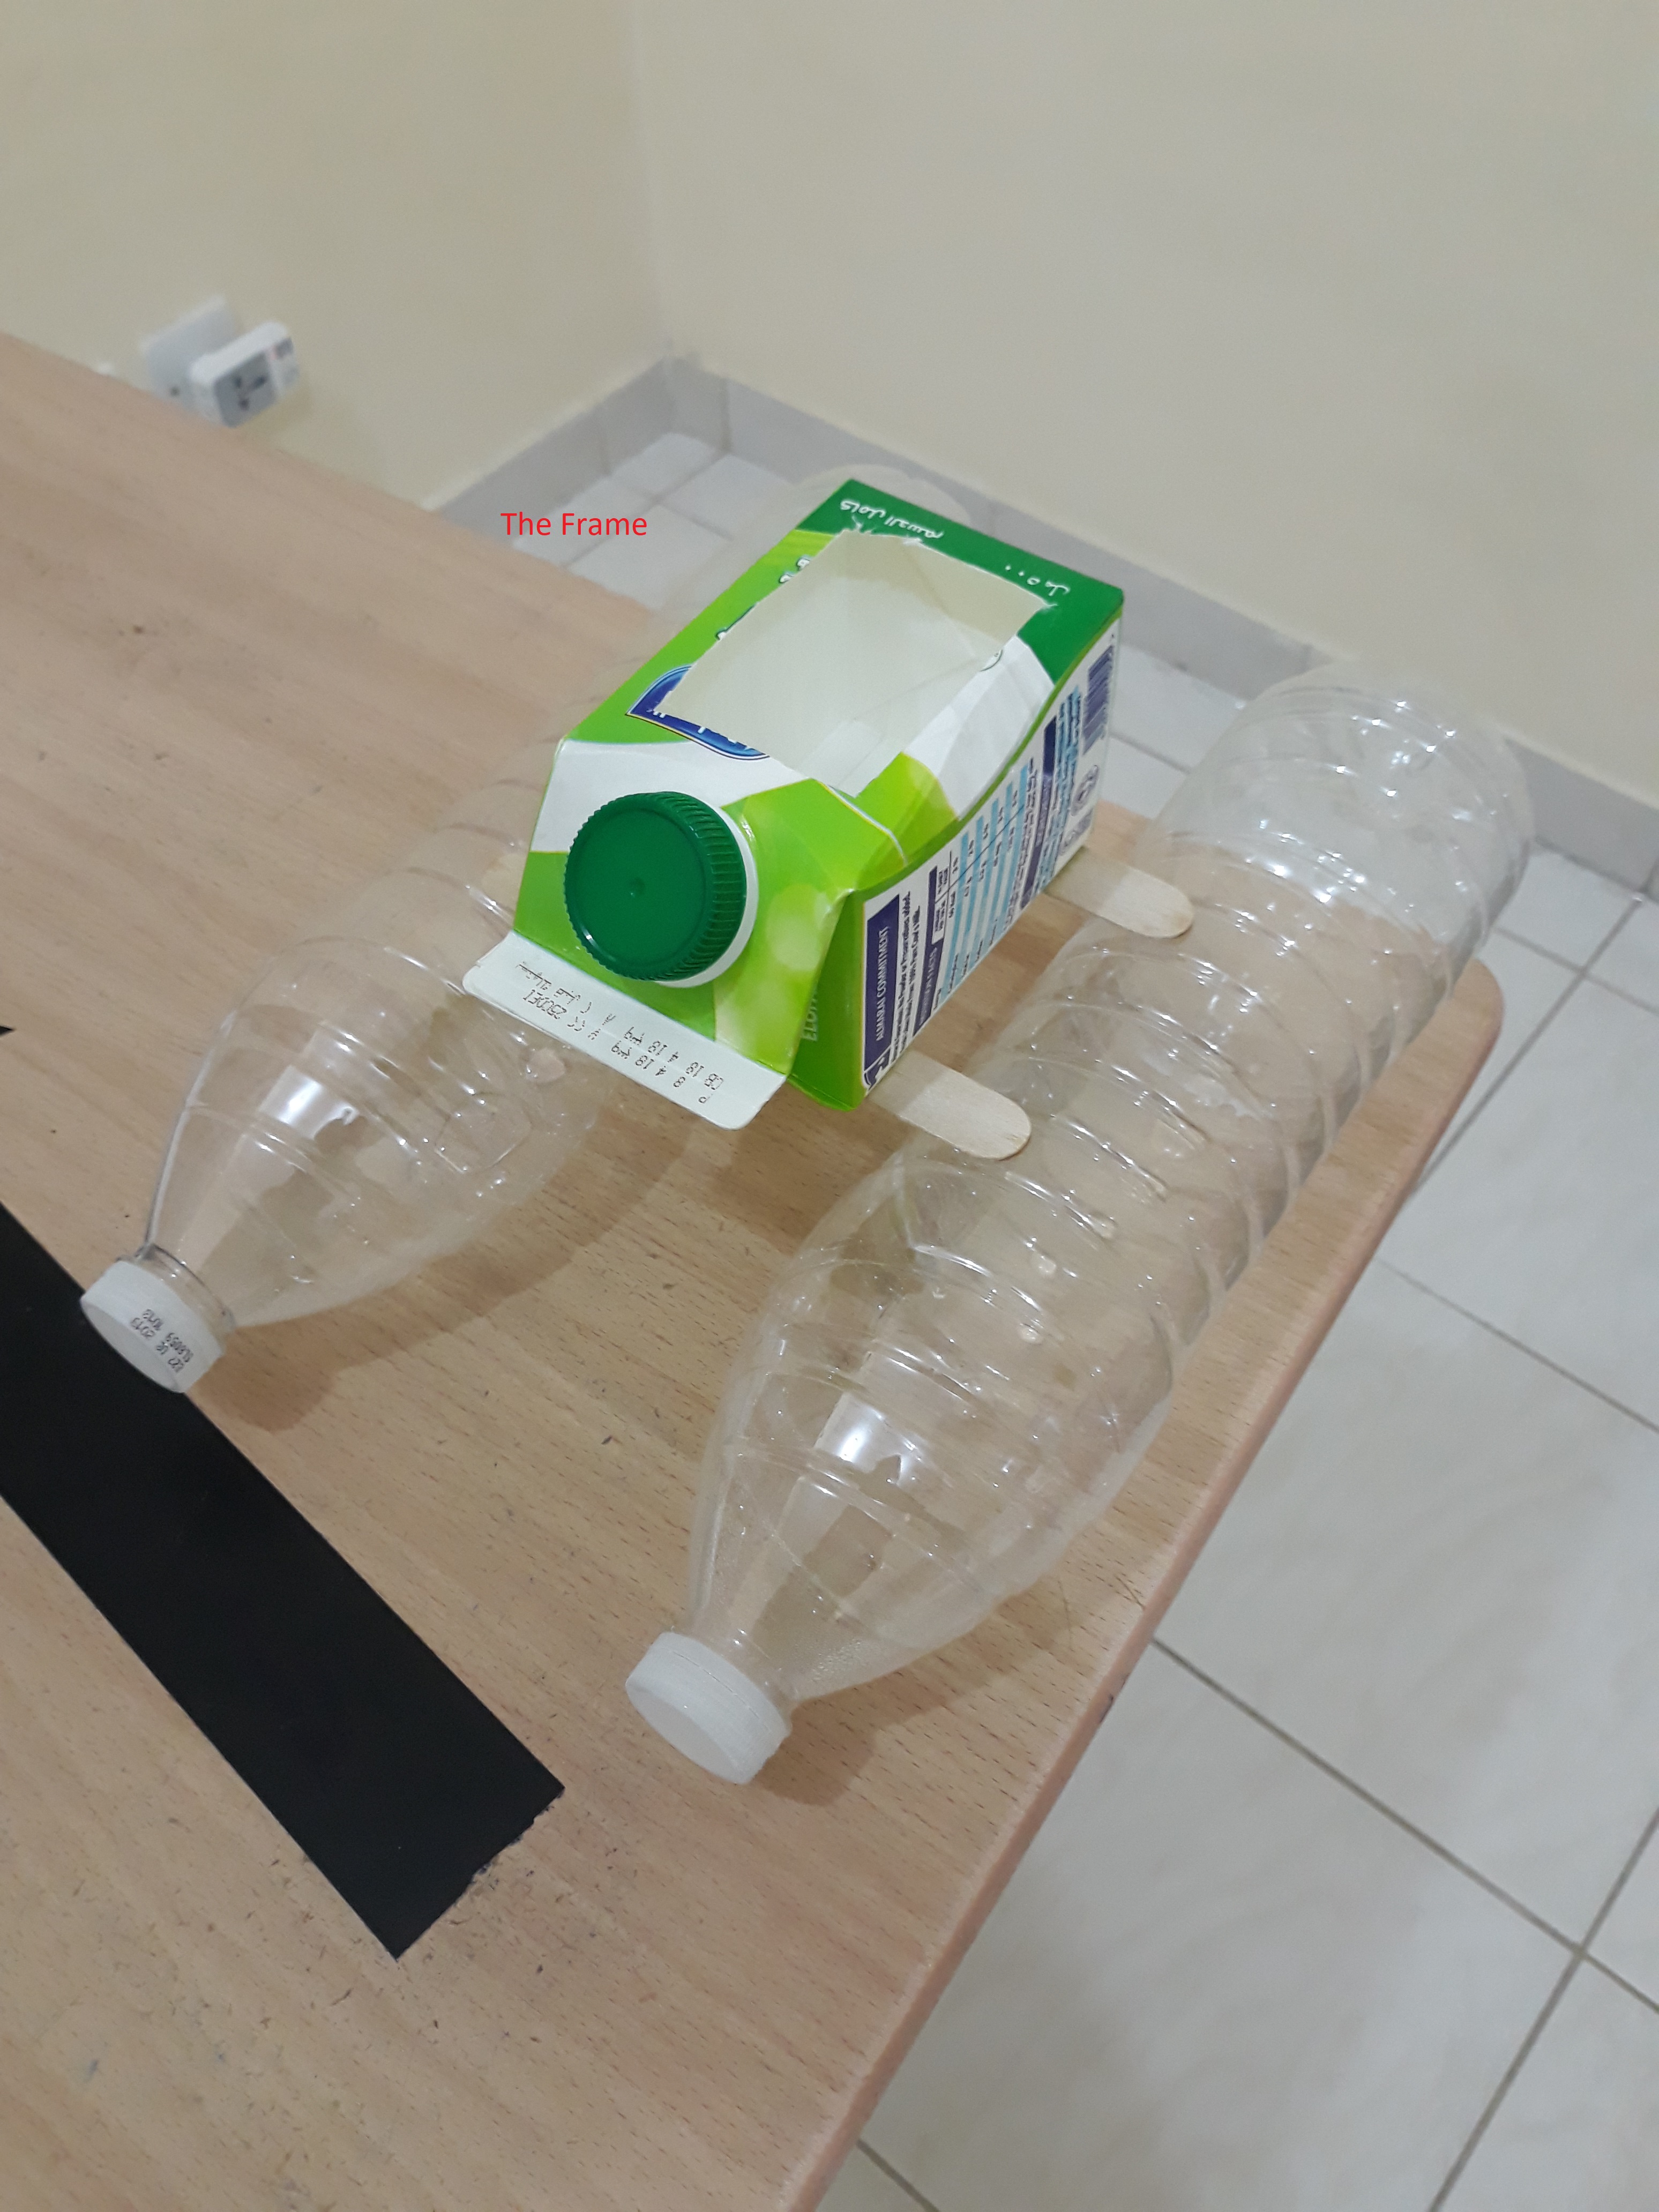
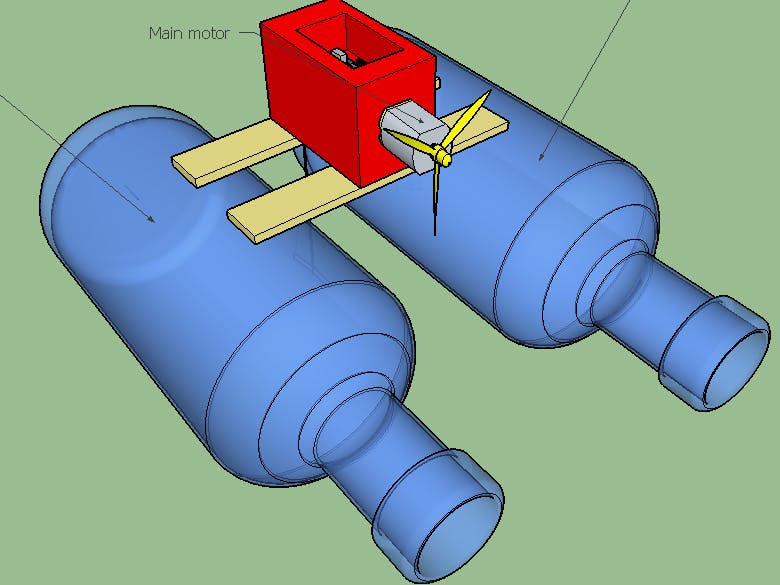
The frame is build by connecting two plastic water bottles by two woody ice cream sticks. The sticks are attached to both the bottles on each side by using a glue. On the top of the sticks, an empty milk bottle is placed (green in the fig).This bottle will host all the electronic staff of the boat.
Connections
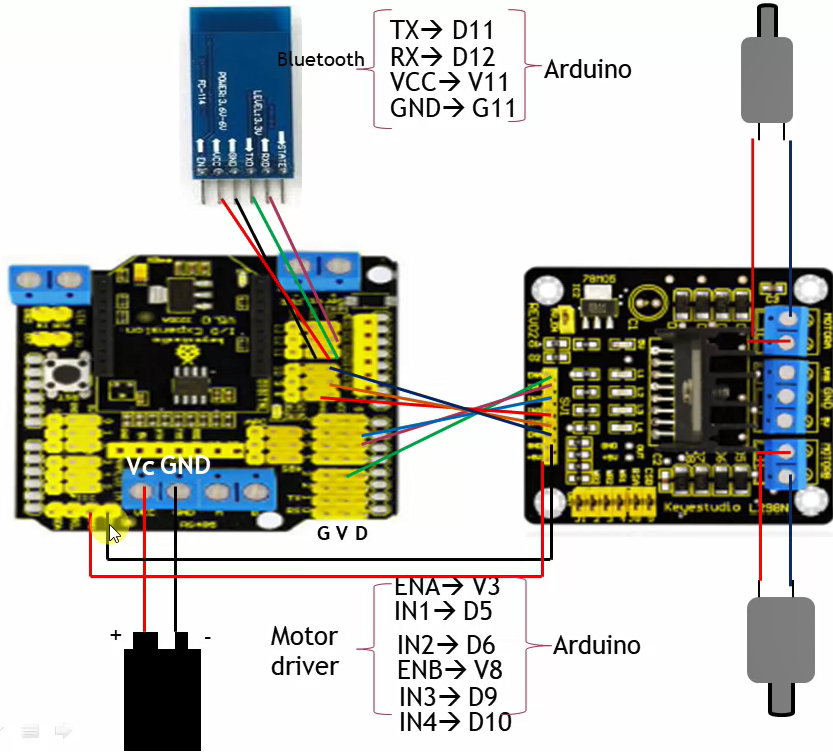
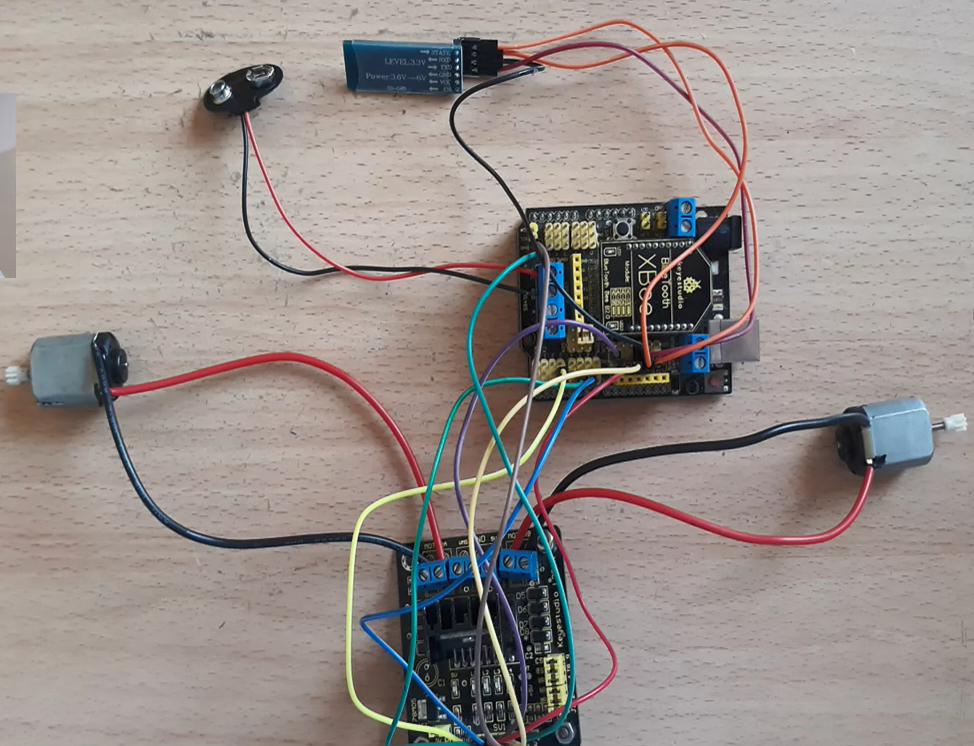
This figure shows how the components of the robot are connected. First of all attach the arduino UNO board to its shield then connect the board to a 9V battery. and use the jumper wires for connecting each pin on the UNO shield to its adjacent pin on the mottor driver. The scheme also shows how the two motors are connected to the motor drive. and how the Bluetooth chip is finally connected to the UNO board.
Housing the electronics
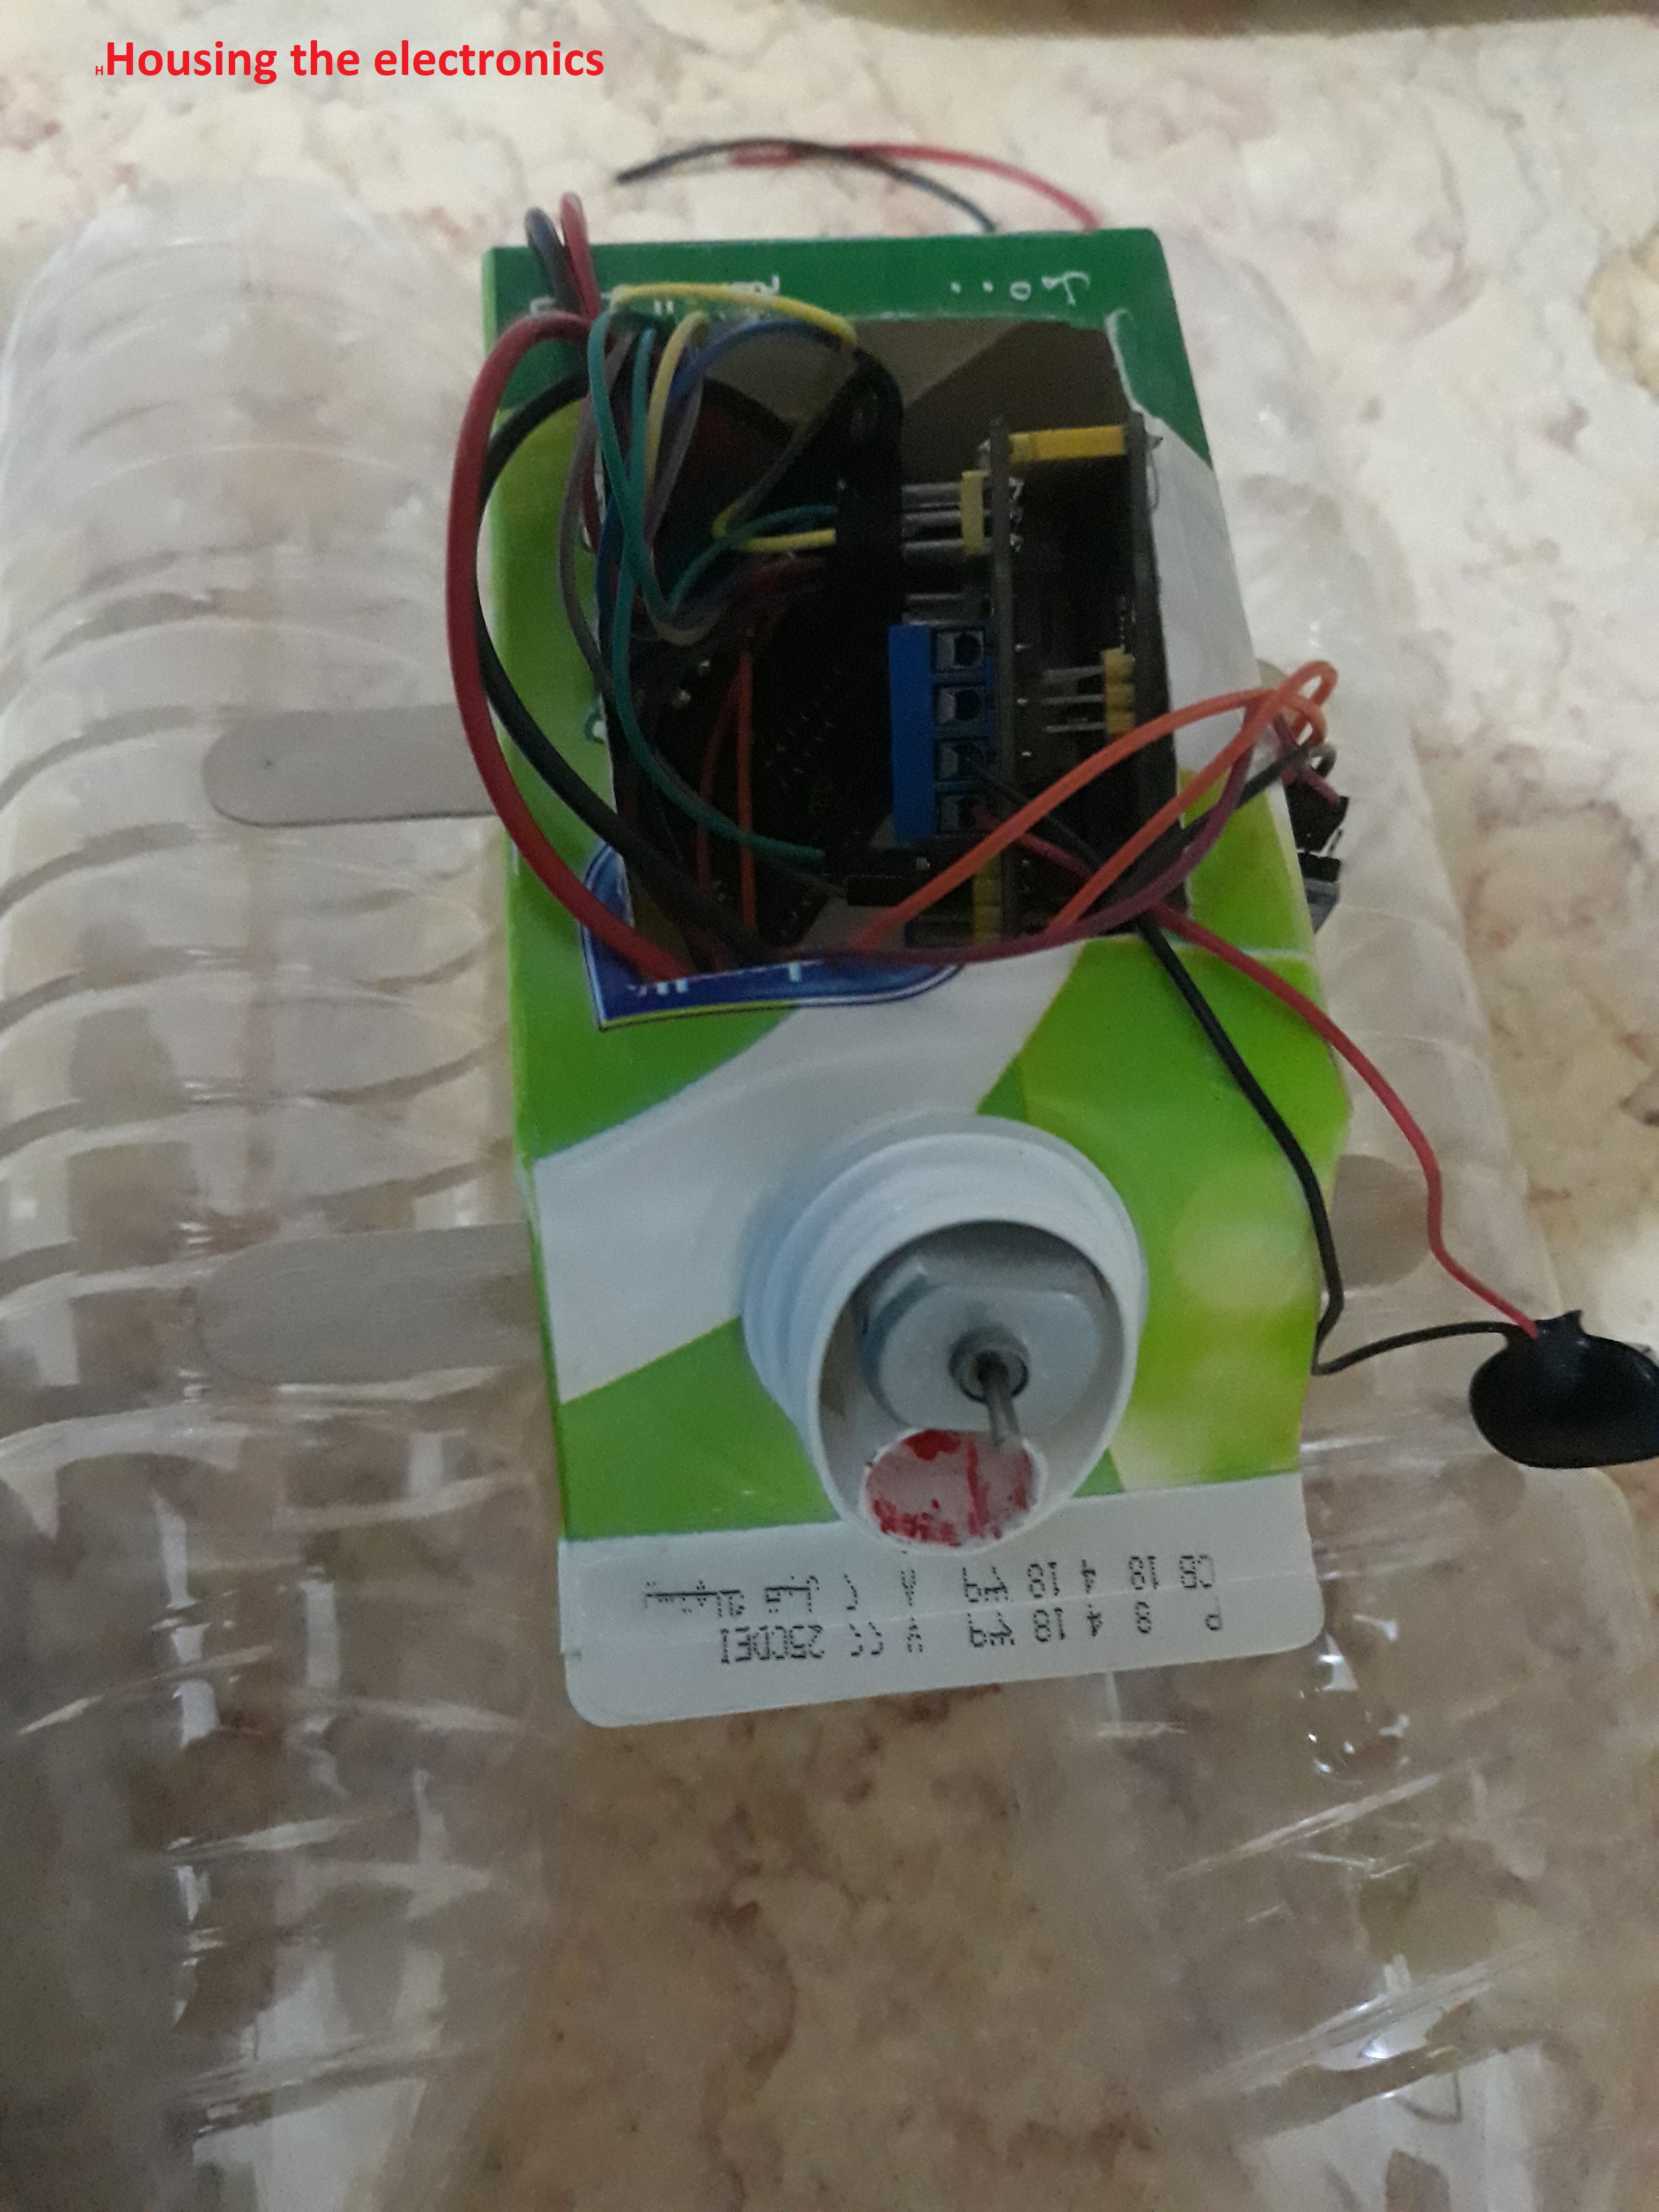
In this figure, all the electronic components (including boards, wires and motors) are inserted into the previously prepared "house" which is the opening on the top of the milk bottle of the frame. Note that the motor is emerging from the round rim of the bottle.
Directional motor and fan
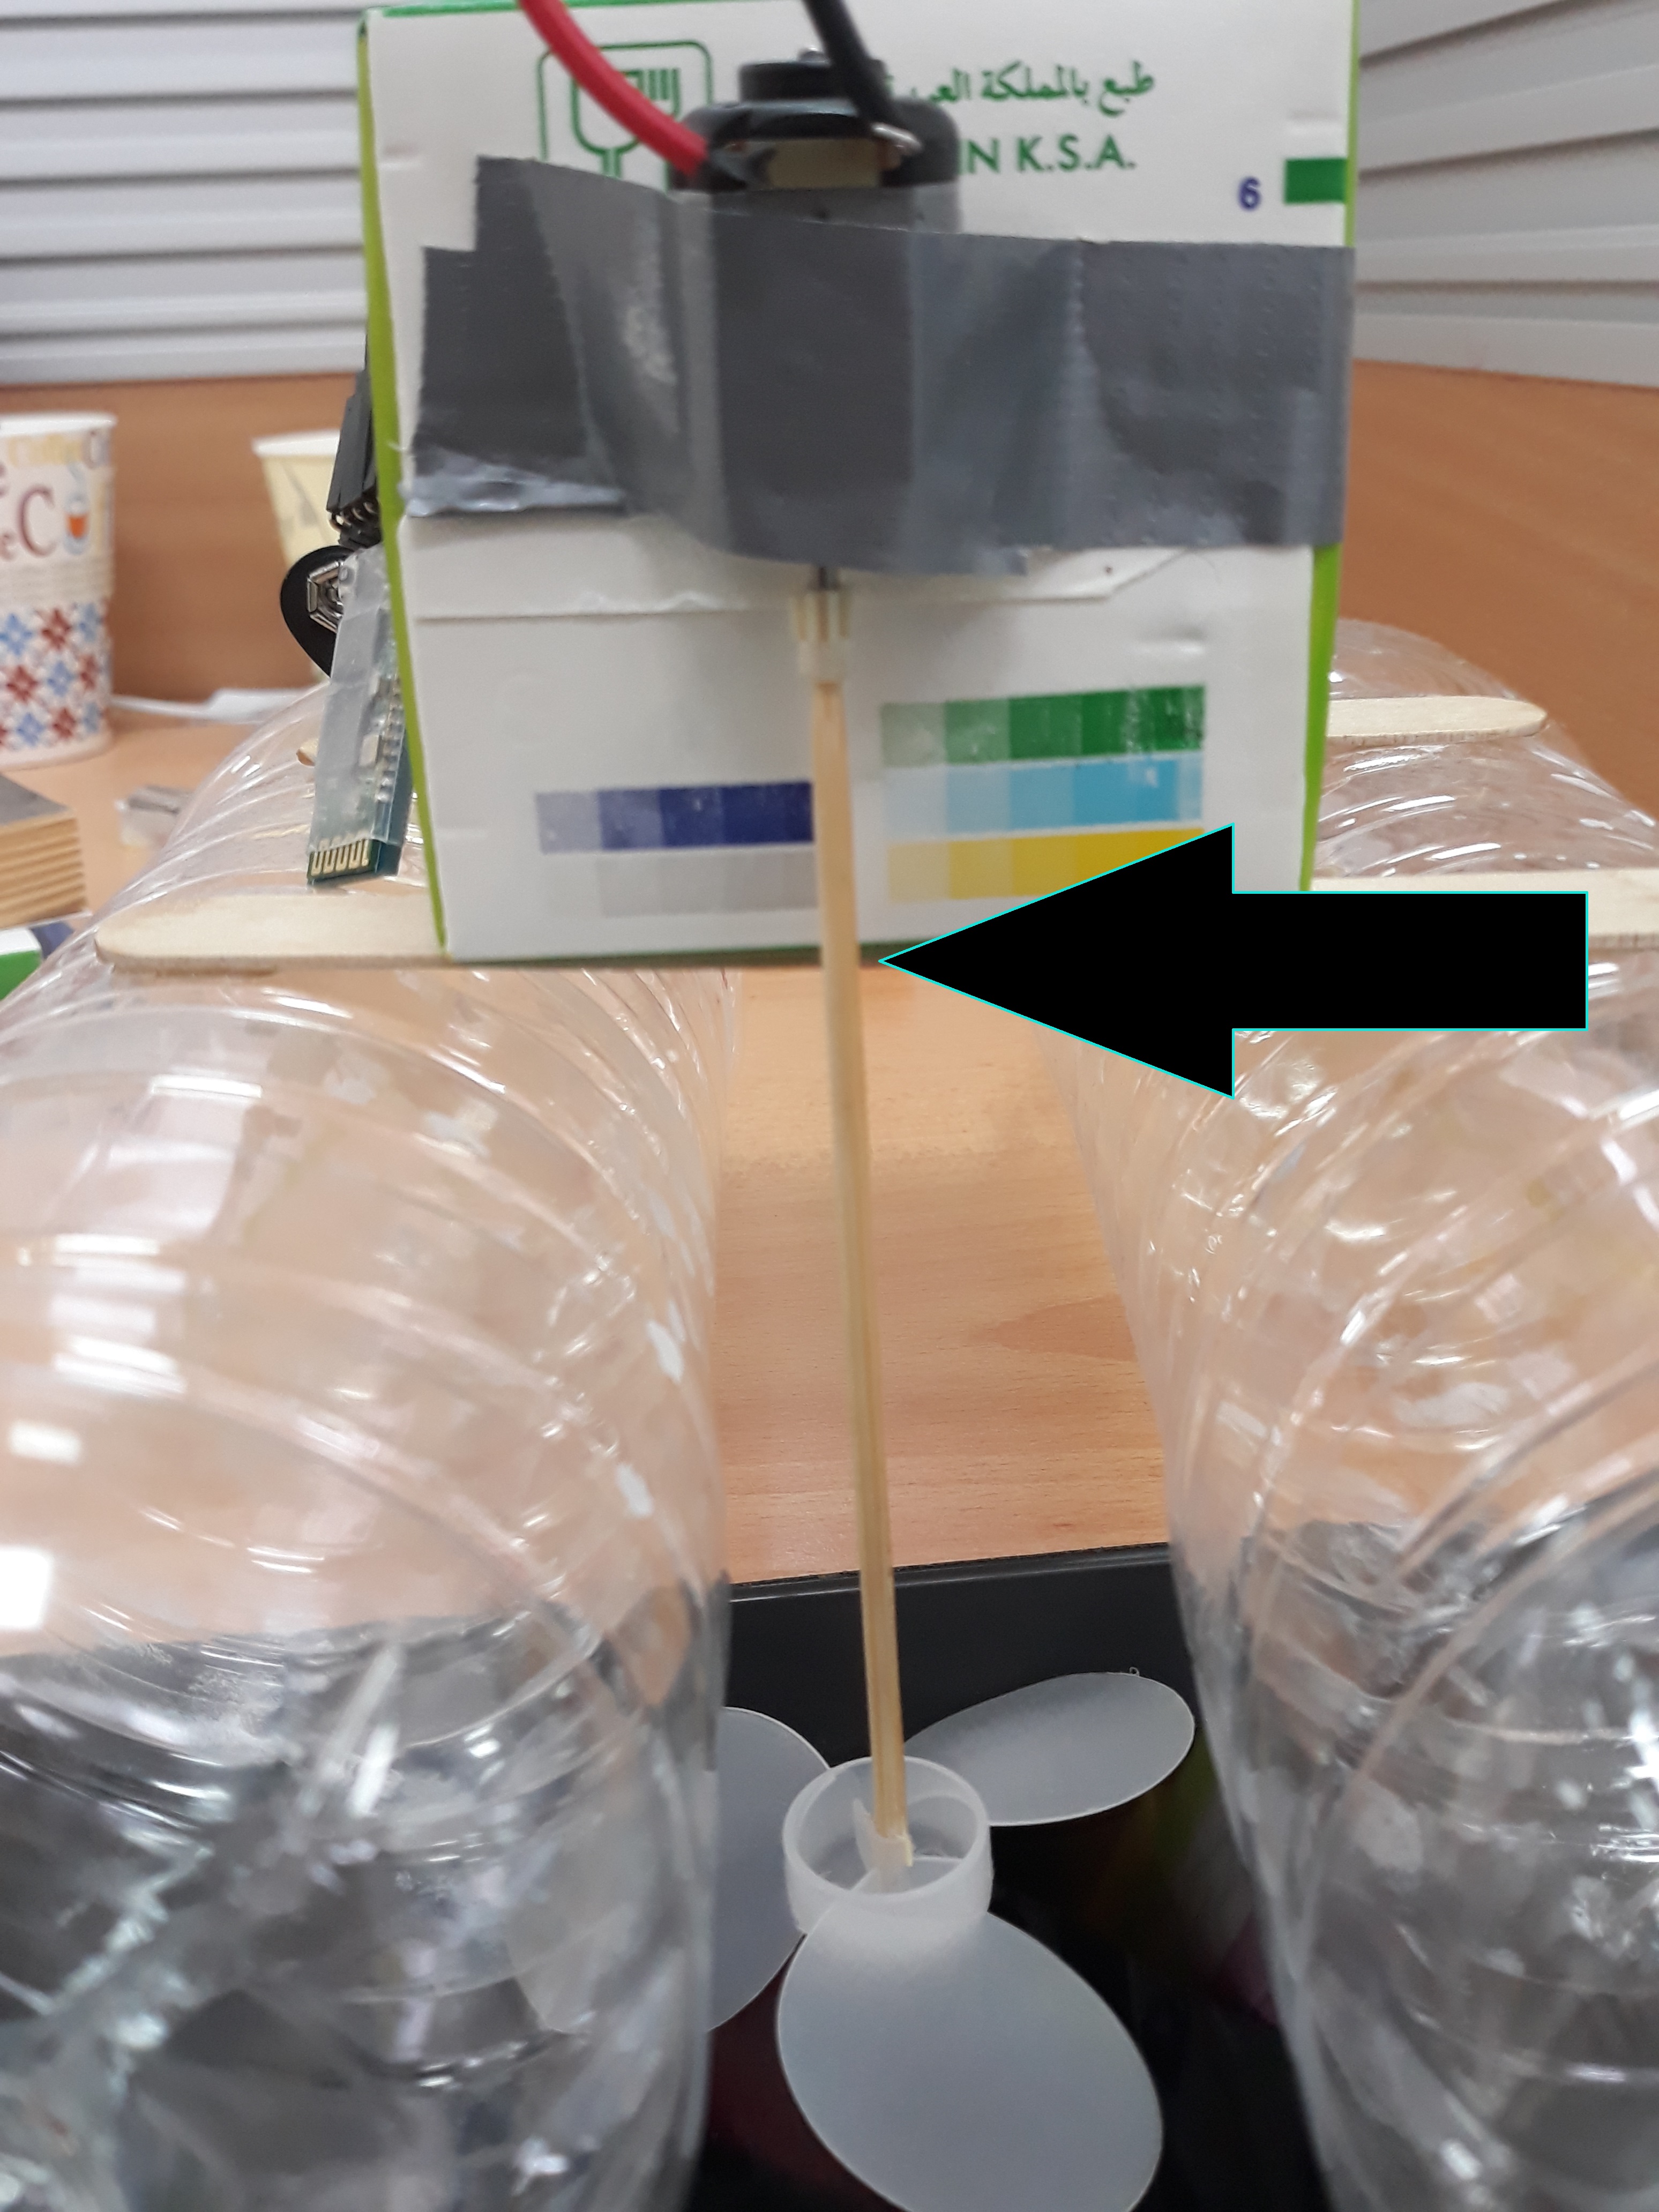
This figure shows how the directional motor (the one in the back of the milk bottle) is attached in its place and a special woody shaft (shown by the black arrow) was designed in order to fit with the white fan. As a result, the white fan (shown at the bottom of the figure) will be able to rotate inside water. This rotation will decide the left-right direction of the robot.
#include <SoftwareSerial.h>
SoftwareSerial BlueTooth(11, 12);    // (TXD, RXD) of HC-06
char BT_input;                    // to store input character received via BT.
int speedpin=3;
int MotorRight1 = 5;
int MotorRight2 = 6;
int speedpin1=8;
int MotorLeft1 = 9;
int MotorLeft2 = 10;

void setup()
{
  BlueTooth.begin(9600);
  Serial.begin(9600);
  pinMode(speedpin,OUTPUT);
  pinMode(MotorRight1, OUTPUT);
  pinMode(MotorRight2, OUTPUT);
  pinMode(MotorLeft1, OUTPUT);
  pinMode(MotorLeft2, OUTPUT);
  pinMode(speedpin1,OUTPUT);
}

void loop()
{
  if (BlueTooth.available())
  {
   BT_input=BlueTooth.read();
    if (BT_input=='U')
  {
    analogWrite(speedpin,100);
   analogWrite(speedpin1,100);
digitalWrite(MotorRight1,HIGH);
digitalWrite(MotorRight2,LOW);
digitalWrite(MotorLeft1,LOW);
digitalWrite(MotorLeft2,LOW);
}
    else if (BT_input=='L')
  {
    analogWrite(speedpin,100);
   analogWrite(speedpin1,100);
digitalWrite(MotorRight1,HIGH);
digitalWrite(MotorRight2,LOW);
digitalWrite(MotorLeft1,LOW);
digitalWrite(MotorLeft2,HIGH);
}


    else if (BT_input=='R')
 {
analogWrite(speedpin,100);
 analogWrite(speedpin1,100);
digitalWrite(MotorRight1,HIGH);
digitalWrite(MotorRight2,LOW);
digitalWrite(MotorLeft1,HIGH);
digitalWrite(MotorLeft2,LOW);
}
  else if (BT_input=='D')
 {
analogWrite(speedpin,100);
 analogWrite(speedpin1,100);
digitalWrite(MotorRight1,LOW);
digitalWrite(MotorRight2,HIGH);
digitalWrite(MotorLeft1,LOW);
digitalWrite(MotorLeft2,LOW);
}


   else if (BT_input=='X')
{
analogWrite(speedpin,100);
analogWrite(speedpin1,100);
digitalWrite(MotorRight1,LOW);
digitalWrite(MotorRight2,LOW);
digitalWrite(MotorLeft1,LOW);
digitalWrite(MotorLeft2,LOW);
}

  }
}




Comments
Please log in or sign up to comment.