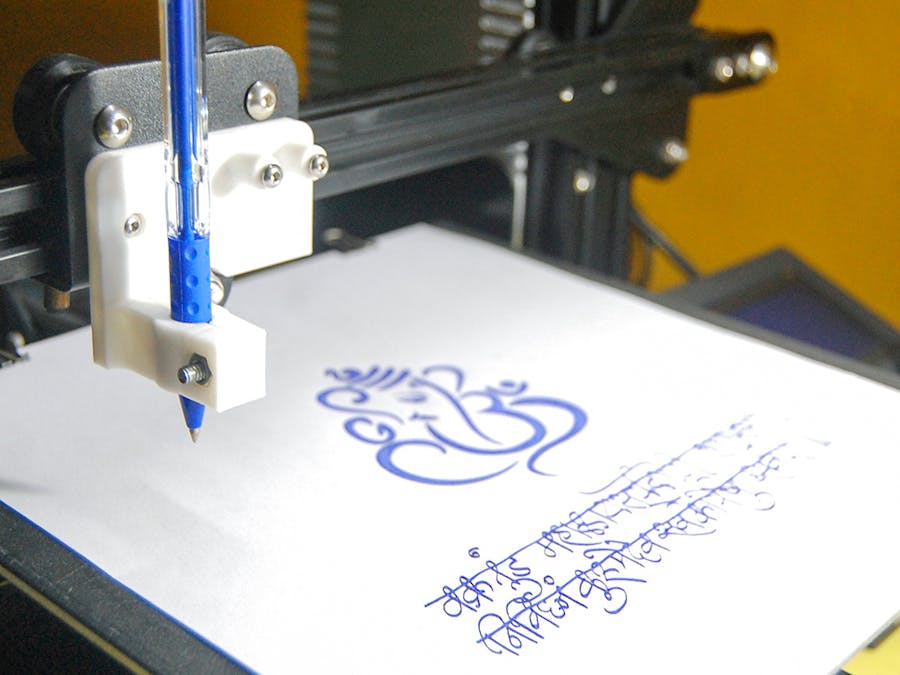
I ran out of 3D filament and there was no way I could buy another due to lockdown. My 3D printer was unused for so many days and eating dust. I had decided to give my 3D printer a quick clean up and so I removed the hot end assembly. At that moment I got an idea of attaching a pen in place of the hot end to make a plotter. I know many people have already done this so I did some searching. I found that most of them used custom firmware for printer along with other software to create the necessary G-code. I decided to try going the usual way the same as that used for printing a 3D object.
Let's get started!
Step 1: Basic Workflow for 3D PrintingThe basic workflow for getting an object 3D printed is:
- CAD software (like Fusion 360) is used to make a 3D model of what you want to print.
- Then the model is exported as an STL file.
- It is then sliced using a slicer software like Cura. As the name suggests, it slices a 3D object into many layers and tells the printer how to move in the X, Y, and Z direction (G-code) to create a layer. Such layers are added on top of each other to create a 3D object.
- The printer runs the G-code and prints the object.
But for our plotter, we will need only one such layer with X and Y coordinates. So we will aim to create an STL file for a single layer 3D object. I will show you two ways by which you can achieve this.
Step 2: 3D Printing and Attaching the Pen HolderBut before going any further we first need to 3D print a pen holder so that we can firmly attach the pen. I found this model by tBenra on Thingiverse.
After you have done printing, turn off the printer and wait till the hot end cools down. Remove the fan mount and the hot end. If it smells like chicken, allow it to cool down a little bit more and try again. Using the same screws attach the pen holder to the printer.
Next, auto-home the printer and lower down the pen in the clamp till the tip touches the bed. You do need an M4 screw and hex nut to tighten the clamp.
Place a piece of paper roughly the size of the bed. Make sure it is tight.
Your plotter is ready to plot. Now, let's make some G-code for it!
Step 3: Preparing STL FileI will be showing you two ways by which you can do this. Choose the method according to your convenience.
Method 1: Designing in CAD
Create a design sketch using CAD software. As an example, I am making a 5cm square with an offset of 5mm.
Now, extrude the sketch by 0.2mm.
Right-click on the body and click on Save as STL.
If you are having two or more non-touching bodies, you cannot save it as a single STL file. In such cases, right-click on the main file which in my case says 'unsaved' and click on Save as STL. In this way, you can save your project as a single STL file.
Method: Using animage file
Suppose you don’t want to design in CAD or you already have your design as an image file. No problem!
Head on to this PNG or JPG to SVG converter.
Select your image file. Set Colours to 1 and click on generate. If it looks good, download the SVG file.
You can either open it in Fusion 360 or use another converter such as this SVG to STL converter.
Select the SVG file which was just downloaded and hit upload.
Set Extrusion Height to 0.2mm and click on Convert.
Download the STL file.
Step 4: Slicer SettingsAfter you have got your STL file, open it in the slicer of your choice. I am using Cura.
Print settings:
Change the nozzle diameter to 0.2mm.
Layer height to 0.2mm. Since our design is 0.2mm thick, this makes it a single layer print.
Wall thickness to 0.2mm.
Wall line count should be 1.
100% infill. (Doesn't matter)
Set Printing and Build Plate Temperature to 0.
Make sure Enable Retraction is checked.
Check Z Hop when Retracted and set Z Hop Height to 0.4mm. This lifts the pen by 0.4mm when moving from one point to another.
Uncheck Enable Print Cooling.
Set Build Plate Adhesion Type to None.
These settings are applicable for both the methods. If you are using the 2nd method, then you probably need to scale the model in the slicer to get the dimensions right. Uncheck Uniform Scaling (so that Z does not change) and adjust X and Y scale.
Hit slice, save the g-code, and run it on the printer.
Step 5: AdjustmentsIf the plotting looks good on the first try, then well done! If not, you might need a few adjustments.
Since the paper does not remain flat after the ink is absorbed, you might see faint marks while the pen moves from one point to another. To solve this, increase the Z Hop Height to a higher number. 1mm should work.
The picture will look off-centered even though it is centered in the slicer. It is because there is an offset in the position of the pen and the nozzle. It is around 40mm. So to compensate for that, you can shift your image by 40mm to the right.
Step 6: Enjoy!Enjoy your creation!
Thank you for sticking to the end. I hope you all love this project and learned something new today. Let me know if you make one for yourself. Subscribe to my YouTube channel for more such projects.


Comments
Please log in or sign up to comment.