/*
  Circus-Switch_light-ESP32.ino

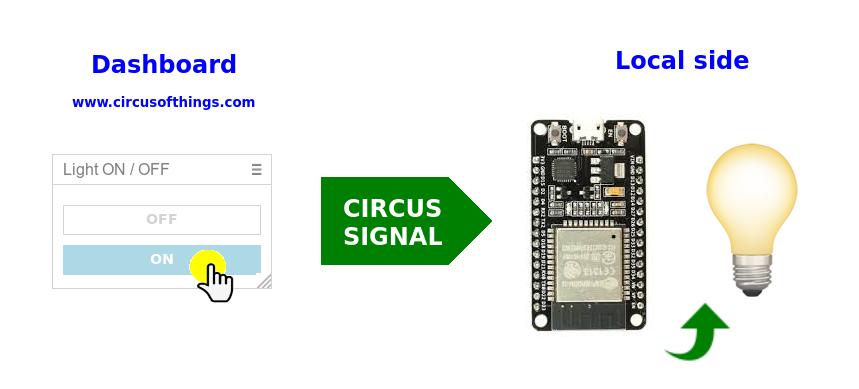
  Switch on/off depending on a Circus Signal.

  Created by Jaume Miralles Isern, June 8, 2019.
*/


#include <CircusESP32Lib.h> // Include all the particular coding for ESP32/Circus, so that you only will use  "read and "write" functions

// ------------------------------------------------
// These are the CircusESP32Lib related declarations
// ------------------------------------------------

char ssid[] = "your_SSID_here"; // Place your wifi SSID here
char password[] =  "your_wifi_password_here"; // Place your wifi password here
char server[] = "www.circusofthings.com";
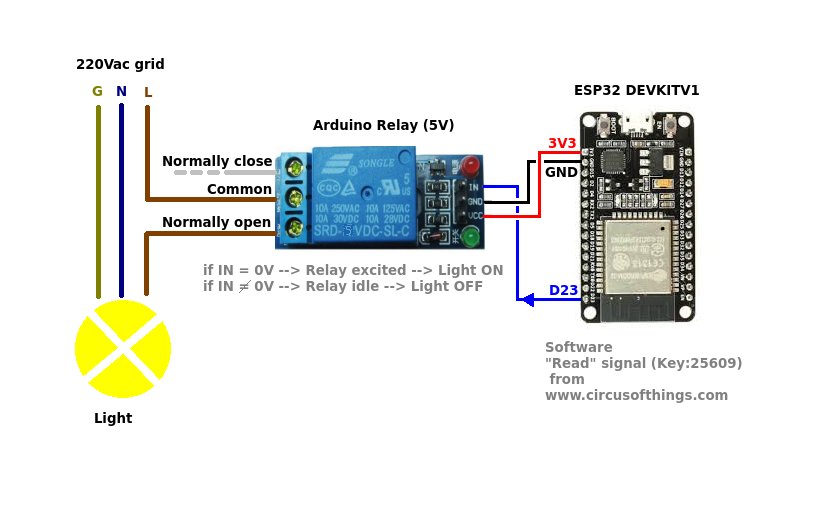
char order_key[] = "25609"; // Type the Key of the Circus Signal you want the ESP32 listen to.
char token[] = "your_circus_token_here"; // Place your token, find it in 'account' at Circus. It will identify you.
CircusESP32Lib circusESP32(server,ssid,password); // The object representing an ESP32 to whom you can order to Write or Read

// ------------------------------------------------
// These are the Switch ON/OFF Example related declarations
// ------------------------------------------------

#define RELAYPIN 23      // digital output of your ESP32 connected to Relay


// ------------------------------------------------

void setup() {
    Serial.begin(115200); // Remember to match this value with the baud rate in your console
    pinMode(RELAYPIN, OUTPUT); // Define our pin for the relay as an output
    circusESP32.begin(); // Let the Circus object set up itself for an SSL/Secure connection
}

void loop() { // Now that all is set up, let's begin with the tasks

    delay(1000);
    // This will read the value of my signal at Circus. I'm supposed to set to 0 or 1.
    double dashboard_order = circusESP32.read(order_key,token);
    // I decided that a signal value of "1" at Circus will set the output as HIGH in ESP32
    // and the normally open terminal of the relay where my light is will be OPEN.
    // So, if Signal=1 then light turns OFF and if Signal=0 then light turns ON
    if(dashboard_order == 1){
        digitalWrite(RELAYPIN, HIGH);  // Open relay contact by setting the voltage HIGH
    } else {
        digitalWrite(RELAYPIN, LOW);  // Close relay contact by setting the voltage LOW
    }

}


Comments