


Not a fan of installing Christmas light every year?
You are not alone in this universe!
Dealing with tangled wires, light strings not working not mentioning installing the light in bitter cold (for those of us who live up north).
To remedy that, this year I decided to do a proof of concept and find a quicker way to put up my Christmas lights...
The IdeaTo use the NeoPixel LED strip with the waterproof silicon sleeve. Then installing a section of a few feet on a tube to support the strip and use some DCDC regulator to be able to use a higher voltage for power ease of power distribution. Design hooks for the gutters and shingles to hold everything in place. Lastly, to control the NeoPixel, use an ESP32 module that can be later programmed to be accessed via WiFi and/or Bluetooth.
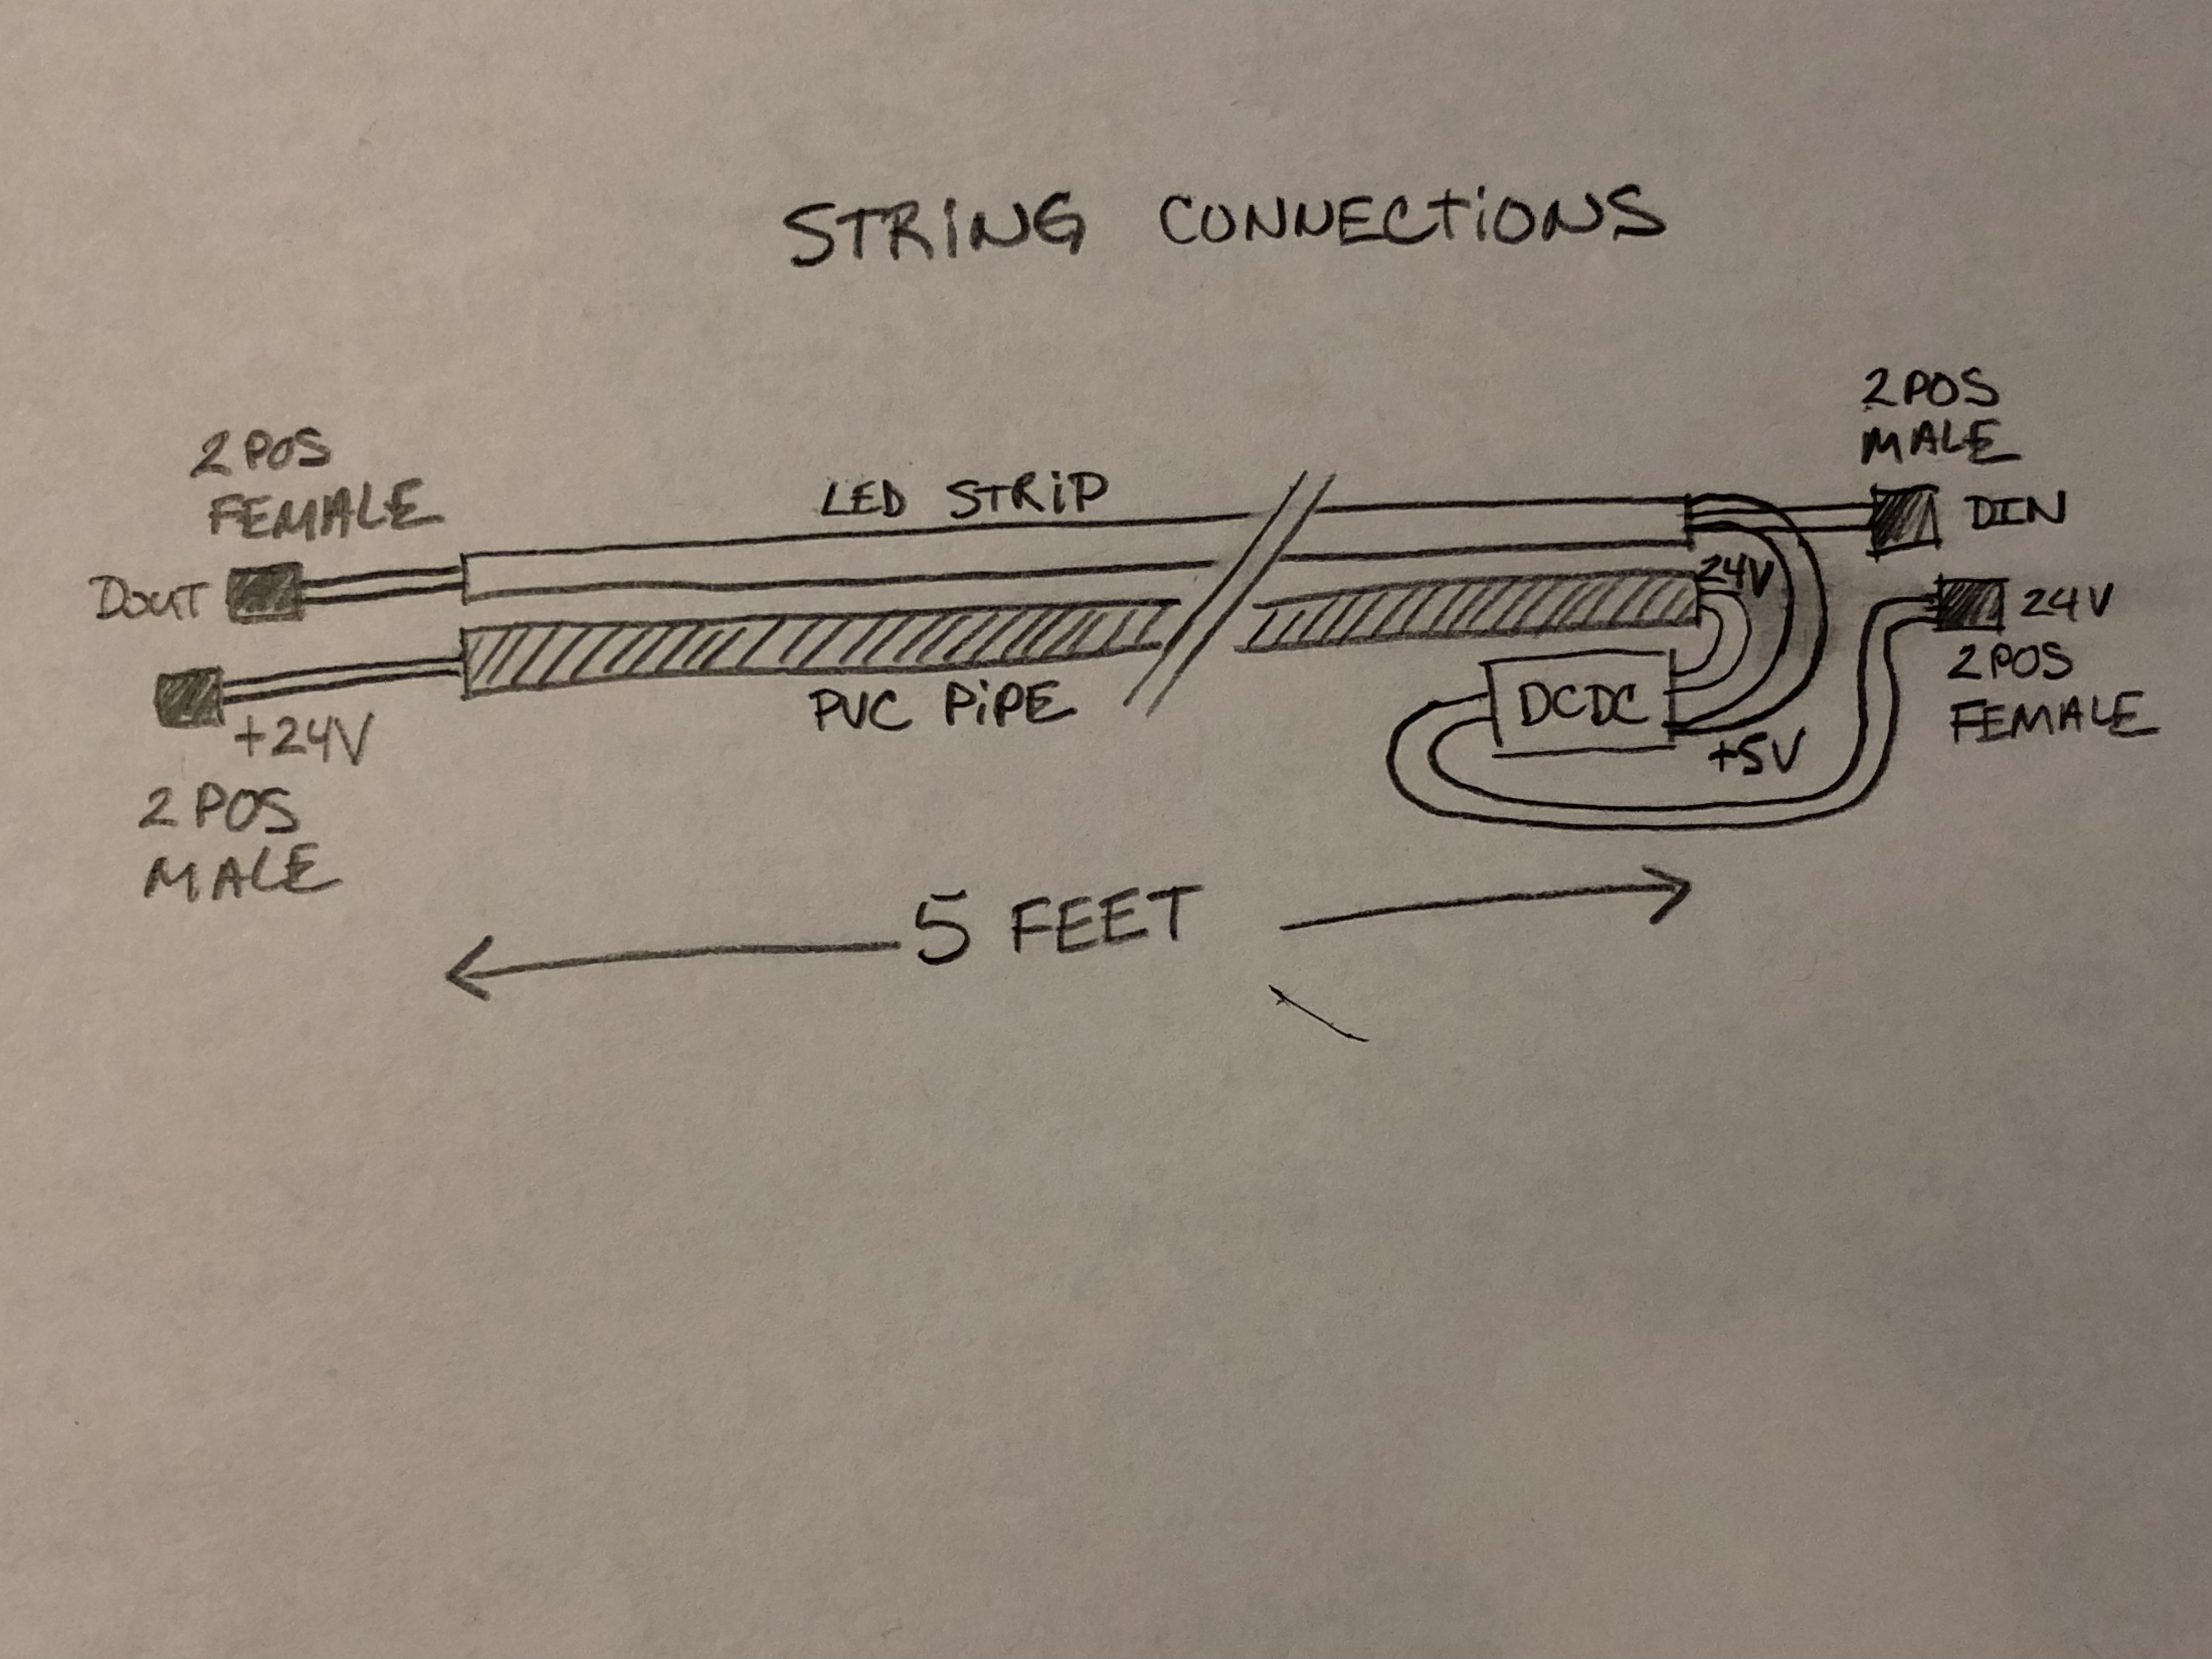
LED Strip SectionI chose to split my LED strip into sections of 5 feet. This decision was directed by the roof line length and the power consumption of the LED strip. I bought some 1/2" PVC pipes by 10 feet long at the local hardware store and that was a good fit creating 2 sections out of one pipe. Also it's a good size for storage during off season.
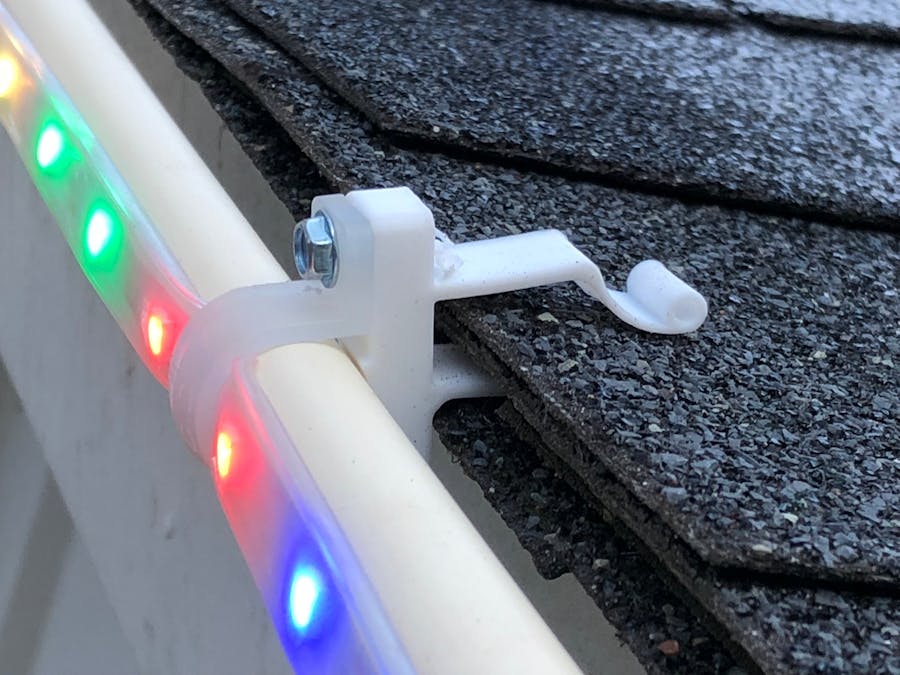
Gutter and Shingle HooksUsing a 3D printer I designed two types of hooks, one for the gutter and one for holding on the edge of my roof shingles.
The hooks then gets installed on a PVC pipe sections. I bought some clear plastic "C" clamps from the hardware store and couple them with the printed hook and secured with 1/2" screws.
The total amount of LED for doing the entire roof line would be close to 300. I believe the max amount of current per LED is around 30mA @300 LED = 9A aprox. I used the LM2596 DCDC buck converter.
This is a lot of current to pass into the LED strip flexible PCB. In order to minimized this and to accommodate the sectional concept, I decided to use a DCDC converter to take 24VDC down to 5VDC. The 24VDC then gets passed down to be used by the next section. Each DCDC is enclosed using an heat shrink tube with each ends stuffed with silicon.
Note: Before shrinking and silicone, make sure to test the operation, it will be hard to do any fix after that.
Next we need to assemble the LED strip on the PVC pipes for each section. The only section that will be different is the first one that contains the ESP32 module.
Make all the necessary connections to the LED strip (5V Power, DIn, DOut, GND). After making the connections, test it!
Each section has 3 hooks. I also added a few tie-wraps to secure the LED even more.
Note: Make sure to seal each ends of the LED strip by applying silicone.
The Only signal need on the ESP32 is GPIO2. This is the Data line of the NeoPixel.
A 3D printed enclosure for the ESP32 module and the DCDC converter was made. One side mounts to the PVC pipe, the other side of the enclosure provide input for the 24VDC, output for the 5V and Data line going to the LED strip.
A nice feature of the ESP32 is that it can be accessed via WiFi or Bluetooth. Right now I do not have any software to allow that. It is programmed to provide one pattern at power up and then it goes dumb... :)
This is a future improvement to add some IoT capability to it!
I wasn't able to get a nice picture showing the colors. On the picture they all blend together. I will see how things goes this year and probably will have to make some improvements to the design. Then next year I will add the second story.


Comments
Please log in or sign up to comment.