


Hardware components | ||||||
| × | 1 | ||||
| × | 1 | ||||
| × | 1 | ||||
| × | 1 | ||||
Software apps and online services | ||||||
 |
| |||||
 |
| |||||
In this tutorial, We will be building an amazing weather station that uses Ubidots IoT services with just couples of lines of Python using Zerynth IDE.
Now, It’s so much easier to benefit from Ubidots analytics and dashboard and control system with Zerynth support library of ubidots platform.
The first question that would pop into your mind is why ubidots platform?Well, First of all it is very easy to integrate your data in their cloud services, With just a couple of lines you have full capability of their enormous data collection, analysis, and visualization tools.
Second, It is a point-and-click dashboard setup, Meaning it’s very simple to have sophisticated dashboard indicators and analytics with just a few clicks of a button.
In addition, It’s free, Setup an educational account and it’s Showtime!
But that’s not all, Here’s the kicker; With Zerynth library support for Ubidots platform, It’s amazingly easy to code in Python/C your preferred microcontroller and be able to benefit from the huge Zerynth features in addition to the IoT services provided by Ubidots.
In this tutorial, We picked ESP32 dev-kit as our device of choice, But you have a wide range of supported devices listed here:https://www.zerynth.com/zerynth-supported-devices/
Hardware Connection:Connect the Vcc of sensor to a 5V source, Gnd of sensor to the GND of the ESP32, Output voltage terminal to pin(A4) as in the Code.
For more info on the Pin-map of the device:
https://docs.zerynth.com/latest/official/board.zerynth.doit_esp32/docs/index.html
There is a step-by-step guideline of the tutorial in this Video:
Step-By-Step Instructions:1 - Zerynth Setup, Connect and Virtualize the device :
If this is your first time using Zerynth studio, Follow this documentation on getting started with Zerynth studio IDE.
2 - Open the examples bar, open the “ubidots Libary” then clone the “Controlled publish period”
3 - Once the project is properly created, copy and paste the sample code provided below into the "main.py" file (replace the existing code).
# Temperature station with Ubidots platform
# Created at 2018
# By:Karim Hamdy -- Karimhamdymoussa@gmail.com
####################################################
import adc                              # import the adc driver
import streams
import json
from wireless import wifi                # choose a wifi chip supporting secure socket
from espressif.esp32net import esp32wifi as wifi_driver
# import ubidots iot module
from ubidots.iot import iot
# import helpers functions to easily device configuration
import helpers
# SET DEVICE CONFIGURATION INSIDE THE FOLLOWING JSON FILE
new_resource('device.conf.json')        # define a callback for period updates
def period_callback(value):
   global publish_period
   print('requested publish period:', int(value))
   publish_period = int(value)
streams.serial()
wifi_driver.auto_init()
print('connecting to wifi...')        # place here your wifi configuration
wifi.link("SSID",wifi.WIFI_WPA2,"PASS")
device_conf = helpers.load_device_conf()
publish_period = 3000
print('connected')                    # create ubidots iot device instance, connect to                                         mqtt broker, set variable update callback and                                         start mqtt reception loop
try:
   device = iot.Device(device_conf['device_label'], device_conf['user_type'], device_conf['api_token'])
   print('connecting to mqtt broker...')
   device.mqtt.connect()
except Exception as e:
   print("ooops, something :(", e)
   while True:
       sleep(1000)
device.on_variable_update(device_conf['device_label'], 'publish_period', period_callback, json=False)
device.mqtt.loop()
while True:
   value = adc.read(A4)                  #Reading the Value of the Analog pin
   mv = ( value*3.1/1024.0)*5000         #Calibration of data to celcuis.
   Temp_Celcuis = mv/100;
   print("Sending to Ubidots account temperature:",Temp_Celcuis," C")
   device.publish({ 'value': Temp_Celcuis }, variable='temperature')
   sleep(publish_period)
4 - Assign your wifi credentials SSID and Pass. in the code.
5 - Assign your Ubidots TOKEN in the “device.config.Json” file in the project folder.
If you don't how to find your Ubidots TOKEN, please reference Ubidots Help Center.
6 - In this sample code the device label is set as "ESP32" and the variable label as "temperature". This means that your request will be sent with these parameters to Ubidots. If you wish to alter this sample code, please do so as needed.
This sample code makes a use of Ubidots library to send contents of one variable that contains the reading of the analog pin(A4) of the ESP32s DevKit.
Note:You have to modify only the Wifi SSID and Password in main.py and the device name and the Tokern in the.JSON file, Other than that it should work fine.
7 - With the code pasted and updated with your credentials you must next verify.
To verify, press the "check-mark" icon which can found below:
8 - Once the script is properly verified, it's time to Uplink the script into the ESP32DevKitC. To uplink the script, press the "up arrow" icon found below:
9 - Once the uplink finishes, you will receive the message "Uplink done" in the terminal log of the Zerynth Studio.
Open the console to debug the status of the request; press the "terminal" icon found below to open the console:
At first, your console will report the connection status. Then you are going to start receiving the status of the connection to Ubidots account.
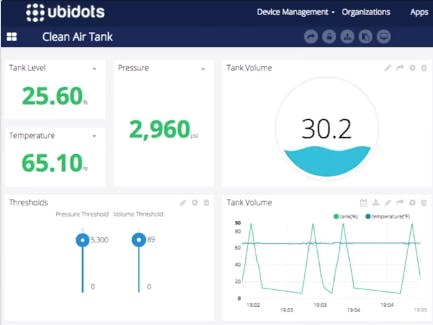
10 - Check the Analytics in your Ubidots account, Sign-in in your educational ubidots account, Then navigate to “Device” tab, then the name of the device.
Bonus: The waiting period in the code is changeable from your ubidots account, You can find the period_callback function that parses the data from ubidots account.
In a nutshell, You can also control your device from ubidots account.Result:
In matter of minutes, You have full capability of Zerynth IDE, Python/C programming and full support of other zerynth features, In addition to the awesome capabilities of Ubidots platform.
Happy Hacking!


Comments
Please log in or sign up to comment.