


Hardware components | ||||||
 |
| × | 1 | |||
 |
| × | 1 | |||
| × | 1 | ||||
| × | 1 | ||||
 |
| × | 1 | |||
| × | 1 | ||||
| × | 1 | ||||
Software apps and online services | ||||||
 |
| |||||
| ||||||
Hand tools and fabrication machines | ||||||
 |
| |||||
When I saw Adafruit's 3D printed BMO I just wanted one, but at the moment I didn't have a gemma board, nor the mini LED 8x8 Matrix (I live in Mexico so these modules are hard to find).
Fortunately Abraham had the MAX7219 module with the 32x32mm LED 8x8 Matrix and some Digispark boards.
I imported Adafruit STL BMO files to TinkerCAD and scaled to fit the Matrix, first time doing 3D modelling lot of tries and errors. BMO was around 40% larger than Adafruit's.
So why not printing in different colors? We used nail polish to paint the buttons as at the moment we didn't have many PLA colors available.
The TinkerCAD project has changed a lot but the STL files are available.
This is a picture of me wearing it for a Maker's Night in GDL. I also bought Pikachu pin that night, that was the very first time I heard the #Badgelife term, but that is a different story.
The best thing of this project is you can use Arduino and the LED Matrix Editor to generate animations.
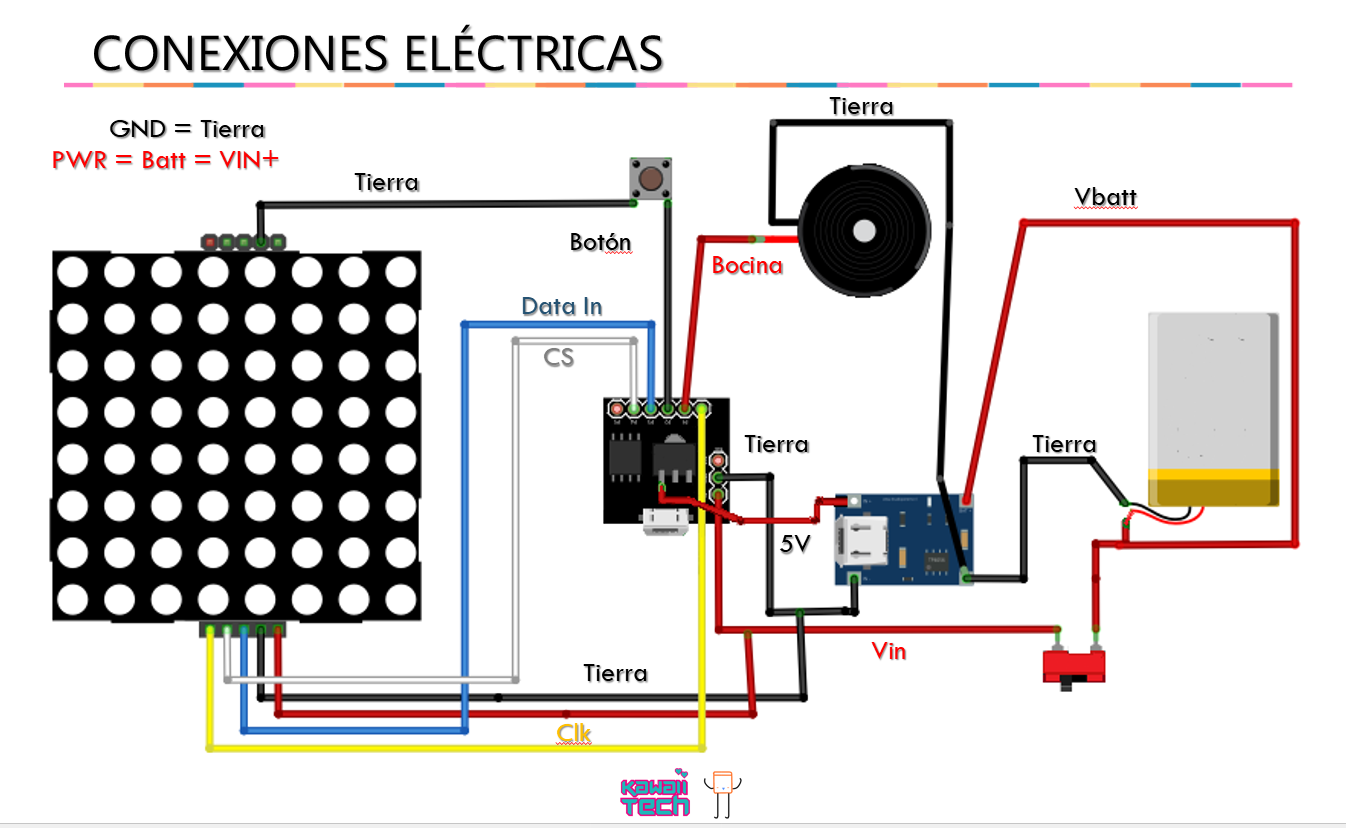
This is the Block Diagram:
Buzzer test with animations.
That wiring was me, but Abraham did an excellent wire optimization to make everything fit in the case.
You don't need the jumper wires but we used this approach so people could easily assemble it.
Hardest part is to snap fit the button, we use PLA so is not flexible.


Comments
Please log in or sign up to comment.