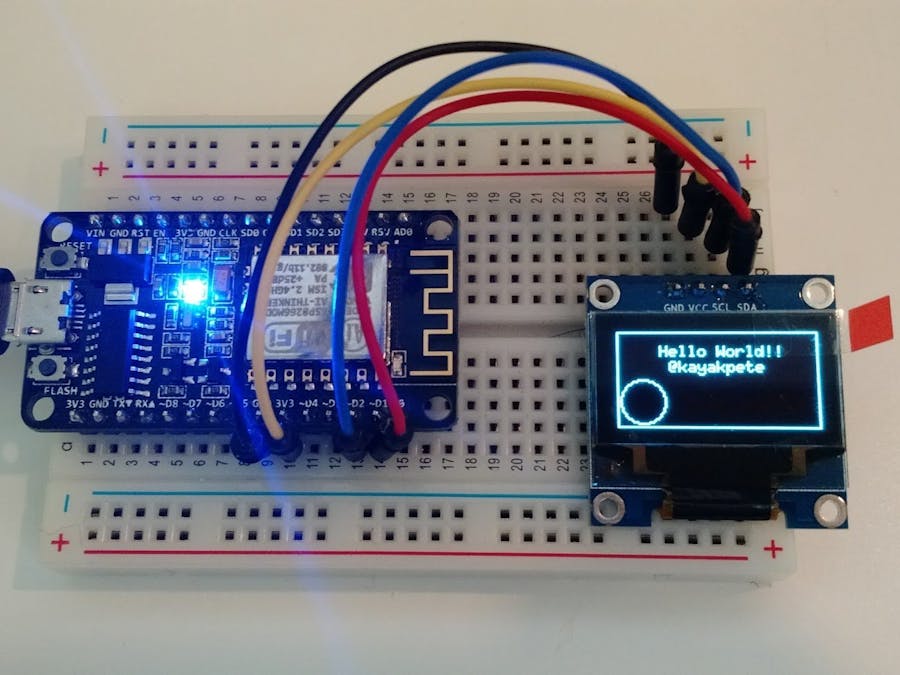
This is a very simple project to test a display connected to an ESP8266.
DetailsRead further to see how you can make a clock out of this project.
Build instructionsGet nodemcu running on your ESP8266, and confirm access via ESPlorer. There's a nice how-to at http://www.esp8266.com/wiki/doku.php?id=loading_firmware
Note that your firmware will need to have the i2c and u8g modules added. You can easily do this at the online NodeMCU firmware builder.
I'm a big fan of this Firmware Flasher, as well.
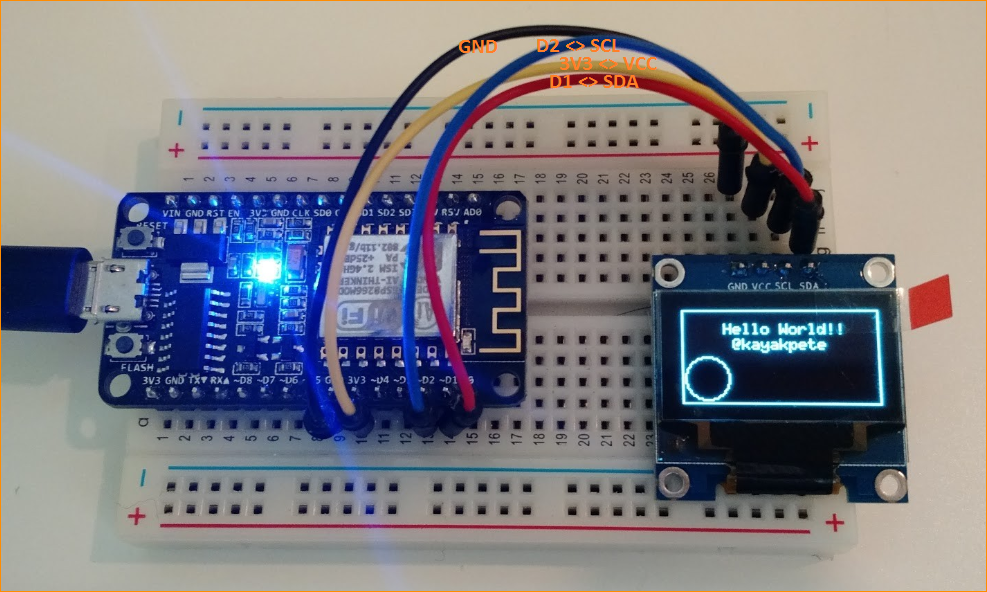
Wire up the display to the ESP-12e:
Connect the following ESP pins to the OLED pins.
ESP <> OLED
GND <> GND
3V3 <> VCC
D1 <> SDA
D2 <> SCL
Load the following code to the ESP and run:
-- OLED Display demo
-- March, 2016
-- @kayakpete | pete@hoffswell.com
-- Hardware:
--   ESP-12E Devkit
--   4 pin I2C OLED 128x64 Display Module
-- Connections:
--   ESP  --  OLED
--   3v3  --  VCC
--   GND  --  GND
--   D1   --  SDA
--   D2   --  SCL
-- Variables
sda = 1 -- SDA Pin
scl = 2 -- SCL Pin
function init_OLED(sda,scl) --Set up the u8glib lib
   sla = 0x3C
   i2c.setup(0, sda, scl, i2c.SLOW)
   disp = u8g.ssd1306_128x64_i2c(sla)
   disp:setFont(u8g.font_6x10)
   disp:setFontRefHeightExtendedText()
   disp:setDefaultForegroundColor()
   disp:setFontPosTop()
   --disp:setRot180()           -- Rotate Display if needed
end
function print_OLED()
 disp:firstPage()
 repeat
   disp:drawFrame(2,2,126,62)
   disp:drawStr(5, 10, str1)
   disp:drawStr(5, 20, str2)
   disp:drawCircle(18, 47, 14)
 until disp:nextPage() == false
end
-- Main Program
str1="    Hello World!!"
str2="     @kayakpete"
init_OLED(sda,scl)
print_OLED()
Nicely Done!
See the files section for code you can use to create a clock out of this project.


Comments
Please log in or sign up to comment.