


Hardware components | ||||||
_ztBMuBhMHo.jpg?auto=compress%2Cformat&w=48&h=48&fit=fill&bg=ffffff) |
| × | 1 | |||
 |
| × | 1 | |||
 |
| × | 1 | |||
 |
| × | 1 | |||
 |
| × | 5 | |||
Software apps and online services | ||||||
 |
| |||||
This project is all about the led brightness control by using a potentiometer. Basically I am going to discuss how we can fade in and fade out a led using POT.
Required Hardware- Arduino UNO (1)
- Mini Breadboard (1)
- 5mm LED (1)
- 10kOhm Potentiometer (1)
- Jumper Wire - Male to male (5)
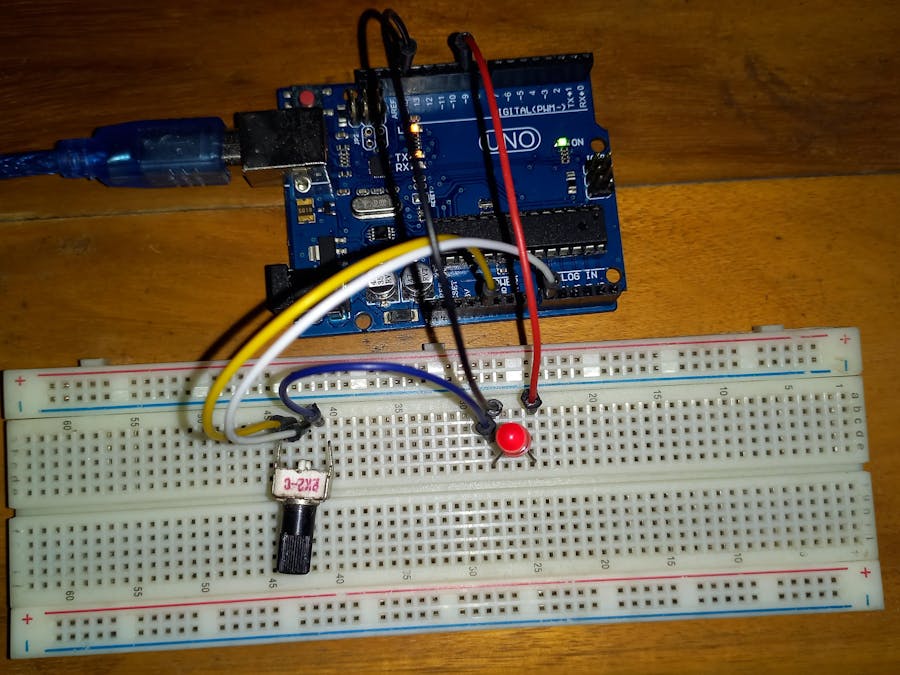
In this project we will change the brightness of a LED light using Potentiometer. The task is so simple. LED and potentiometer will attach to the Arduino baord. Potentiometer will be connected with the Analog pin A0. When we rotate the knob of potentiometer, it will change the value of the resistance. So, we know that when the value of resistance is high the LED will give us the low brightness. On the contrary when the value of resistance is low the LED will lit up with high brightness. When we rotate the knob in the anti-clockwise direction the value of resistance will be decreased and the LED will lit up according to the value of resistance. Then when we rotate the knob in the clockwise direction the LED will be dark because of increasing the value of resistance.
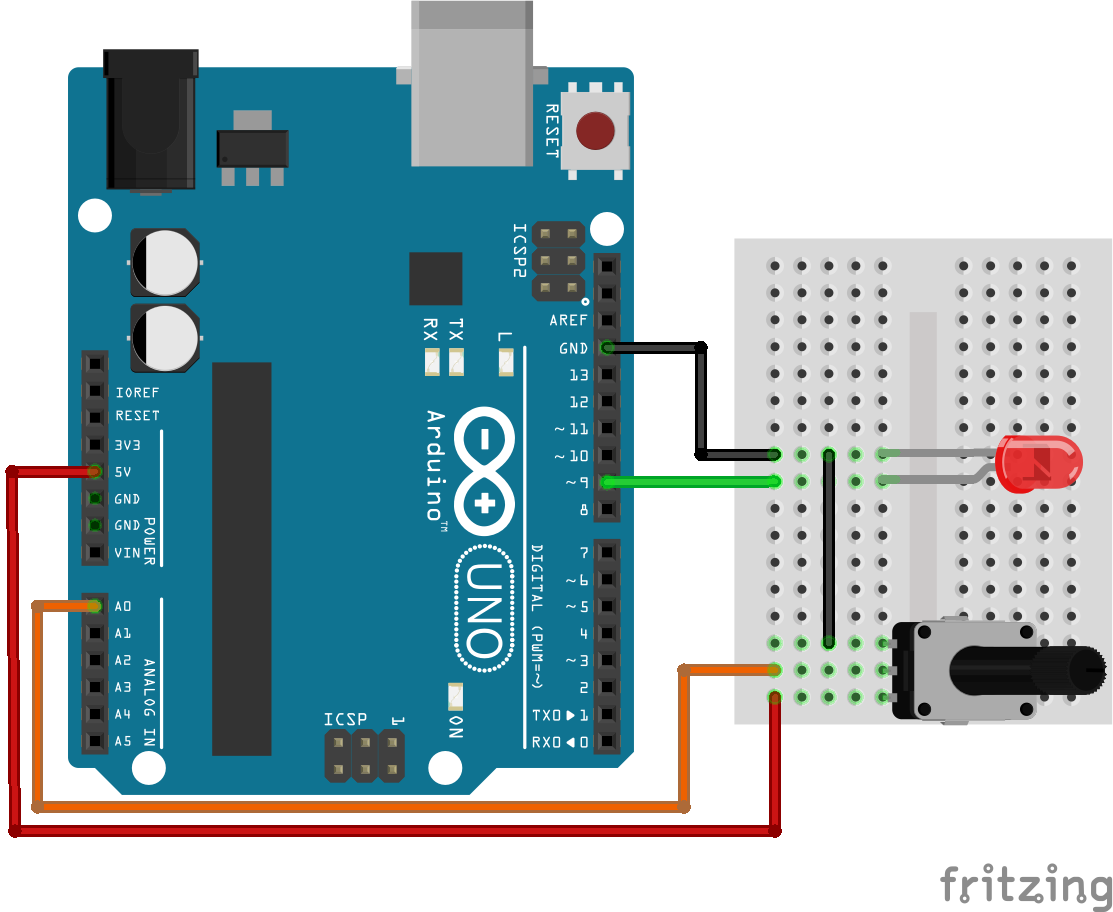
Circuit AnalysisArduino ---------------------------- POT
+5V ------------------------- Positive Terminal
GND -------------------------- Negative Terminal
Analog Pin A0 ------------ Output Pin
LED Anode Pin to the Arduino Digital Pin 9 and LED's Cathode Pin to the GND pin of Arduino.
Potentiometer in our projectPotentiometer is a resistance whose resistance can be changed at the turn of a knob or sliding a knob. In this project we have used a 10Kohm potentiometer. That means this POT value will be varied between 1KOhm to 10Kohm. We can change its value from 0.1kohm to 10kohm by rotating the knob. When we decrease the value of resistance the LED will be fade in and on the contrary when we increase the value of resistance the LED will be faded out in our project.
ProcedureStep-1
Build the circuit from the Schematic section.
Step-2
Open the Arduino IDE in your PC/Laptop and plug the Arduino with your PC/Laptop with USB cable.
Step-3
Write down the code that is provided by the Code section. Then check the board and Port setting from the Arduino IDE.
Step-4
Now upload the code in the Arduino. You are all set to test the project.
Demonstration VideoLinksGithub Link:https://github.com/KAST-Tech/arduino-basics-projects/tree/main/Project-%235
Tinkercad Project Link:https://www.tinkercad.com/things/0oDg1iKjL1o


Comments
Please log in or sign up to comment.