


Hardware components | ||||||
_ztBMuBhMHo.jpg?auto=compress%2Cformat&w=48&h=48&fit=fill&bg=ffffff) |
| × | 1 | |||
 |
| × | 1 | |||
 |
| × | 1 | |||
 |
| × | 1 | |||
 |
| × | 2 | |||
 |
| × | 10 | |||
Software apps and online services | ||||||
 |
| |||||
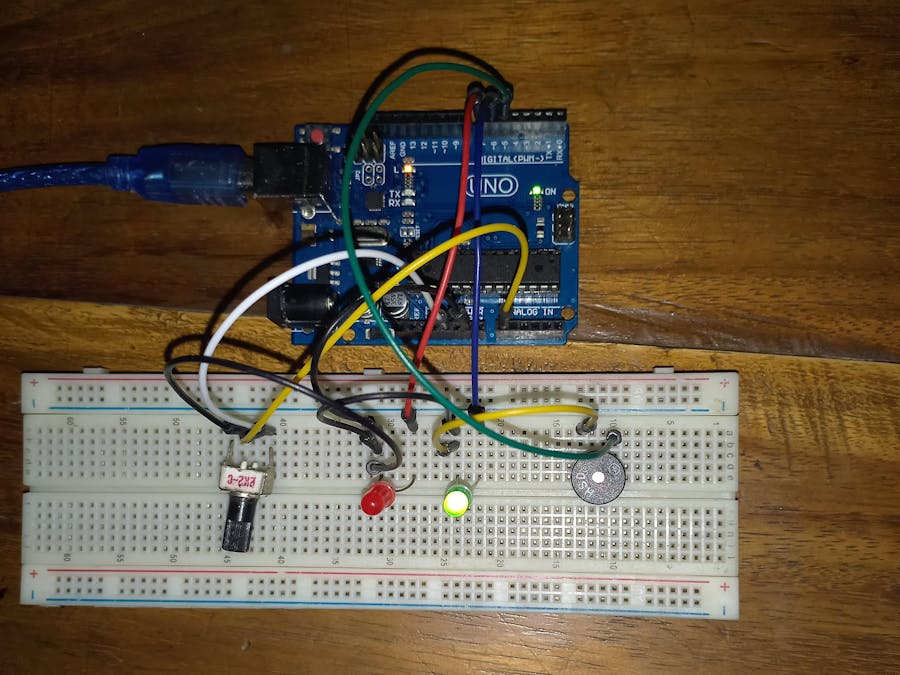
In this project I am going to demonstrate how we can control 2 LED lights & one buzzer using potentiometer. This is a very basic project on Arduino UNO. This project will help us to integrate 2 or more components with Arduino.
Required Components- Arduino UNO
- Breadboard
- 5mm LED light (2)
- Potentiometer (10kOhm)
- Buzzer
- Jumper Wire (Male to Male)
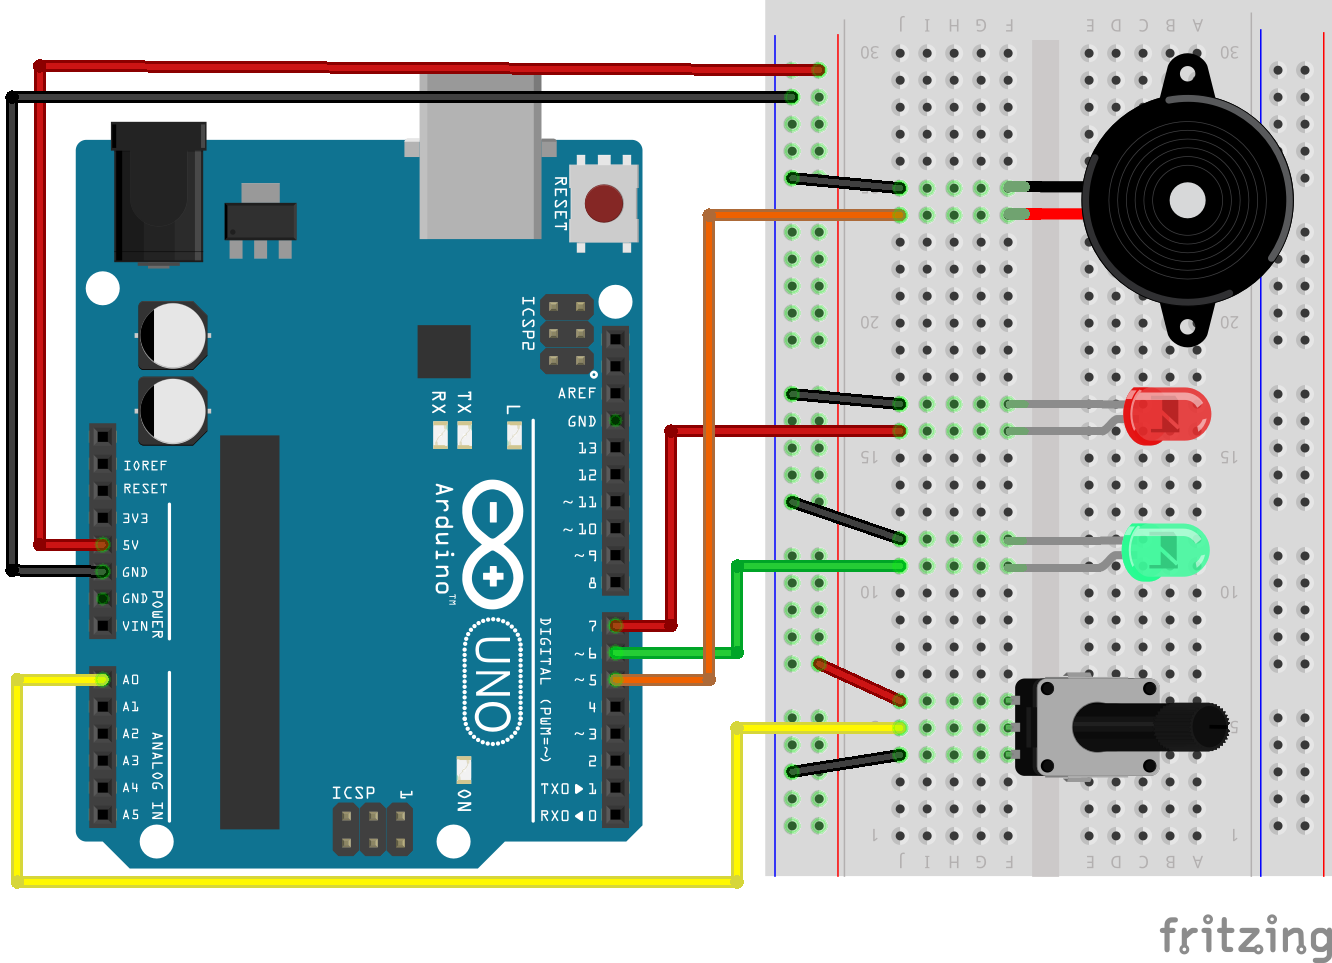
1. Arduino Digital Pin 5 to Buzzer Positive Point
2. Arduino Digital Pin 6 to Green LED Anode
3. Arduino Digital Pin 7 to Red LED Anode
4. Arduino Analog Pin A0 to Potentiometer Signal Pin
5. Arduino +5V to Potentiometer Positive Pin
6. Arduino GND Pin to Red & Green LED Anode Pin
7. Arduino GND Pin to Buzzer & Potentiometer Negative Point
Working PrincipleWe know that the potentiometer works as variable resistance. That means when we rotate the knob of the potentiometer it changes its resistance. When we rotate the potentiometer in clockwise direction it will increase its resistance. On the other hand when we rotate the potentiometer in the anti-clockwise it decreases its resistance. We will use this mechanism in this project. When we rotate the knob of potentiometer in anti-clockwise it will light up the Green LED. That means it will reminds us that the value of resistance is LOW that is why the current will pass through the Green LED very effectively. But for this project we set a threshold value for the resistance. If the potentiometer crosses the threshold value RED LED and Buzzer will be activated. It reminds us the value of resistance is HIGH now. If we want to stop the Red LED and Buzzer, we need to decrease the value of resistance by rotating the knob of the potentiometer and after decreasing the resistance value under the threshold value the green LED will automatically lit up.
ProcedureStep-1
First build up the circuit according to the Schematic section. In the schematic section you will find the circuit diagram of this project.
Step-2
After that plug in the Arduino with your PC/Laptop with the data cable.
Step-3
Then Open the Arduino IDE in from your PC/Laptop. Please ensure the Board and Port setting from the Arduino IDE.
Step-4
Write down the code from the code section or you can copy & paste the code from code section. After writing the code upload the code to your Arduino.
Step-5
Finally test the project that actually works or not by rotating the knob of the potentiometer.
Demonstration VideoLinksGithub Project link: https://github.com/KAST-Tech/arduino-basics-projects/tree/main/Project-%237
Tinkercad Project Link: https://www.tinkercad.com/things/hoBPtkwAoOw


Comments
Please log in or sign up to comment.