Introduction:
The Automatic room lighting system uses the Bolt WiFi module to control the sensor and the lights in harmony. Every 10 seconds, the sensor reads the brightness of the room and relays this data to the WiFi module. This module decides whether or not the light should be turned on or off. If the state of the light is already what it should be, no change occurs. If the state of the light is to be changed, it changes and a message is sent to the user alerting them of the said change. If you want to change turn off/on the light against the program's flow of control, the module can be controlled by the Home Assistant(Amazon Alexa or Google Home).
This Automatic Room Lighting System Has 4 steps:
Step 1: Hardware Connections
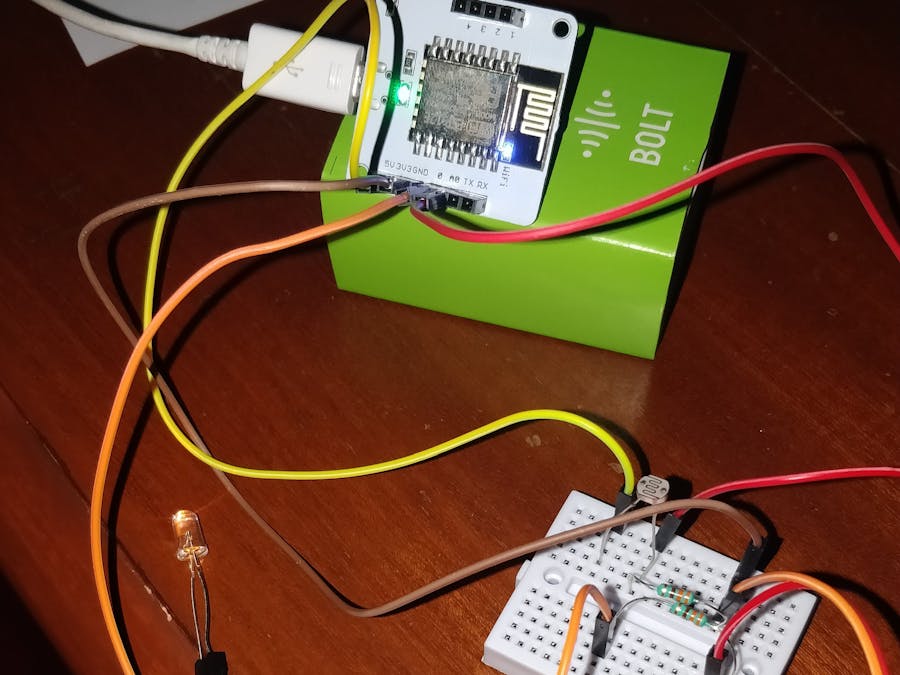
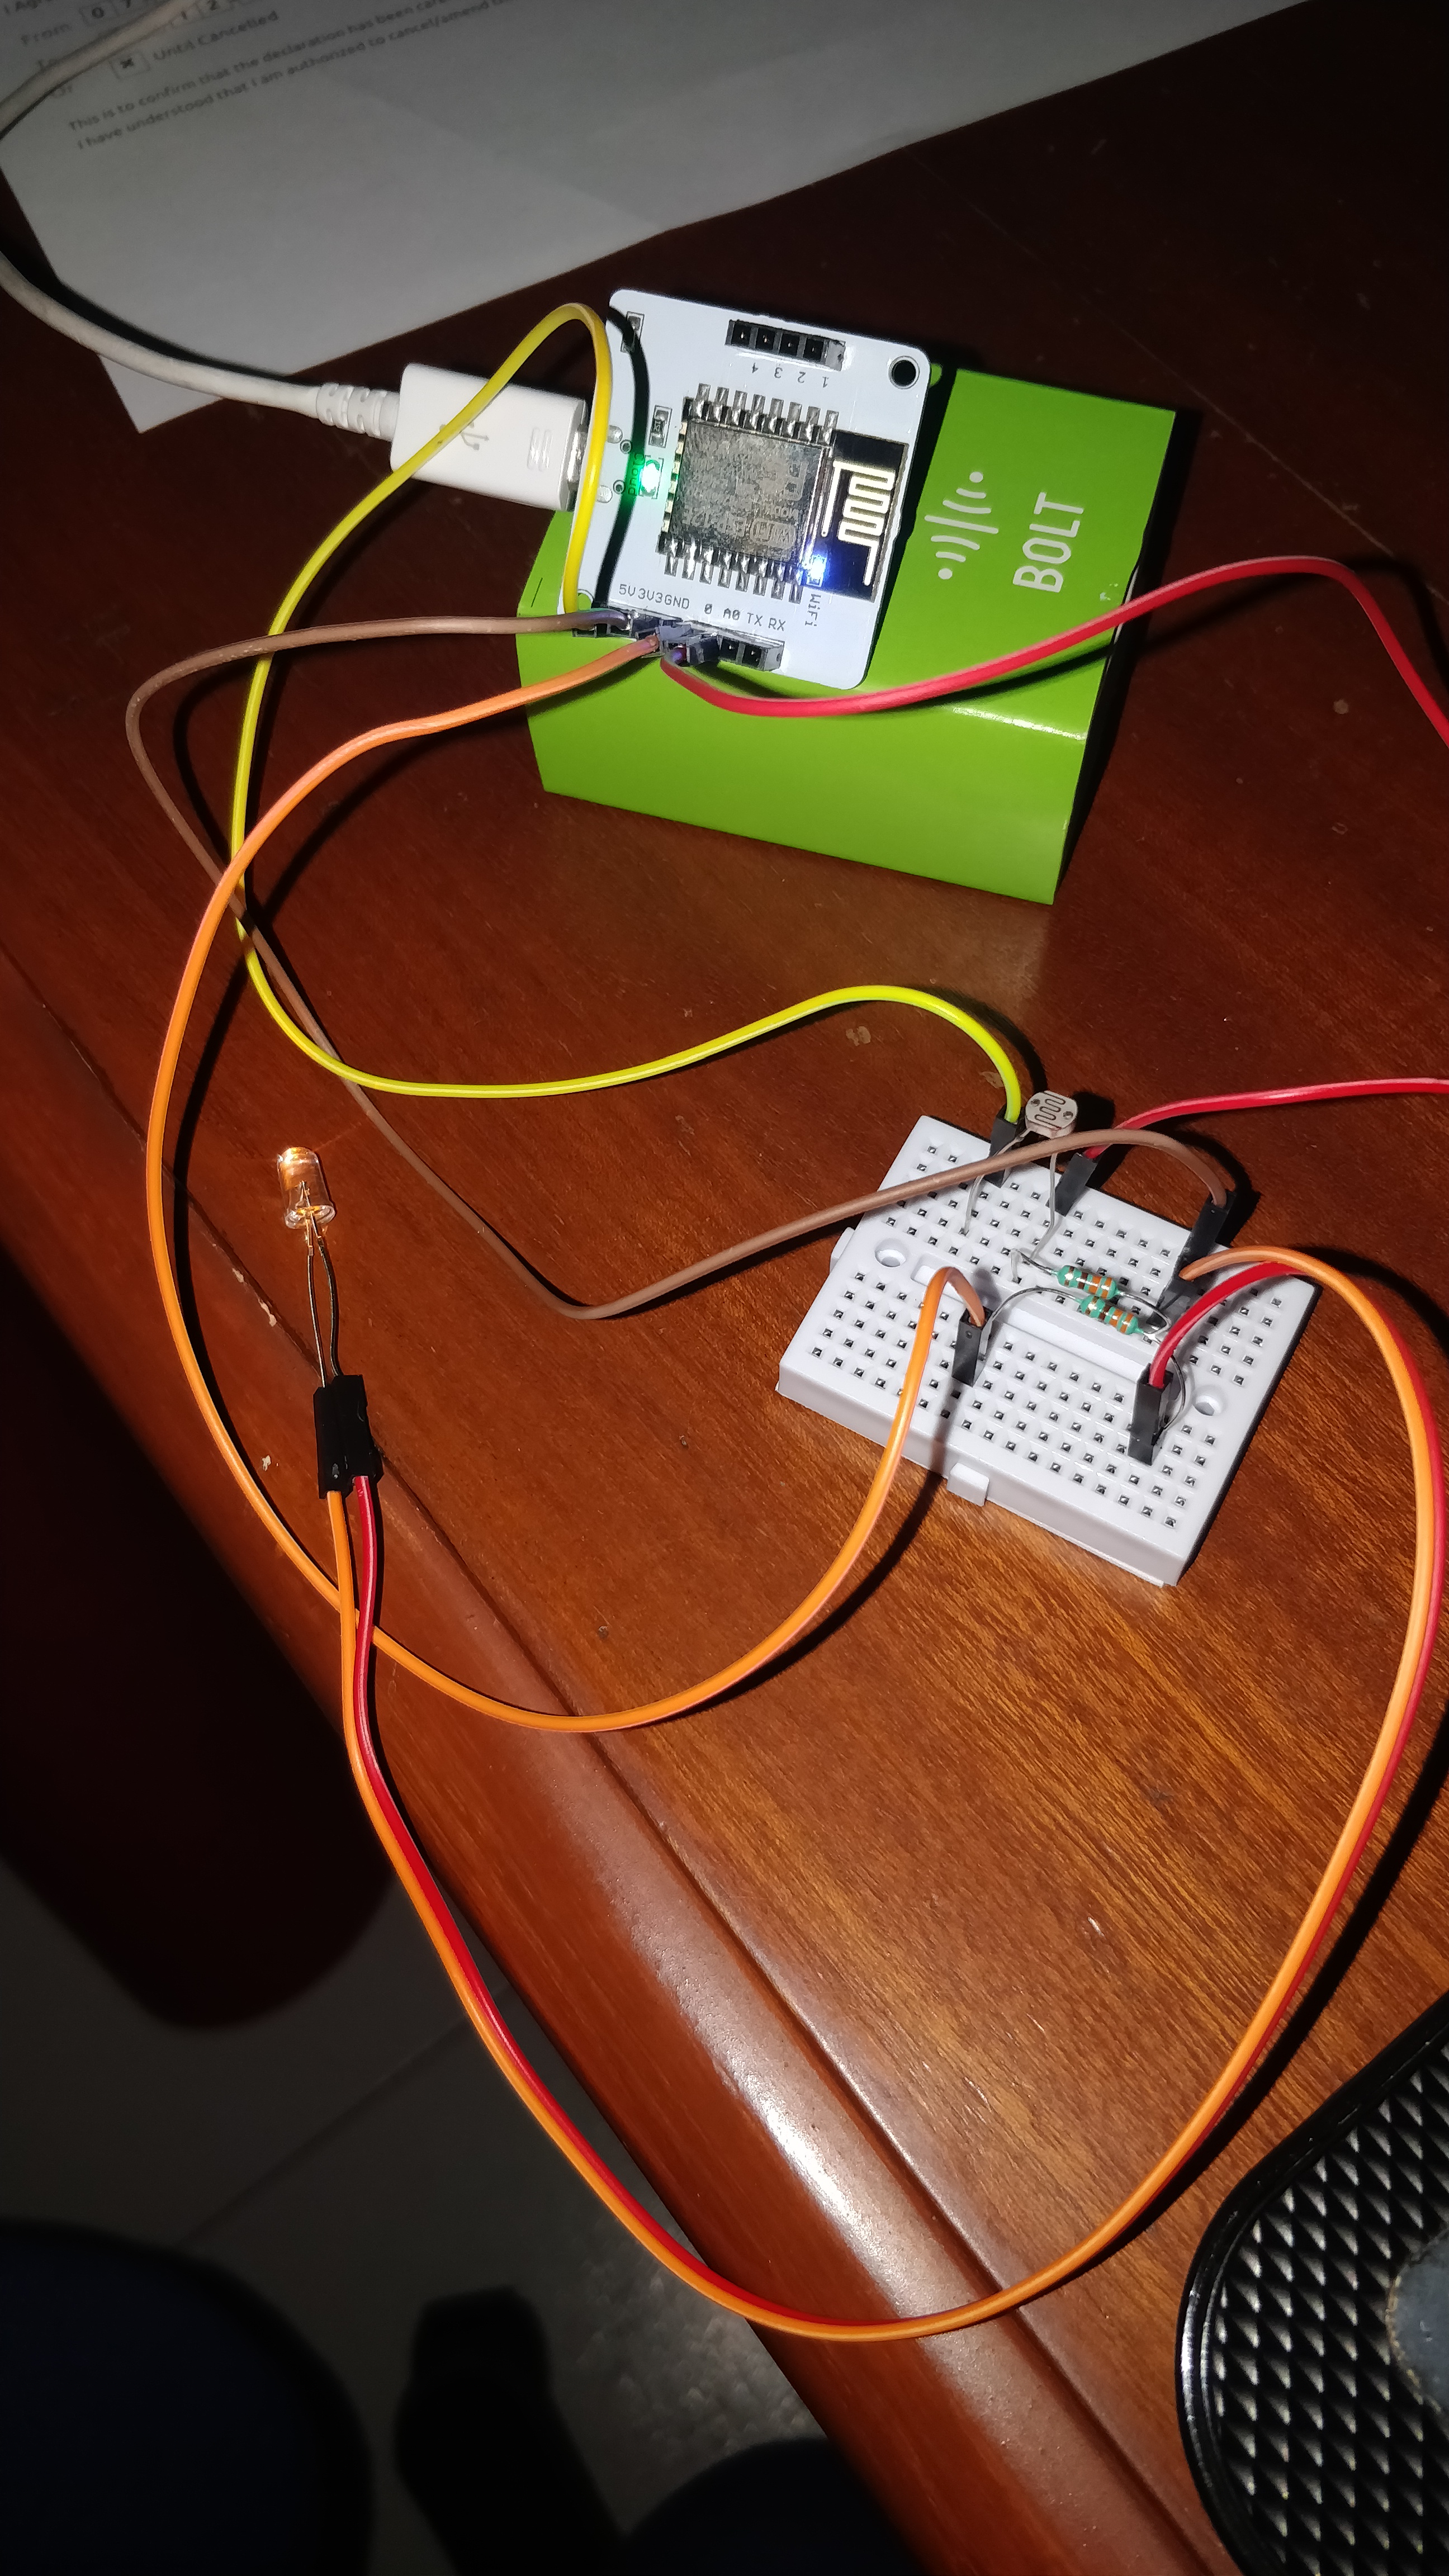
First arrange the resistors and the LDR on the bread board such that one of the resistors and the LDR are in series and the other resistor is separate from this setup, and connect two jumper wires to the two prongs of the LED.
Then connect jumper wires individually to the GND, 3V3, PIN 0 and A0 of the Bolt Wi-Fi Module.
Then attach the jumper wire of the GND pin to the free end of the resistor in series with the LDR on the bread board, The A0 wire to the intermediate LDR and resistor connection on the bread board and the 3V3 wire to the free end of the LDR on the bread board. Then connect the positive terminal of the LED to the one end of the seperate resistor and the negative terminal of the LED in series to the GND of the Bolt module on the bread board. Connect PIN 0 wire to the other end of the separate resistor.
Connect the Bolt module to a USB Power Source and you're good to go!
Step 2: Configuration File
First log into your Bolt cloud account and get the required API key and Device ID of your Bolt Wi-Fi Module.
Then Create an account with a Third Party SMS Provider. In this case we use Twilio.
Twilio is a third-party SMS functionality provider. It is a cloud communications platform as a service (PaaS) company. Twilio allows software developers to programmatically make and receive phone calls and also send and receive text messages using its web service APIs.
Please note that SMS delivery via a trial Twilio account is not guaranteed to be instant by Twilio. Also, note that SMS will not be sent to numbers which have DND(Do Not Disturb) turned ON.
Creating an account on Twilio.
Step 1: Open https://www.twilio.com/ in browser.
Step 2: Click on Get a Free API Key button to sign up.
Step 3: Fill all the necessary details in SIGN UP form. Below is the screenshot of filled sign up form.
Step 4: To verify they will ask for your phone number. Choose India as an option in the drop down and then enter your phone number.
Step 5: Click on "Products" as shown on the screen below,
Step 6: Now enable the SMS services by clicking on two check boxes for Programmable SMS and Phone Numbers as shown below.
Once you have done this, scroll to the bottom of the screen and click on "Continue".
Step 7: Now, you will need to give a name for your project. I have given the name as My Project. Click on "Continue" once you have entered the project name.
Step 8: Click on "Skip this step" when it asks you to Invite a Teammate.
Step 9: Your project should be created at this point. Click on "Project Info" to view the account credentials which is required for your projects.
Step 10: You can view the Account SID and Auth token on this page. The Auth token is not visible by default, you can click on "view" button to make the Auth token visible as shown below. Copy both and save them somewhere securely.
Step 11: From the drop-down menu, choose "Programmable SMS". Now click on Get Started button to generate phone number.
Step 12: Click on Get a number button.
Step 13: Then a popup will appear. Click on Choose this number button.
Step 14: Then a popup will appear which will have the final number. Copy this number and save to notepad for future references.
That's it. You have successfully created the account on Twilio. In the next lesson, we will use Bolt Python library to create our own SMS Alert system.
Create a file named conf.py which will store all the credentials related to Twilio. Write below code to save all the credentials in a single file.
SID is the SSID available on the Twilio dashboard. AUTH_TOKEN is also available on the Twilio dashboard.
FOM_NUMBER is the number given to you by Twilio. TO_NUMBER is the number to send the message to.
Note: You have to replace all the above value with your credentials. You can find the first four value in Twilio dashboard and the last two in Bolt Cloud dashboard.
We store all the credentials in a separate file since it is sensitive data which should not be shared with anyone. Hence it is a good practice to avoid using credentials in code directly. After replacing all the values, save the file using CTRL+X.
This file conf.py is the configuration file and contains all the important information required to carry out the communication between your Python code and the Bolt Wi-Fi module.
Step 3: The Python Code
This is the main code that runs the entire system.
This code requires that you install the Bolt Python package which can be done by the command "pip3 install boltiot" in your terminal.
Code Description:
The code first gets the current status of the LED and stores it in the variable flag ( 0 if the LED is off, 1 if it is ON).
Then it repetitively reads the sensor value and determines whether the LED status should be changed.
In this case we take the limit as 150 as that is the value that suits my room, please feel free to change the value according to your needs.
If the sensor value is greater than the limit and the LED is on, the LED is turned off, flag is set to 0 and a message is sent.
Else if the sensor value is less than the limit and the LED is off, the LED is turned on, flag is set to 1 and the respective message is sent.
Else if the room is bright and the LED is off or if the room is dark and the LED is ON, the LED remains as it is.
The program reads the light intensity value from the LDR every 10 seconds and computes a course of action.
This is the terminal output:
As you can see only when the Sensor Value crosses the 150 mark, greater or lesser, only then the status of the led is changed and a message is sent.
This is the Alert message you get.
Step 4: Connecting System to The Home Assistant
First we need to write a GPIO Command that can communicate with the Bolt module to switch on and off the light.
We can access this in the website cloud.boltiot.com.
From there we can go to: Docs Tab -> API Documentation -> GPIO Commands API -> Write Digital Output
The command to write digital output is:
https://cloud.boltiot.com/remote/###<<API>>###/digitalWrite?pin=0&state=HIGH&deviceName=BOLT##<<ID>>##
Make sure that you change the API Key to your own API Key and ID to device ID which you got in the previous step.
This the command to switch on the LED. To switch off the LED we change state to LOW as:
https://cloud.boltiot.com/remote/###<<API>>###/digitalWrite?pin=0&state=LOW&deviceName=BOLT##<<ID>>##
Next we must integrate Amazon ALEXA with our Bolt WiFi module using IFTTT and Webhooks.
1)First create an account wiht IFTTT.
2)Then, go to IFTTT to create a new applet by clicking here ifttt.com/create
3)Click on +This
4)Choose Amazon Alexa -> Say Specific Phrase
5)Type the phrase you want to trigger the action. I used 'Switch on the l e d' and click on 'Create Trigger'.
6)Click on +That
7)Select Webhooks and then Make a web request
8)Enter the API URL you got in the previous Step. Make sure that you change the API Key and device name.
9)Method will be GET
10)Content type will be Application/json
Here is how your screen will look like
11)Click on 'Create Action' and then Click on 'Finish'
Now do the same process for a command to switch off the LED.
NOTE: This can be done using Google Home also, at step 4, just choose google home assistant/ google home.
With that we are done, all that is left is to switch on the Bolt WiFi Module, Switch on Alexa and run the program. The LED will automatically turn on and off with a small delay due to the 10 second timer within the program. If you want to manually turn off/on the LED, just say the magic words to Alexa.
NOTE: Make sure you keep the LDR away from the LED source so the light emitted from the LED does not hinder the functionality of the program.


Comments
Please log in or sign up to comment.