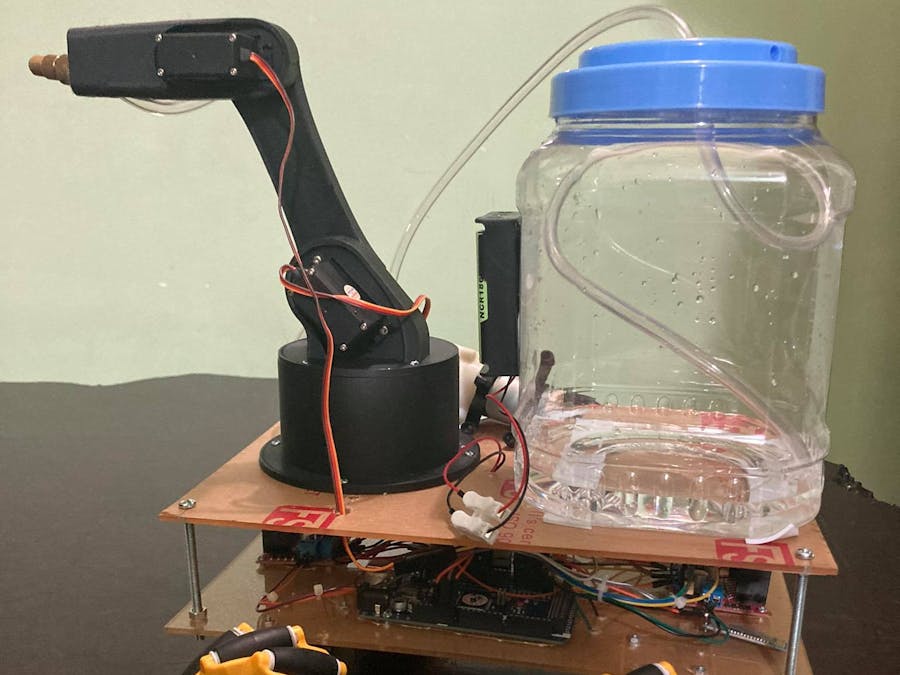
#include <Servo.h>
Servo servo1;
Servo servo2;
Servo servo3;
int relay = 8;
// Motor R1 connections
int inA1 = 5;
int inA2 = 4;
// Motor L1 connections
int inA3 = 6;
int inA4 = 7;
//Motor R2:
int inB1 = 15;
int inB2 = 14;
//Motor L2:
int inB3 = 16;
int inB4 = 17;

char input=0; //input to be used

void setup(){
Serial1.begin(9600);
Serial1.setTimeout(10);
//Servo pins:
servo1.attach(9);
servo2.attach(10);
servo3.attach(11);
pinMode(relay,OUTPUT);
//Motor outputs:
pinMode(inA1, OUTPUT);
pinMode(inA2, OUTPUT);
pinMode(inA3, OUTPUT);
pinMode(inA4, OUTPUT);
pinMode(inB1, OUTPUT);
pinMode(inB2, OUTPUT);
pinMode(inB3, OUTPUT);
pinMode(inB4, OUTPUT);
}

//Direction Control:
void foward(){
 digitalWrite(inA1,HIGH);
 digitalWrite(inA2,LOW);
 digitalWrite(inA3,HIGH);
 digitalWrite(inA4,LOW);
 digitalWrite(inB1,HIGH);
 digitalWrite(inB2,LOW);
 digitalWrite(inB3,HIGH);
 digitalWrite(inB4,LOW);
}

void reverse(){
 digitalWrite(inA1,LOW);
 digitalWrite(inA2,HIGH);
 digitalWrite(inA3,LOW);
 digitalWrite(inA4,HIGH);
 digitalWrite(inB1,LOW);
 digitalWrite(inB2,HIGH);
 digitalWrite(inB3,LOW);
 digitalWrite(inB4,HIGH);
}

void hold(){
 digitalWrite(inA1,LOW);
 digitalWrite(inA2,LOW);
 digitalWrite(inA3,LOW);
 digitalWrite(inA4,LOW);
 digitalWrite(inB1,LOW);
 digitalWrite(inB2,LOW);
 digitalWrite(inB3,LOW);
 digitalWrite(inB4,LOW);
}

void right(){
 digitalWrite(inA1,HIGH);
 digitalWrite(inA2,LOW);
 digitalWrite(inA3,LOW);
 digitalWrite(inA4,LOW);
 digitalWrite(inB1,HIGH);
 digitalWrite(inB2,LOW);
 digitalWrite(inB3,LOW);
 digitalWrite(inB4,LOW);
}

void left(){
 digitalWrite(inA1,LOW);
 digitalWrite(inA2,LOW);
 digitalWrite(inA3,HIGH);
 digitalWrite(inA4,LOW);
 digitalWrite(inB1,LOW);
 digitalWrite(inB2,LOW);
 digitalWrite(inB3,HIGH);
 digitalWrite(inB4,LOW);
}

void spin(){
 digitalWrite(inA1,HIGH);
 digitalWrite(inA2,LOW);
 digitalWrite(inA3,LOW);
 digitalWrite(inA4,HIGH);
 digitalWrite(inB1,LOW);
 digitalWrite(inB2,HIGH);
 digitalWrite(inB3,HIGH);
 digitalWrite(inB4,LOW);
}

void sideR(){
 digitalWrite(inA1,LOW);
 digitalWrite(inA2,HIGH);
 digitalWrite(inA3,HIGH);
 digitalWrite(inA4,LOW);
 digitalWrite(inB1,LOW);
 digitalWrite(inB2,HIGH);
 digitalWrite(inB3,HIGH);
 digitalWrite(inB4,LOW);
}


void sideL(){
 digitalWrite(inA1,HIGH);
 digitalWrite(inA2,LOW);
 digitalWrite(inA3,LOW);
 digitalWrite(inA4,HIGH);
 digitalWrite(inB1,HIGH);
 digitalWrite(inB2,LOW);
 digitalWrite(inB3,LOW);
 digitalWrite(inB4,HIGH);
}

void loop(){
if (Serial1.available() > 0) {

//c d liu gi v
input = Serial1.read();
}

//Motor Controlling:
if(input == 1){
input = Serial1.read();
foward();
}

else if(input == 2){
input = Serial1.read();
reverse();
}

else if (input == 3){
input = Serial1.read();
left();
}

else if (input == 4){
input = Serial1.read();
right();
}

else if (input == 5){
spin();
}

else if (input == 6){
input = Serial1.read();
sideL();
}

else if (input == 7){
input = Serial1.read();
sideR();
}

else if (input == 0){
input = Serial1.read();
hold();
}

//Servo Controlling:

//Arm:
  if(input==8)
  {
  input = Serial1.read();
  servo2.write(150);
  }
    if(input==9)
  {
   input = Serial1.read();
  servo2.write(180);
  }

 //Gripper:
    if(input==10)
  {
   input = Serial1.read();
  servo1.write(50);
  }
    if(input==11)
  {
   input = Serial1.read();
  servo1.write(100);
  }
    if(input==12)
  {
   input = Serial1.read();
  servo1.write(150);
  }

//Base:
    if(input==13)
  {
   input = Serial1.read();
  servo3.write(180);
  }

    if(input==14)
  {
   input = Serial1.read();
  servo3.write(130);
  }

    if(input==15)
  {
  input = Serial1.read();
  servo3.write(80);
  }

//Relay:
     if(input==16)
 {
  input = Serial1.read();
digitalWrite(relay,HIGH);
 }

      if(input==17)
 {
  input = Serial1.read();
digitalWrite(relay,LOW);
 }

delay(10);
}


_wzec989qrF.jpg?auto=compress%2Cformat&w=48&h=48&fit=fill&bg=ffffff)

_qM2soP8k8n.jpg?auto=compress%2Cformat&w=48&h=48&fit=fill&bg=ffffff)


Comments
Please log in or sign up to comment.