Introduction:
As a college student, one ends up spending alot of time in their apartment. However, most college kids lack the interior decorating skills to create a fun, relaxing environment. More often than not, the room either goes undecorated or is randomly thrown together. Fortunately, there is a simple solution: LED light strips. They are extremely versatile, and can be used as either relaxing backlight for reading a book or flashing colors for a party with friends. However, why stop here? Our project, "Light Up Your World", allows for the LED light strip to be turned on and off using the two Particle Photons and the Internet of Things. By detecting the level of brightness in the room, the Photons can communicate to activate the LED strip without the user ever having to touch a button.
How It Works:
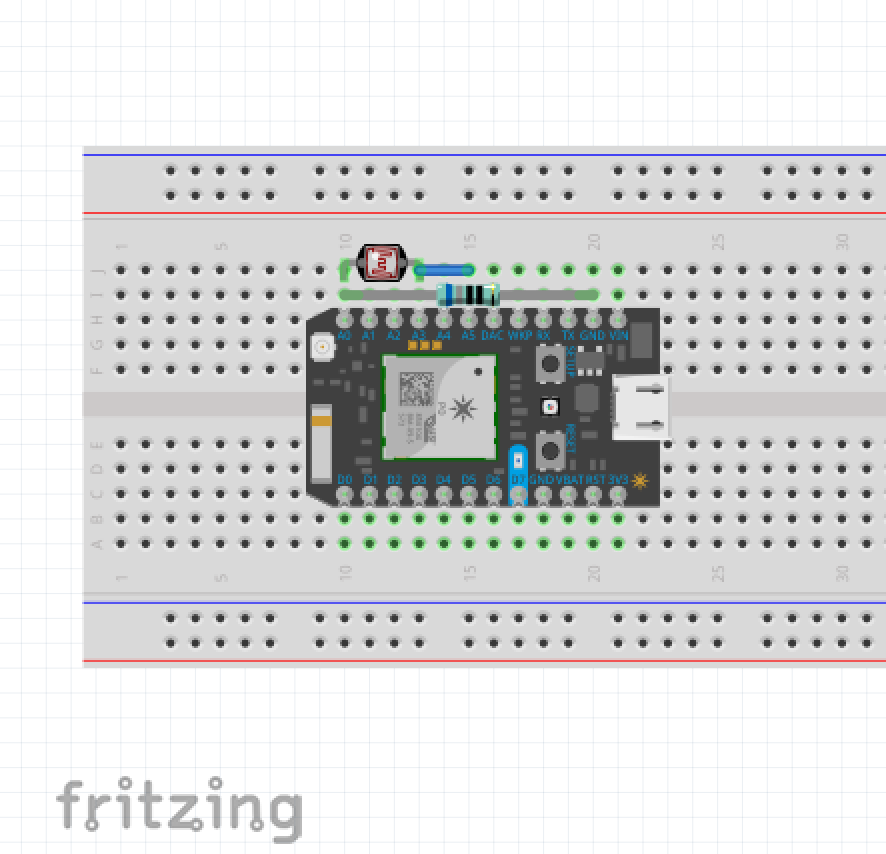
The first photon acts as a light sensor, measuring the analog signal across the A0 pin. A 680 ohm resistor and a photoresistsor are used together so that the the resistance varies depending on the amount of light that the photon is exposed to. In the code that is flashed to this photon, a threshold analog output of 40 was established as the distinguishing value between light and dark. Anytime that the room is light and the value is greater than 40, the photon publishes data to the cloud which says "broken". Anytime that the room is dark and the value is less than 40, the photon publishes data to the cloud which says "intact".
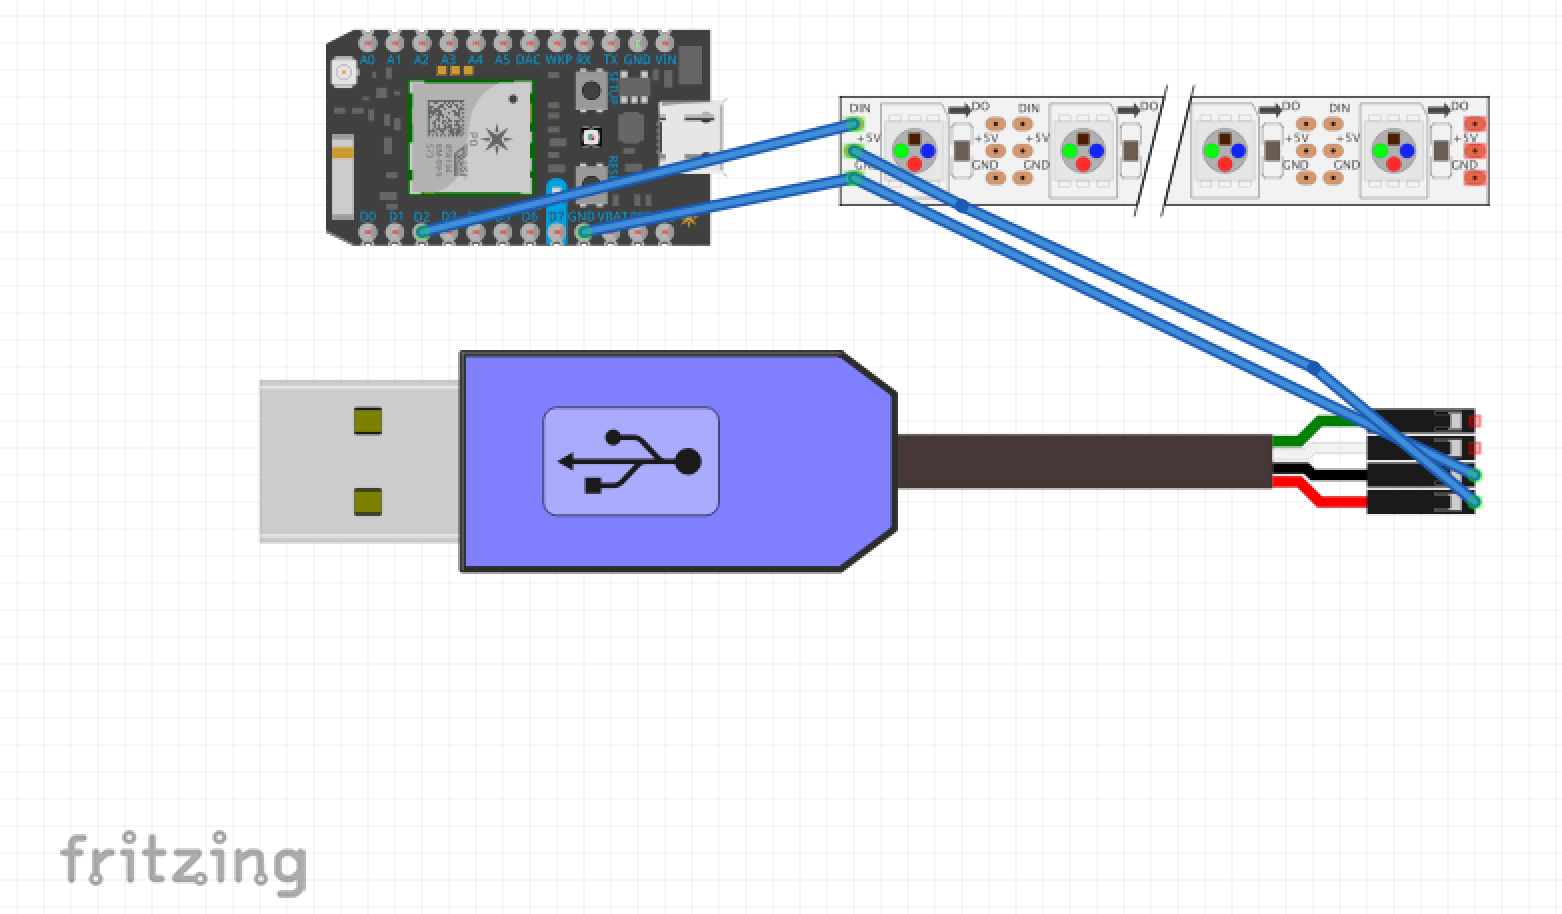
The second photon subscribes to the data that is published by the first photon. Whenver this photon reads "broken", it does nothing. However, whenever the photon reads "intact", it activates the WS2812B LED strip. It also activates the D7 on board LED, which acts as a trouble shoot to determine if the photons are communicating successfully.
When building this, use the female end of the WS2812B light string for your power and signal input. An external power supply is needed because the LEDs require a 5V input (the photon only provides 3.3V max) and a high current (60mA per light). For a string of 50 lights, that equates to 3A. Do not use the breadboard to connect the lights to the power supply because the breadboard may cause a significant power drop and cause a brown out. Another key is not to forget connecting the photon ground to the LED string ground.
Using the individually addressable LEDs we were able to customize the lights in our apartment. We opted to light them up green for UNC Charlotte spirit, but any color can be used. The LEDs can also be customized into different patterns and animations. As you become more practiced with the NEOPIXEL library you can explore these options.
Video:
This is a short video which describes how the project works.
Graphs:
This first graph shows the analog output of the A0 pin as a function of brightness on the Particle Photon which uses the photoresistsor. To achieve this, the Particle Photon was taken into a completely dark room and the iPhone flashlight was shone onto the photoresistsor at different brightnesses. The second image shows the different levels of brightnesses that the iPhone can achieve. This graph was compared to the threshold value of 40 at which the Cloud message switches from "broken" to "intact" and the LED strip is activated.
The second graph was created using IFTTT. The third image shows the description of how the IFTTT program works. Whenever the analog output of the first particle photon is greater than the threshold value of 40, a new column is added to a Google Sheets spreadsheet with the value of the pin. Image four shows the second graph. The program was run over the course of several hours, but because the photon was in a consistently evenly lit room, the values remained constant over that span.


Comments
Please log in or sign up to comment.