


Hardware components | ||||||
| × | 1 | ||||
Software apps and online services | ||||||
 |
| |||||
| ||||||
Hand tools and fabrication machines | ||||||
 |
| |||||
| ||||||
| ||||||
 |
| |||||
The Weather Kite project: The Goal of the project was to build a box-kite, with a temperature and pressure sensor, and to let it fly and record data. While building a working kite was our main goal, we also wanted to become better builders and technology users. We have been able to fly the kite for short periods of time in the absence of wind, but unfortunately we have not able to record weather data just yet.
The Building Side of the project:
One day during class time, Mr. Holzwarth, our instructor came up to the four of us and asked if we wanted to build a kite. He gave us a box of materials and a set of instructions. We were able to build the kite quickly and had time to fly it the same day. (The small, box kite, which would later became our prototype can be seen below.)
The next day, for reasons we are not entirely sure of, we decided to modify the kite by adding wings. The same day, we decided to build a lager model twice the size of the prototype. We also wanted to add a small-board computer to the kite to read temperature and air pressure. To accomplish the two goals, creating working sensors and creating a kite that would be able to carry the payload, we split up into two groups. Elliot and Gabriel started working on the kite, while Saaman and Conner started programming the small-board computer. (To read the programming story look below).
Elliot and Gabriel started thinking about how to make the larger model more efficient, and how to create more lift. Instead of using tape we decided to sew the paper together. Additionally, we wanted to get rid of the holes between the sticks and the paper so that no air would go through. The third major modification was to use AutoDeskFusion360 to create connector pieces between the sticks.
So it began. First, we used a sewing machine to create the two small boxes. While Elliot was sewing, Gabriel finalized the designs for the connector pieces, sketching them, and calculating sizes and angles. As soon as we were finished, we started up AutoDeskFusion360 and created them. Making them was quite the challenge, we both had very little experience with the program so it took us a long time and many class periods to create the 4 different pieces. The first one took hours to create. We got fast and faster as we became more comfortable with the software, and by the end we could design pieces in a mere 10 minutes by the end. Once done, we started to print the pieces using the Makerbot. Unfortunately, we measured something wrong. We had to redo the design in AutoDesk. Luckily, this wasn’t a problem as we had become quite quick with the software.
We printed out the correct pieces and stated assembling the kite. First, we built the skeleton using rods and the connector pieces. Then we added the boxes. We had not cut the wings yet, so Gabriel went along with that task, while Elliot thought of a ways to fix them to the skeleton.
After several trials, Gabriel managed to cut out the correct sized wing. Elliot thought that the best way to fix the wings onto the kite was to have little extensions on the sides of the wings that could be wrapped around the rod and then sewed to itself. After the wings were mounted onto the kite, we took it out for a test flight. (See the flight below)
After the successful test flight. We mounted the small-board computer. Unfortunately, we did not think about the impact of the weight. We mounted the computer towards the front, and a bit to the left, which led to a disaster in the test flight, due to the torque given to the kite from the weight of the small-board computer. (Video below)
After the failure, we tried to find the ideal spot for the small board computer, and make key improvements in other areas. We hot glued the connector pieces to the rod, so that the rod would not slip out of the connector piece midflight. Additionally, we sewed the boxes to the skeleton, so that they would not give under the pressure of the wind. We found the ideal mounting spot (at the base of the kite), and we made the improvements. Now the only thing we are waiting for is wind to fly the kite.
The programming side of the project, as told by Saaman Ghodsi:
My task was to make the lightest object possible that could record data while being on the kite. With a lot of help from Dan The Man and Dave Holzwarth, I was able to accomplish this task.
An Arduino is a microcontroller-based kit for building digital devices and interactive objects that can sense and control objects in the physical world. The Arudino was the most accesible object that we could use to meet the needs of this side of the project.
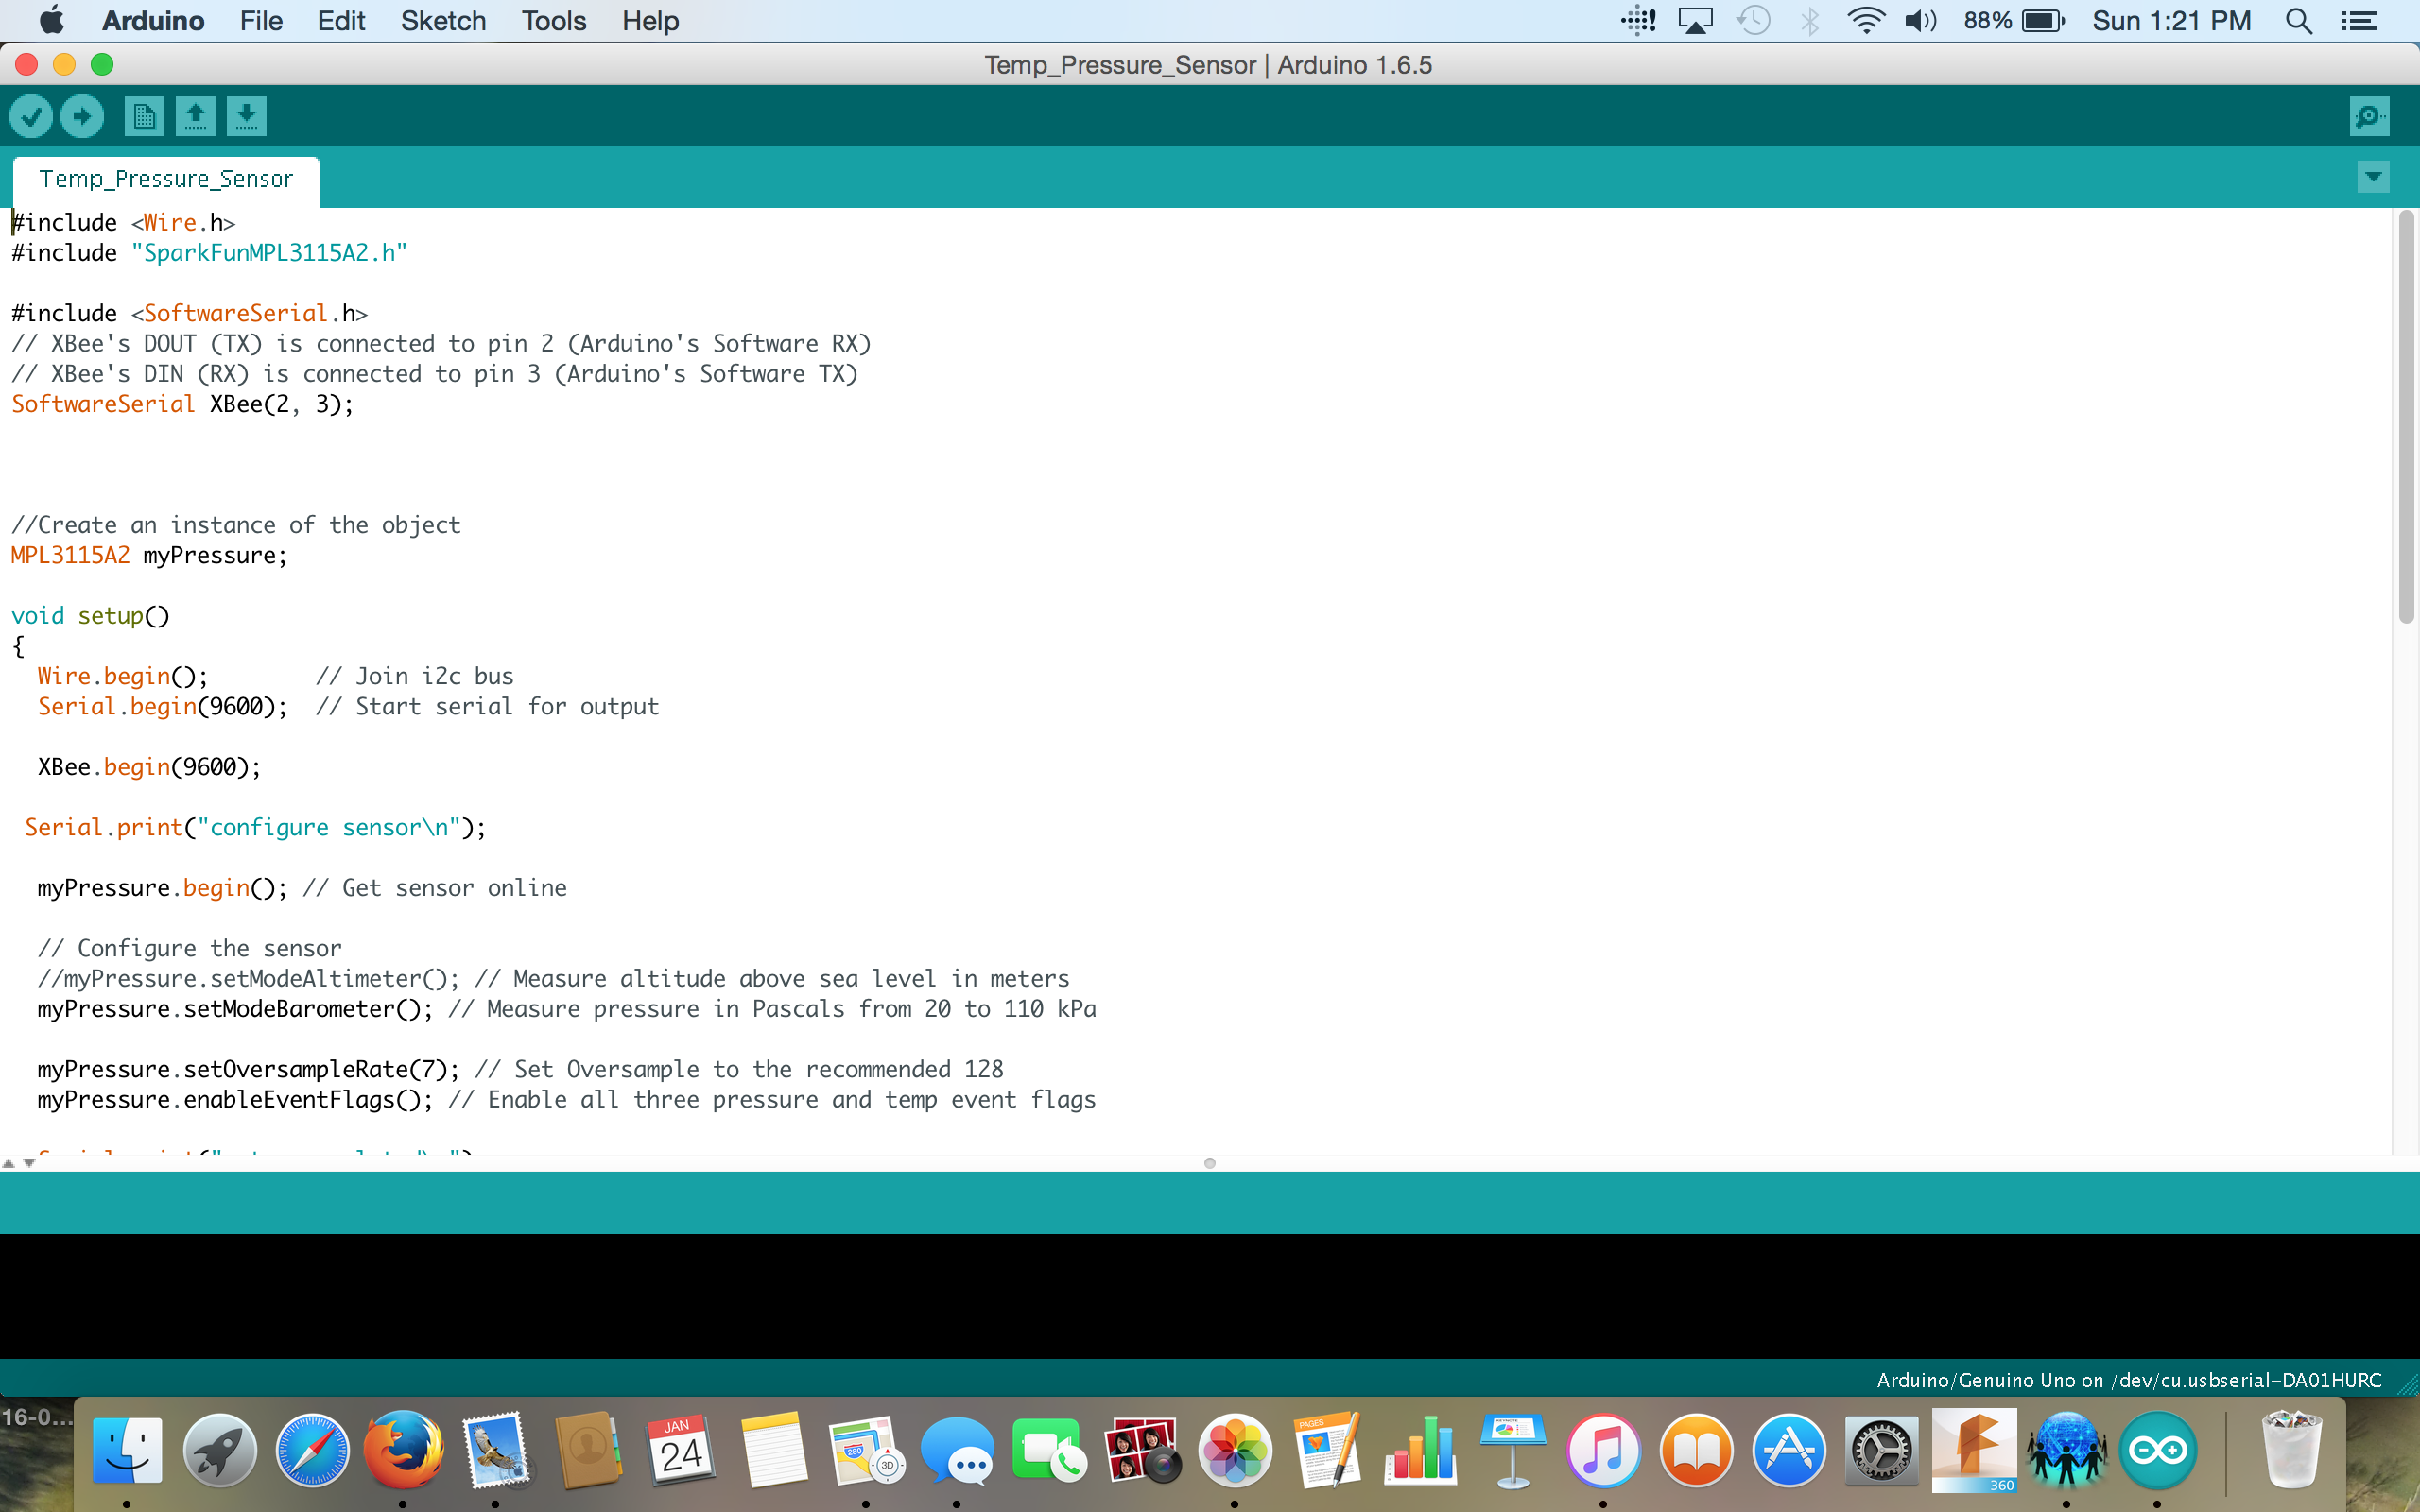
First, I had to learn how to setup the Arduino. I was unfamiliar with bread boards, resistors, and all sorts of other tools, so I had to learn about them. This was probably the hardest part of my side of the project because setting up Arduinos requires perfect circuitry for them to work. With help from Sparkfun wesbite guides and Dan The Man, I was able to make the prototype of the Arduino.
The next step was to program. I had to download the Arduino software which allows you to type code on your computer and download it into an Arduino. I had some background in programming already from Robot C, but I got a lot of help with Arduino from Dan The Man. The code is simple; it records temperature (Fahrenheit) and pressure (Pascals) every second.
After this was finished, I was only halfway done with programming. I now had to install an XBee. XBee’s are useful, in our case especially, because they are wireless transceivers. The XBee allows me to have the Arduino on the kite instead of connected to my laptop. One XBee is connected to my computer while the other is on the Arduino on the kite. Instead of the Arduino getting its power from my computer, it is connected to a 9 volt battery so it can be on the kite.
Next, I had to download a program called XCTU. XCTU allows me to actually read the data coming from the arduino. All I have to do each is have one of the XBee's connected to my laptop, power up the arduino, and open XCTU to read incoming data. The only minor problem is the range on the XBee's. Its maximum communication distance is about 150 meters. So sometimes I have to run with the kite while holding my laptop to receive data.
Lastly, I needed to make the Arduino robust and lighter. There were wires and loose parts everywhere on the Arduino that needed to be held in place, otherwise they would rip off due to the movement of the kite. The breadboard was a very heavy part of the Arduino and it was better if it were removed. So, using a soldering iron, Dan The Man and I reconnected all the wires to the Arduino instead of the breadboard to save space and weight.
This changed the prototype into the final product, and it was now ready to fly. The kite builders took the Arduino and strapped it down into the box kite.


Comments
Please log in or sign up to comment.