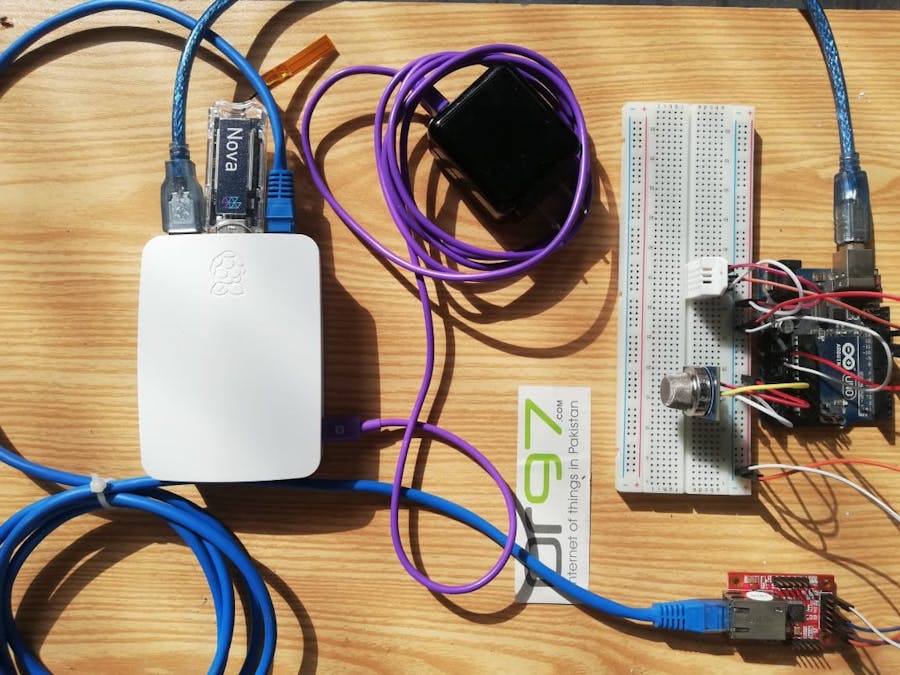
Environment monitoring is very important factor in factories, warehouses, greenhouses, and control sheds; either they are working safely and did not making any major pollution source for environment.
Idea behind the project is that some areas contains wireless signal issues so can't deploy wireless sensor nodes. so wiz750sr is the solution for IoT products where we can connect our devices to internet via lan cables and send their data to internet.
In this project, I am using the WIZ750SR to transmit Arduino data to the Hologram Network via a Raspberry Pi and Nova USB modem.
The WIZ750SR and Arduino act as server nodes, while the Raspberry Pi acts as client to take data from these nodes and the other side acts as gateway to send data to Hologram network via Nova USB modem. Hologram is the platform from where we can stream the data to AWS, Slack channels, or any custom platform via web APIs/hooks.
WIZnet SetupFirst, connect your WIZ750SR to wiz-eb board, connect mini USB cable to laptop, and connect the WIZ750SR Ethernet cable to PC Ethernet port. Open the wizconfig software for WIZ750SR configuration. You can download the wizconfig from GitHub. After opening the software, click on search button which is point by red box.
Note: Before you open the software, please configure your Ethernet to IP address 192.168.11.1 In this case, your PC will act as a network gateway.
In this project, I am going to use the 192.168.11.2 IP address for WIZ750SR module which is by defualt IP address. Select operation mode as TCP server and please set the serial options according to below image. After that, click on setting button to save the module settings.
Please verify the WIZ750SR connectivity with your PC by ping.
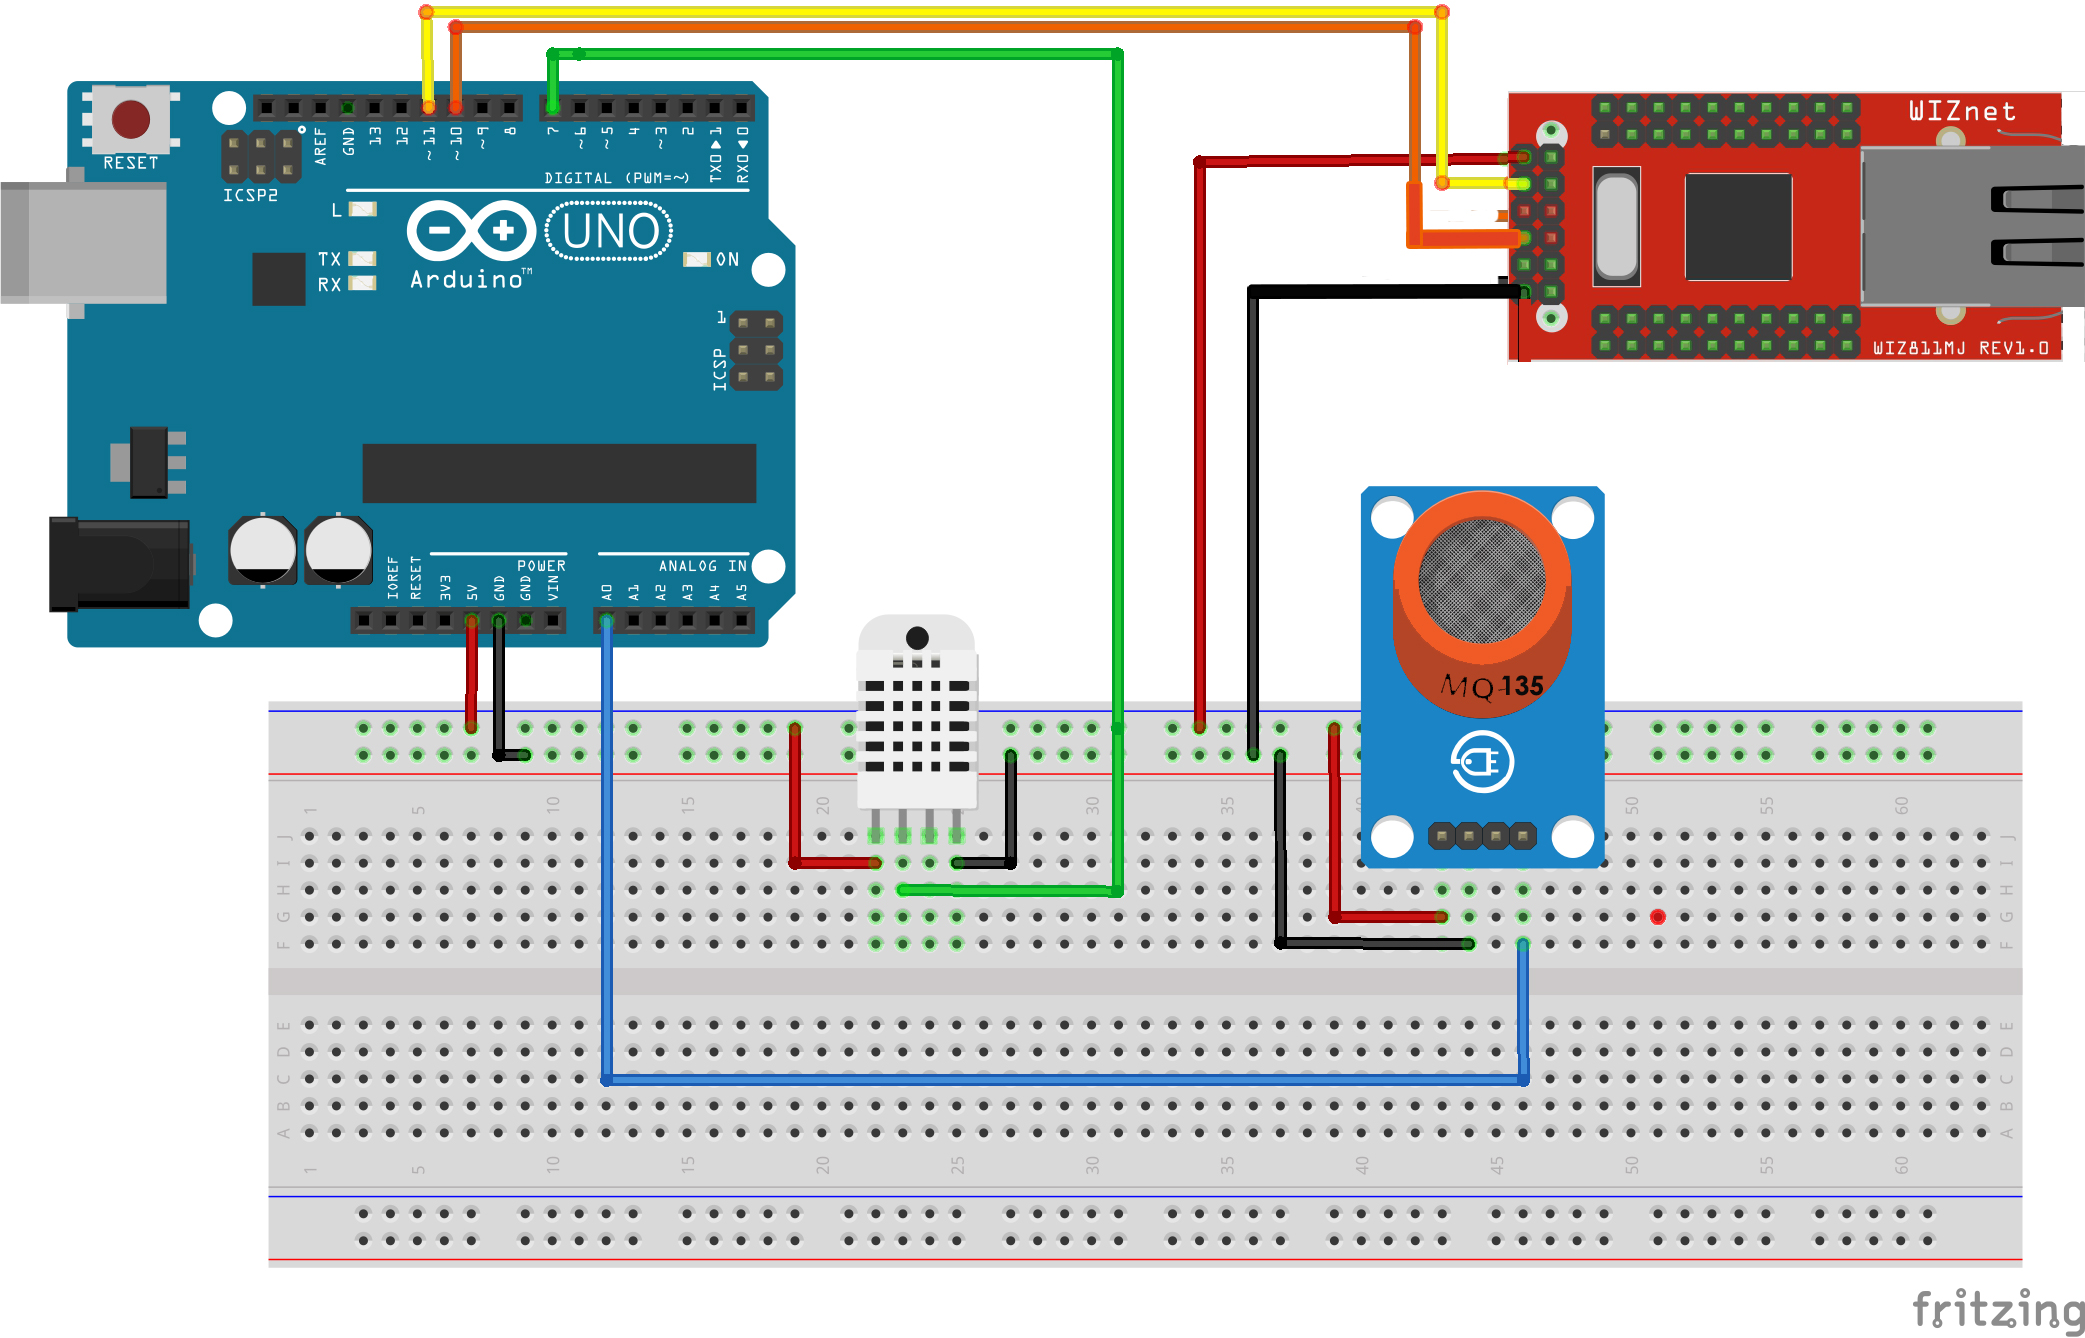
After completing the configuration above, connect the WIZ750SR module to Arduino. Please follow the diagram below for connections.
After making the connections, you can run a simple test by using serial software example from Arduino IDE and use any TCP client to get WIZnet server response. Every data you write on Arduino software, serial will be visible on TCP client which is connected to WIZ750SR server. In the above case, 192.168.11.2 is a WIZ750SR server IP address.
Arduino SetupI am going to use an MQ-135 to measure environment pollution level and DHT22 to measure environment temperature and humidity. In the schematics, you can see the Arduino connectivity with sensor and WIZ750SR. Before going to use the attached code, please install the DHT22 Library and Adafruit Master Sensor Library.
After completing the wiring setup, please download the Arduino code from code section and upload it to Arduino board.
Raspberry Pi and Hologram SetupConnect the Hologram Nova modem with Raspberry Pi and follow this article for further setup and settings.
Before we connect the WIZ750SR module LAN cable to Raspberry Pi Ethernet port, you need to assign static IP address (192.168.11.1) that will act as default gateway for WIZ750SR module.
Open the Raspberry terminal and exectue the command below.
sudo nano /etc/dhcpcd.conf
Assign the static IP address to eth0.
# Example static IP configuration:
interface eth0
static ip_address=192.168.11.1/24
After configuration, ping the WIZ750SR module, so you can verify its communication with Raspberry Pi.
Now that our setup has been completed, download the Python code from code section and execute as below.
sudo python wiz750sr-hologram.py
Python code will run in a loop which will open the TCP client after a five-second delay. Request the data from WIZ750SR server and send Hologram Cloud via the Nova modem.
Below is the Hologram dashboard displaying the data that has been received from WIZ750SR server, which is showing temperature, humidity, and gas readings. From the Hologram dashboard, we can send the data to AWS cloud, Slack channel, or any custom portal via web API/hooks for further process.


_ztBMuBhMHo.jpg?auto=compress%2Cformat&w=48&h=48&fit=fill&bg=ffffff)


Comments
Please log in or sign up to comment.