Air Quality is the biggest issue of current century and it's growing day by day due to rapid growth of industries specially under developed countries are facing very negative impact on human beings as well as on other living organisms due to air pollution. To combat with pollution firstly we need a system to measure the pollution so that all the stake holders of the system take mandatory measurements to protect the environment. There are many devices in the market for air quality monitoring but expensive to sort out the issue I have developed a device with low cost open source controllers and sensors to carry out that project with free cloud services.
To complete the project we need below hardware & software.
Hardware1-Wemos D1 Mini
2-MQ-135 (Air Quality Sensor)
3-DHT11/DHT22 (Temperature & Humidity Sensor)
4-Breadboard or PCB you can order from here
Software1-Arduino IDE here
2-Thingspeak Coud here
So firstly we will start with the hardware. below is the schematic diagram of the system which is showing how to connect the pins of sensors to We-Mos D1 Mini for Breaboard or Vero Board or you can buy the PCB from PCBWay Click Here.
below is the PCB which is sponsored by PCBWay and you can use the same design from here.
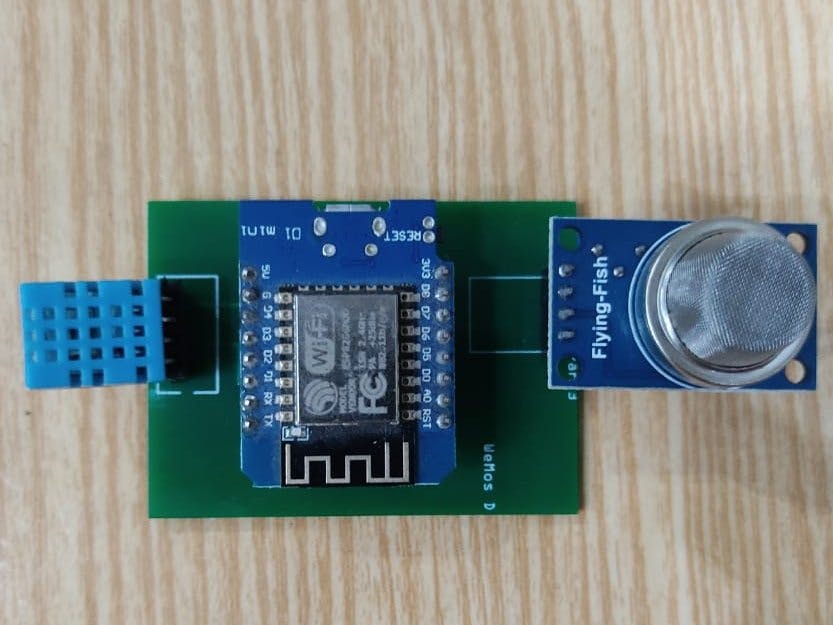
after soldering all the stuff on PCB it looks like below image.
Now we are moving towards the Software Side. Firstly download the Arduino IDE from here if you didn't have. After installing the Arduino IDE Navigate to Preferences in Arduino IDE and add the below URL under 'Additional Boards Manager URLs'
http://arduino.esp8266.com/stable/package_esp8266com_index.jsonAfter that we need to Install the ESP8266 Series board in our IDE. Click on Tools->Board->Board Manager
Type ESP8266 in Board Manager Search bar which will show the result just select & click on install.
After installation of boards 2 libraries are required for DHT11/DHT22 sensor & ThingSpeak Cloud Click on Sketch -> Include Library-> Manage Libraries...
Firstly type DHT11 in search bar and you will get alot of results just select the DHT Sensor Library by Adafruit.
Now Type Thingspeak in the search bar and only install by MathWorks.
After setting up Arduino IDE with Libraries and & Boards. now we are moving towards Thingspeak. if you didn't have account on Thingspeak just signup and click on new channel button.
Add the fields like showing in below image.
After adding channel fields now click on API Keys which will be later used in Arduino Code for cloud connectivity. Copy the Channel ID & Write API Key
Download the code for Arduino from GitHub the URL is mentioned in the code section. here you need to update your secret.h file with Wi-Fi SSID,Password & ThingSpeak Channel ID & Write API Key.
Now upload the code to thing speak and you are good to go with readings. Arduino is uploading the readings with interval of 5 minutes but you can change the time interval in Arduino Code.
and if you want to update the time then just update the time in Arduino code. here time is in milliseconds which is 1 second equal to 1000 so for 5 minutes we need to convert 5x60=300 seconds and then multiply 300 seconds with 1000 which will be 300000 milliseconds.
if hope you guys like my project and if you have any question please feel free to comment and I will try my best to accommodate you asap.


Comments
Please log in or sign up to comment.