


Hardware components | ||||||
 |
| × | 1 | |||
_ztBMuBhMHo.jpg?auto=compress%2Cformat&w=48&h=48&fit=fill&bg=ffffff) |
| × | 1 | |||
| × | 1 | ||||
 |
| × | 1 | |||
| × | 1 | ||||
 |
| × | 1 | |||
 |
| × | 1 | |||
 |
| × | 3 | |||
| × | 1 | ||||
This project consists of AGL demos on the Dragonboard410c.
List of demos:
- 1. HVAC Demo
- 2. Demo Application
1. HVAC Demo
HVAC (Heat Ventilation and Air Control) demo focussed on demostrating the HVAC GUI present in AGL demo platform. This involves controlling the fan speed and temperature.
For demonstration purposes, default HVAC GUI is modified as below:
- Controlling fan speed
- Controlling left temperature - controlling light intensity
- Controlling right temperature - controlling light intensity
1) Hardware
- 1.1) Hardware Requirements
2) Software Setup
- 2.1) Arduino
- 2.2) Dragonboard410c
- 3) Hardware Setup
- 4) HVAC Demo
- 5) Video Demonstration
- Dragonboard410c
- 96Boards compliant power supply
- Linksprite 96Boards touchscreen
- Sensors Mezzanine
- Audio Mezzanine (Required if using external Arduino)
- Arduino Uno (Optional)
- DC motor with propellers
- L298 motor driver
- 5mm LEDs
- 330 ohm resistors
- Connecting wires
Note: It is assumed that Sensors Mezzanine is placed on top of Dragonboard410c2) Software Setup2.1) Arduino
Controlling Fan Speed and LED intensity are handled by the Arduino. Sensors Mezzanine has an ATMega328 microcontroller comaptible with Arduino Uno. Youcan use that or any external Arduino Uno for PWM control.
In case of using Sensors Mezzanine, the sketch can be uploaded by using Dragonboard410c itself. For more info, see here.
Following are the steps for getting the required arduino sketch:
If using Sensors Mezzanine, please follow the below steps on Dragonboard410crunning Debian otherwise use Arduino IDE on the host system for programming.
$ cd ~/Documents
$ git clone https://github.com/96boards-projects/agl-demo.git
$ cd agl-demo/arduino/hvac
Now open the hvac.ino using Arduino IDE and flash it onto the Sensors Mezzanine or Arduino Uno.
Execution environment: Host PC
Software Dependencies:$ sudo apt-get install gawk wget git-core diffstat unzip texinfo gcc-multilib \
build-essential chrpath socat libsdl1.2-dev xterm cpio curl
AGL uses repo tool for maintaining repositories. We need to download the source on the host machine and cross compileit for Dragonboard410c.
$ export AGL_TOP=$HOME/workspace_agl
$ mkdir -p $AGL_TOP
$ mkdir -p ~/bin
$ export PATH=~/bin:$PATH
$ curl https://storage.googleapis.com/git-repo-downloads/repo > ~/bin/repo
$ chmod a+x ~/bin/repo
Next, download the stable branch of AGL.
$ cd $AGL_TOP
$ repo init -b dab -m dab_4.0.2.xml -u https://gerrit.automotivelinux.org/gerrit/AGL/AGL-repo
$ repo sync
Note:Building AGL
As of writing latest stable branch of AGL is 4.0.2. Always download the most recent stable release.
Replace AGL_TOP with the top level directory of cloned AGL source.
Next, build the agl-demo-platform for Dragonboard410c.
Now move to the directory where you have cloned the agl-demo project from 96Boards Projects Org.
Copy the custom HVAC recipie to AGL source
Execute bitbake command by moving to the build directory of AGL source.
$ cd $(AGL_TOP)/build
$ bitbake agl-demo-platform
Note: Replace AGL_TOP with the top level directory of cloned AGL source
Build will take quite some time depending upon the host machine configuration.
Flashing AGL onto Dragonboard410cOnce the build has been completed, we have to flash the boot and rootfs images onto Dragonboard410c. Boot Dragonboard into fastboot mode by following the instructions here. Then follow the below instructions to flash AGL onto Dragonboard410c.
$ cd $AGL_TOP/build/tmp/deploy/images/dragonboard-410c
$ sudo fastboot flash boot boot-dragonboard-410c.img
$ sudo fastboot flash rootfs agl-demo-platform-dragonboard-410c.ext4
Once flash has been completed. Proceed to the below sections to execute HVAC demo.
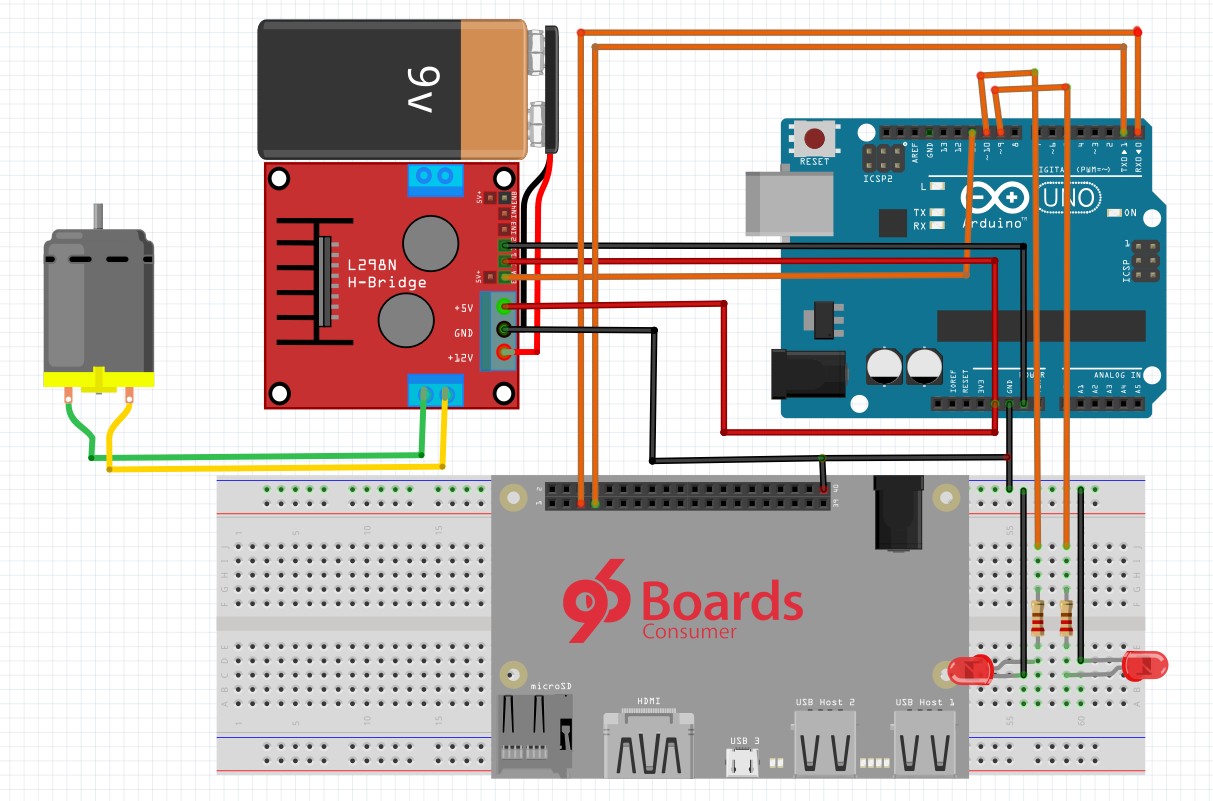
3) Hardware Setup- Make sure the Dragonboard410c is powered off.
- Connect DC motor and LEDs to Arduino as per above schematic.
- Connect LCD to Dragonboard410c via HDMI cable for display and Micro USB cable for touch input.
- Power on your 96Boards CE with compatible power supply.
- Dragonboard410c should now boot into AGL and homescreen should be visible.
Note:4) HVAC Demo
If you are using Arduino on Sensors Mezzanine, no need to connect Rx/Tx lines and5v line from motor driver.
If you are using external Arduino, place Audio Mezzanine on top of DB410c. Then connect Rx/Tx lines from level shifted LS connector at the centre.
Execution environment: Dragonboard410c
Navigate to the HVAC application from the home screen.
To control the LED intensities, change the values of L/R temperatures by dragging upthe LO box.
- To control the Fan speed, change the position of the slider at the top.
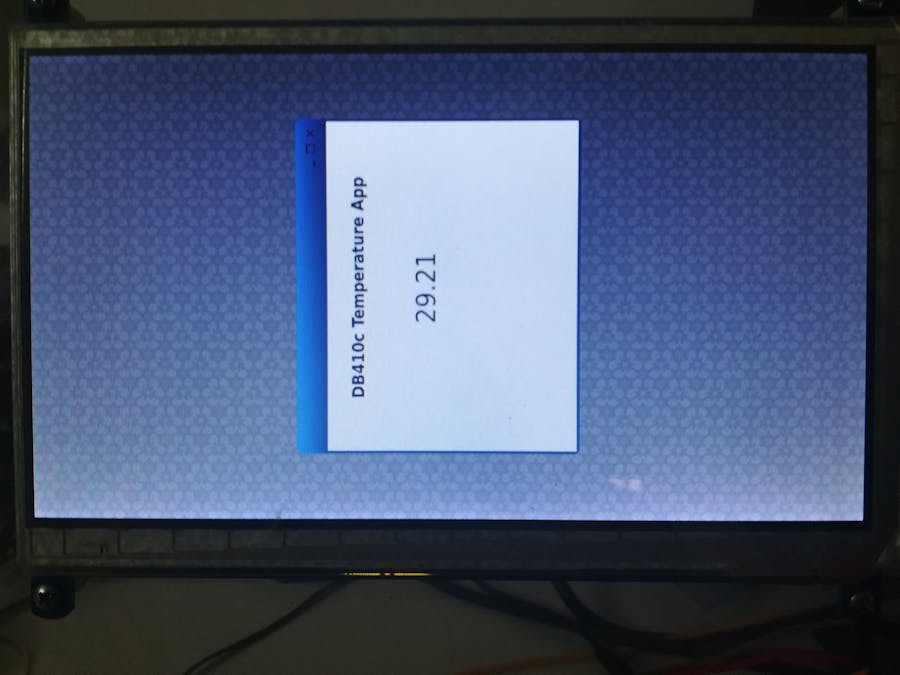
2. Demo Application
A demo Qt application which displays temperature data from TMP007 recursively at 3 seconds interval. This demo can be used as a template for developing applciations using AGL framework.
Table of Contents1) Hardware
- 1.1) Hardware Requirements
2) Software Setup
- 2.1) SDK Environment
- 3) Hardware Setup
- 4) Demo Application
- Dragonboard410c
- 96Boards Compliant Power Supply
- Linksprite 96Boards Touch Screen
- Sensors Mezzanine
- TMP007 Sensor
Boot agl-demo-platform on Dragonboard410c as mentioned in HVAC Demo.
2.1) SDK EnvironmentSet up the SDK environment for building AGL applications by following this guide.
3) Hardware Setup- Make sure the Dragonboard410c is powered off.
- Connect Linksprite touchscreen.
- Connect Sensors Mezzanine.
- Connect TMP007 senosr to I2C-0 port on Sensors Mezzanine.
- Power on your Dragonboard410c with compatible power supply.
Execution environment: Host PC
Now, the demo application can be built using the SDK environment inside Docker container on host. First navigate to the docker-worker-generator directory then follow thebelow steps to login to the SDK Docker container and build the demo application.
Now, SSH into the Docker container using the shown command in terminal and build the application.
$ ssh -p 2222 devel@mybuilder.local;
$ source /xdt/sdk/environment-setup-<your_target>
$ git clone https://github.com/96boards-projects/agl-demo
$ cd agl-demo/db410c-temp
$ qmake
$ make
After the successful build, applciation package will be available under package directory. Copy it to the Dragonboard410c running AGL using SD card and start the application as below:
Execution environment: Dragonboard410c
Note: Before starting the application,homescreenneeds to be disabled as mentioned here.
$ cd <package_directory>
$ afm-util install db410c-temp.wgt
You should be able to see the Application ID: db410c-temp@0.1
Now, the application window will get opened and the temperature data will be shown as below:


_3u05Tpwasz.png?auto=compress%2Cformat&w=40&h=40&fit=fillmax&bg=fff&dpr=2)


Comments
Please log in or sign up to comment.