It is an instrument used by pilots during flights (sailplane, paraglider, hanglider, balloon, etc.) to help finding the core of the thermals and climb the air more and better.
Brief description:It is a very sensitive barometer that emits sounds when climb (going up) and also when sinking (going down). Sounds are simple beep-beep, every second, or two per second or more during climb (more climb rate = higher frequency beeps): it is so sensitive that it starts beeping just after a few centimeters (!) per second; you may try slowly lifting your arm holding in the hand the Vario to obtain the sound. In case of sinking rate it emits long (continuous) beeeeeeeeps at -1 m/sec or more.
Components list:- Arduino Pro Mini 3.3v 8 Mhz as MCU
- GY-63 (MS5611) barometric pressure sensor 3.3v
- Dipswitch 8
- Buzzer (active with internal oscillator)
- Multiplexer 8x1 4051 3.3v
- LiPo battery 1s 3.7v 350mAh + 10cm red/black wire and M+F connectors
- Voltage step-up module + USB LiPo charger, TP5400 from AZDelivery;
- A few resistors, 8x4.7k network resistance, 220, 2x10k, and capacitors 47uF, 470uF
- Resettable fuse 0.5A
- Small plastic ABS black box, size 78x39x22 mm
- Sliding on/off switch
- 6 pins header female connector (for FTDI)
- 17 pins male (2x, 2x, 2x, 2x, 2x, 4x, 1x, 1x and 1x)
- 4 pins male 90° for P-sensor circuit
- 30 cm of rigid wire, plastic covered, for jumpers and connections
- Green cord
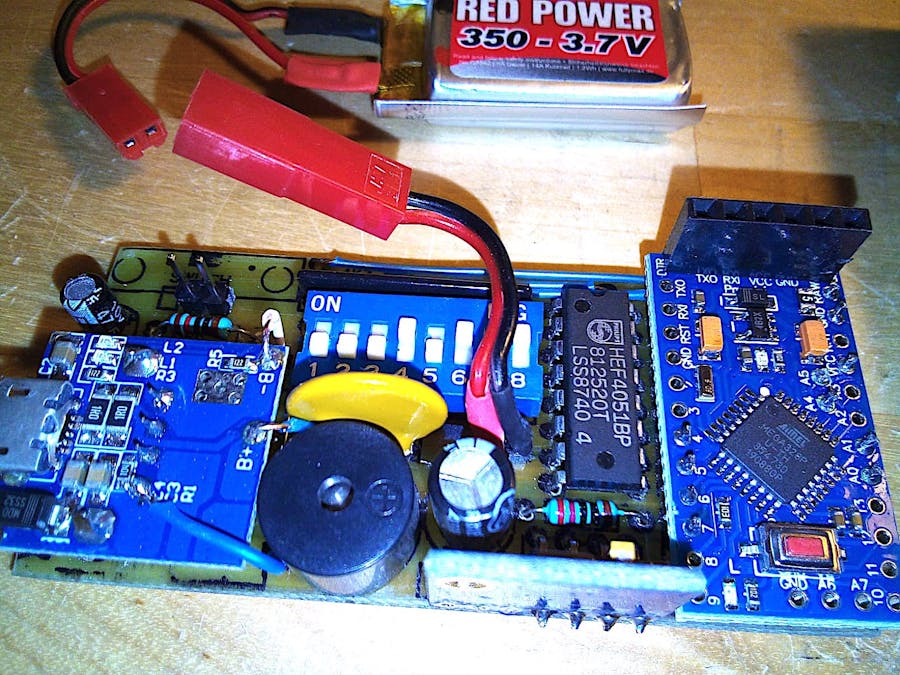
The Fritzing above schematic shows everything you need to build the circuit. Please pay attention the brown "ceramic capacitor", just below the black switch, is a resettable fuse instead (I haven't found the right design for it). In place of the 8 x resistors I used a single component, a resistor network, it includes 8 x 4.7K ohms, all of them inside; look at the next picture to find it, is hard to find, is the black one at the top of the blue dipswitch, it got nine pins, one common, the others eight for the resistors. The Fritzing schematic file for downloading is available below.
The meaning of the dipswitch:I liked to use the blue dipswitch, 8 x very small on/off switches in one coloured case, to select and change the parameters for the Vario functioning. It is a table for these parameters shown above and explained here as follows:
- 1 - not used
- 2 - volume low or high
- 3 and 4 - sinking alarm m/sec: -999 -1 -2 -3
- 5 and 6 - beep frequency Hz: +1 +1.5 +2 +3
- 7 and 8 - sensitivity m/sec: +0.0 +0.1 +0.2 +0.5
Pin 1 is not used, any position, on or off, does not change anything.
Pin 2 changes volume level of the buzzer; it operates electrically: when pin is on it shorts circuit the resistor in series with the buzzer and let pass more current to have higher volume beeps.
Pin 3 and 4 set the sinking level (going down) below which the Vario will play beeeeeeeeep; pins are used as binary code, two bits, 4 settings: 00=0, 01=1, 10=2 11=3; you could set the sinking alarm at -999 m/sec (it means no limit, it will never beeps) with pin 3=off and pin 4=off (binary 00); you could set the other values to -1, -2 or -3 m/sec respectively with pin 3=off/4=on, 3=on/4=off and 3=on/4=on. For example at position 2 the Vario will beeeeeeeeeep only at sinking rate more then -2 m/sec. For testing you should try using an elevator... descending from floor number 3 to floor number 0, or run quickly the ladder steps...
Pin 5 and 6 set the beep frequency, they work together as binary code as explained above for the other couple of pins; at the same climb speed, set at +2Hz will beep-beep more quickly than at +1Hz. Some people like to have slowly beeps and less "stress" :-)
Pin 7 and 8 set the instrument sensitivity: +0.0 means maximum sensitivity at going up movement, it needs less then 10cm/sec speed to beep-beep; in this position sometimes the instrument beeps, even steady in place, catching very small pressure changes (i.e. closing a door in the room can increase the air pressure a little bit); it catches also normal electrical "noises" but is pretty stable and useful. At the 4th position we have +0.5 m/sec sensitivity, significantly less sensitive to air pressure changes, you need "much" more speed going up to climb altitude to obtain beep-beep. For testing you should try using an elevator... from floor number 0 to floor number 3...
From an electronic circuit point of view, pins 1 and 3-8 are read analogically by the way of the multiplexer 4051 chip, then the software decides if it is on or off, values > 512 or not: it got 8 inputs to 1 common ports connected to the Arduino as input. To select which one of the 8 ports to read the on/off positions of the Dipswitch, the MCU (Arduino) sets 3 bits in output you already know as it works: 000, 001, 010, 011, 100, 101, 110, 111 (0, 1, 2, 3, 4, 5, 6, 7 = 8 ports = 8 on/off switches). Have a look at the code the "readDIPswitch()" function.
Mind the battery:The two 10k resistors together with 47uF capacitor work as voltage divider to test battery voltage. LiPo are known to be critical when discharged below 3.3v for this reason every 10 seconds (BATTinterval) the function "checkBATT()" is called and in case of low voltage the buzzer will inform you with 6 short beeps in a second. Do not wait too long to switch off, and recharge soon!
It is very IMPORTANT you remember to make at least one HOLE in the box to let air passing through for sensor pressure changes. I made two holes as you see in the picture: one is for listen buzzer beeps and one is for seeing the charging status led when connected to micro USB cable and charger. Ah yes, it is another hole for the micro USB too. With holes the Variometer is not waterproof anymore...
The green cord is to safely hook it somewhere on board: you do not want to loose it, absolutely!
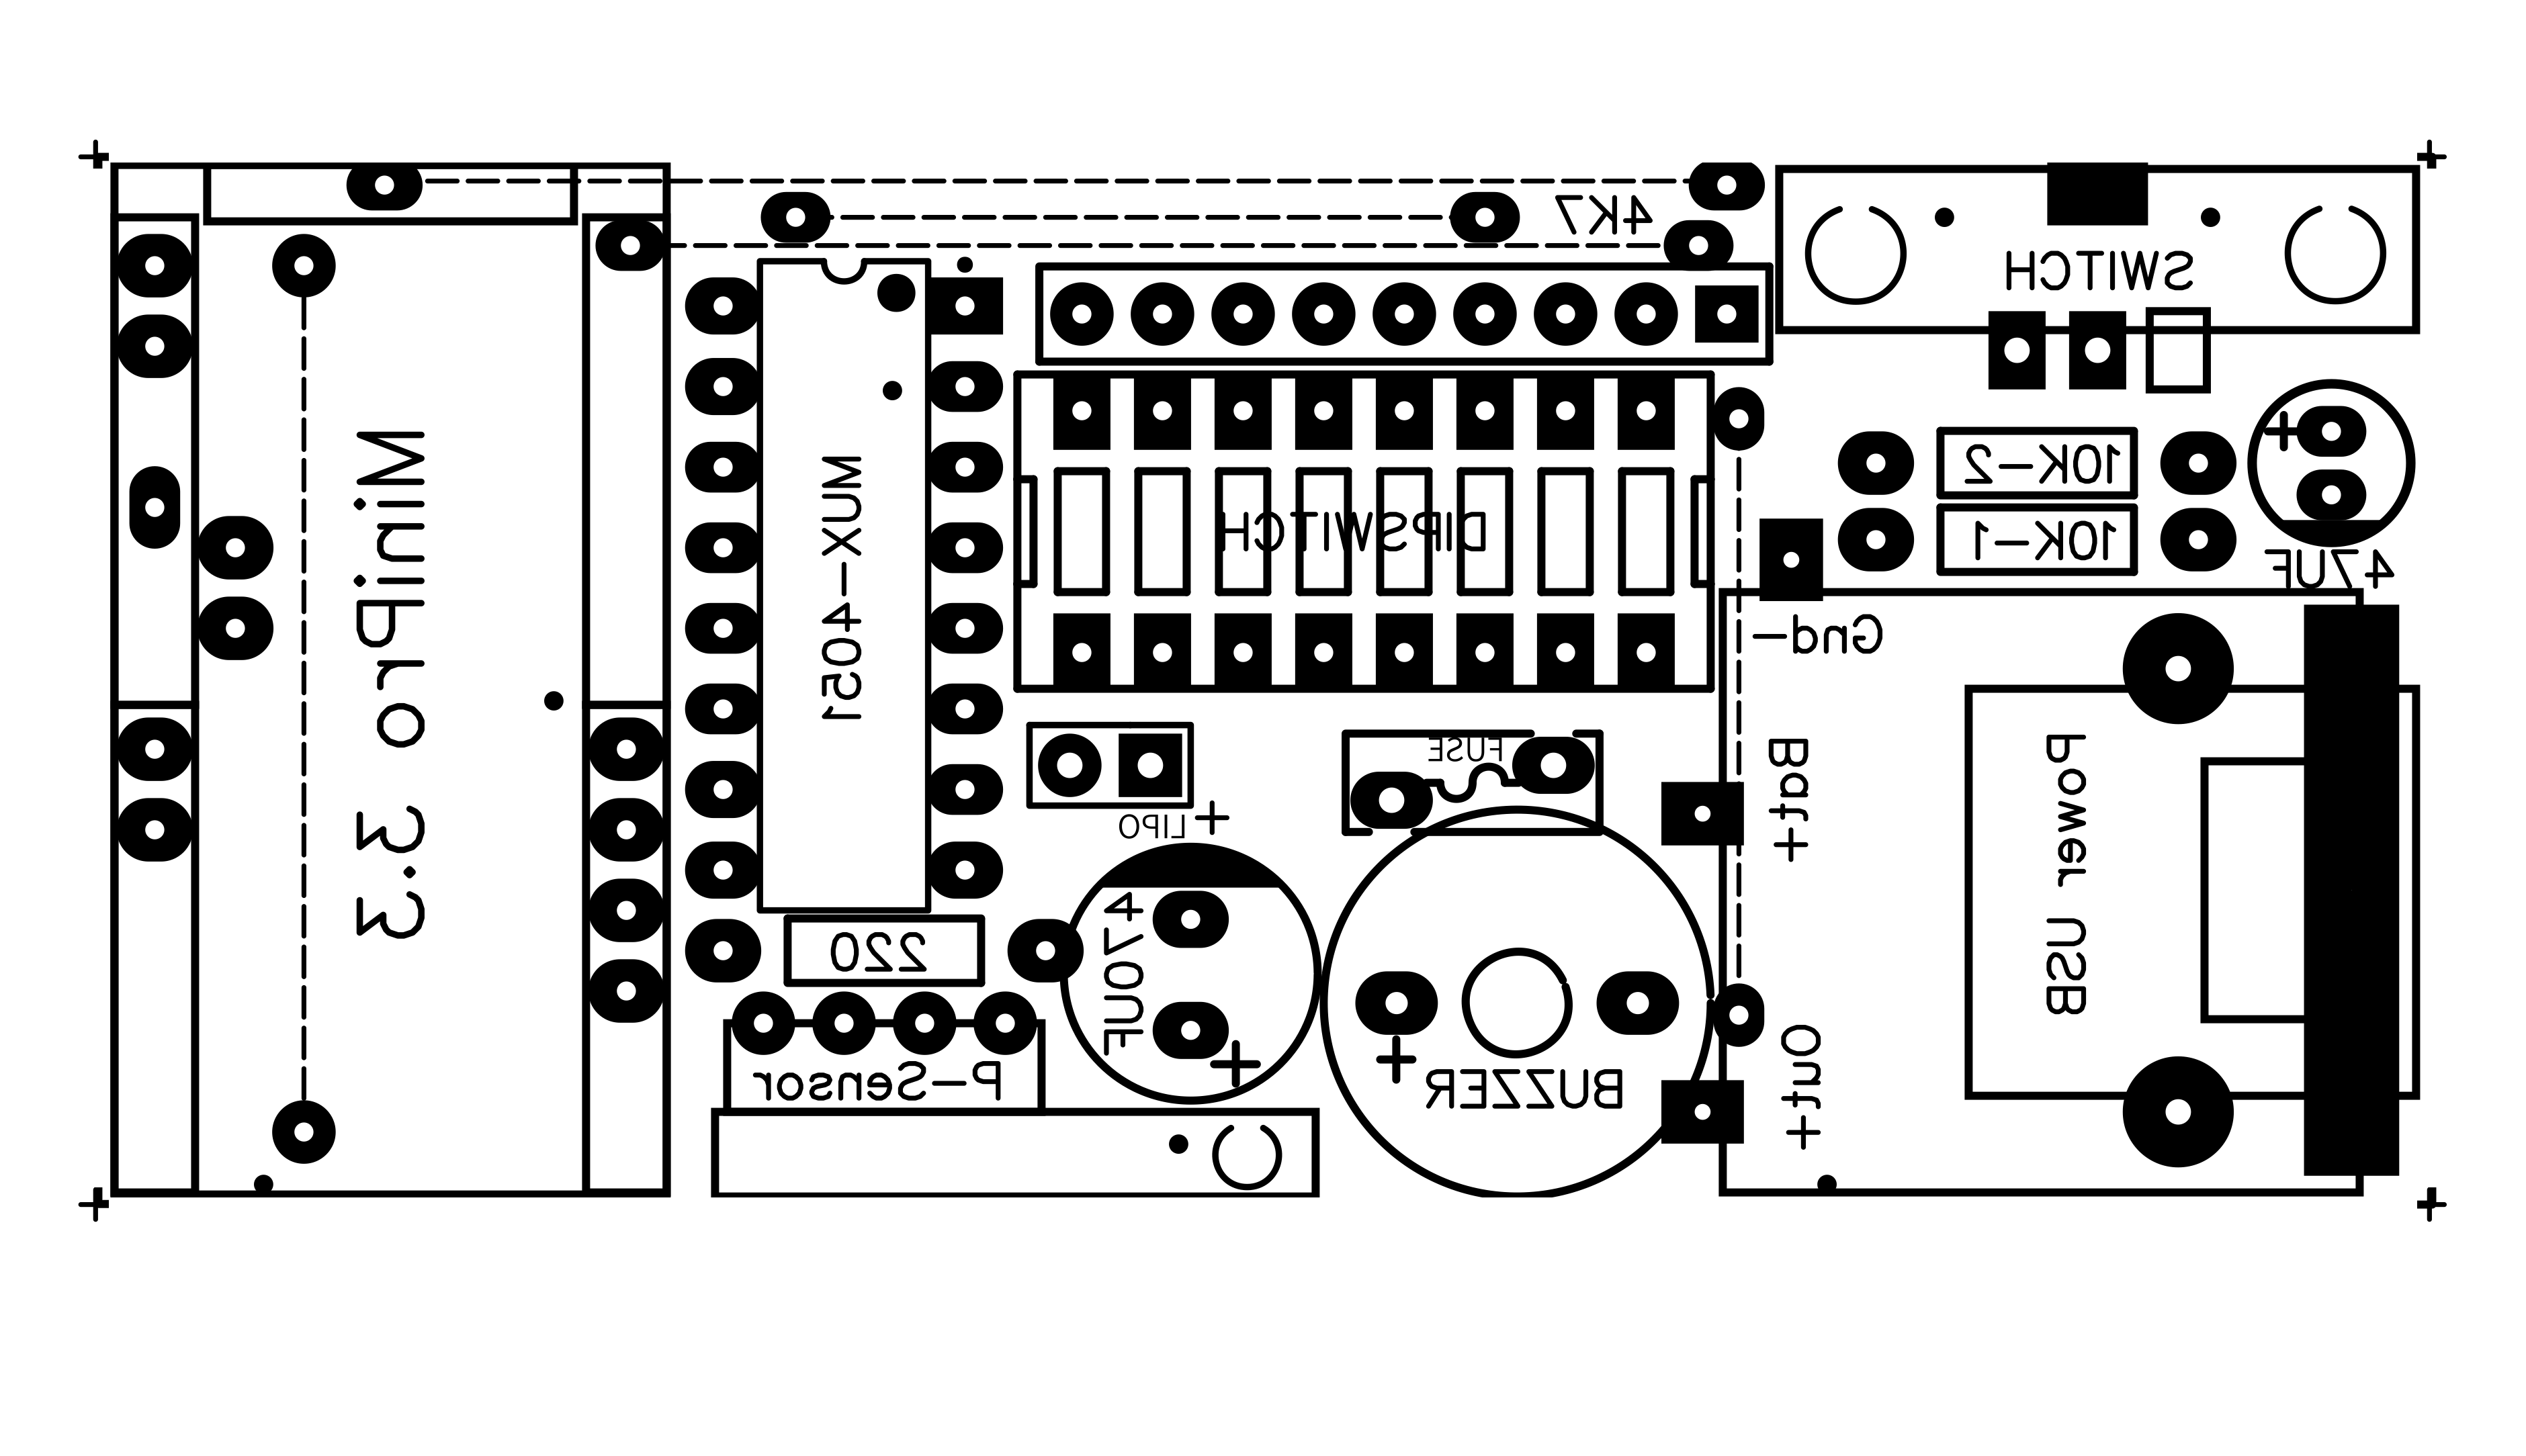
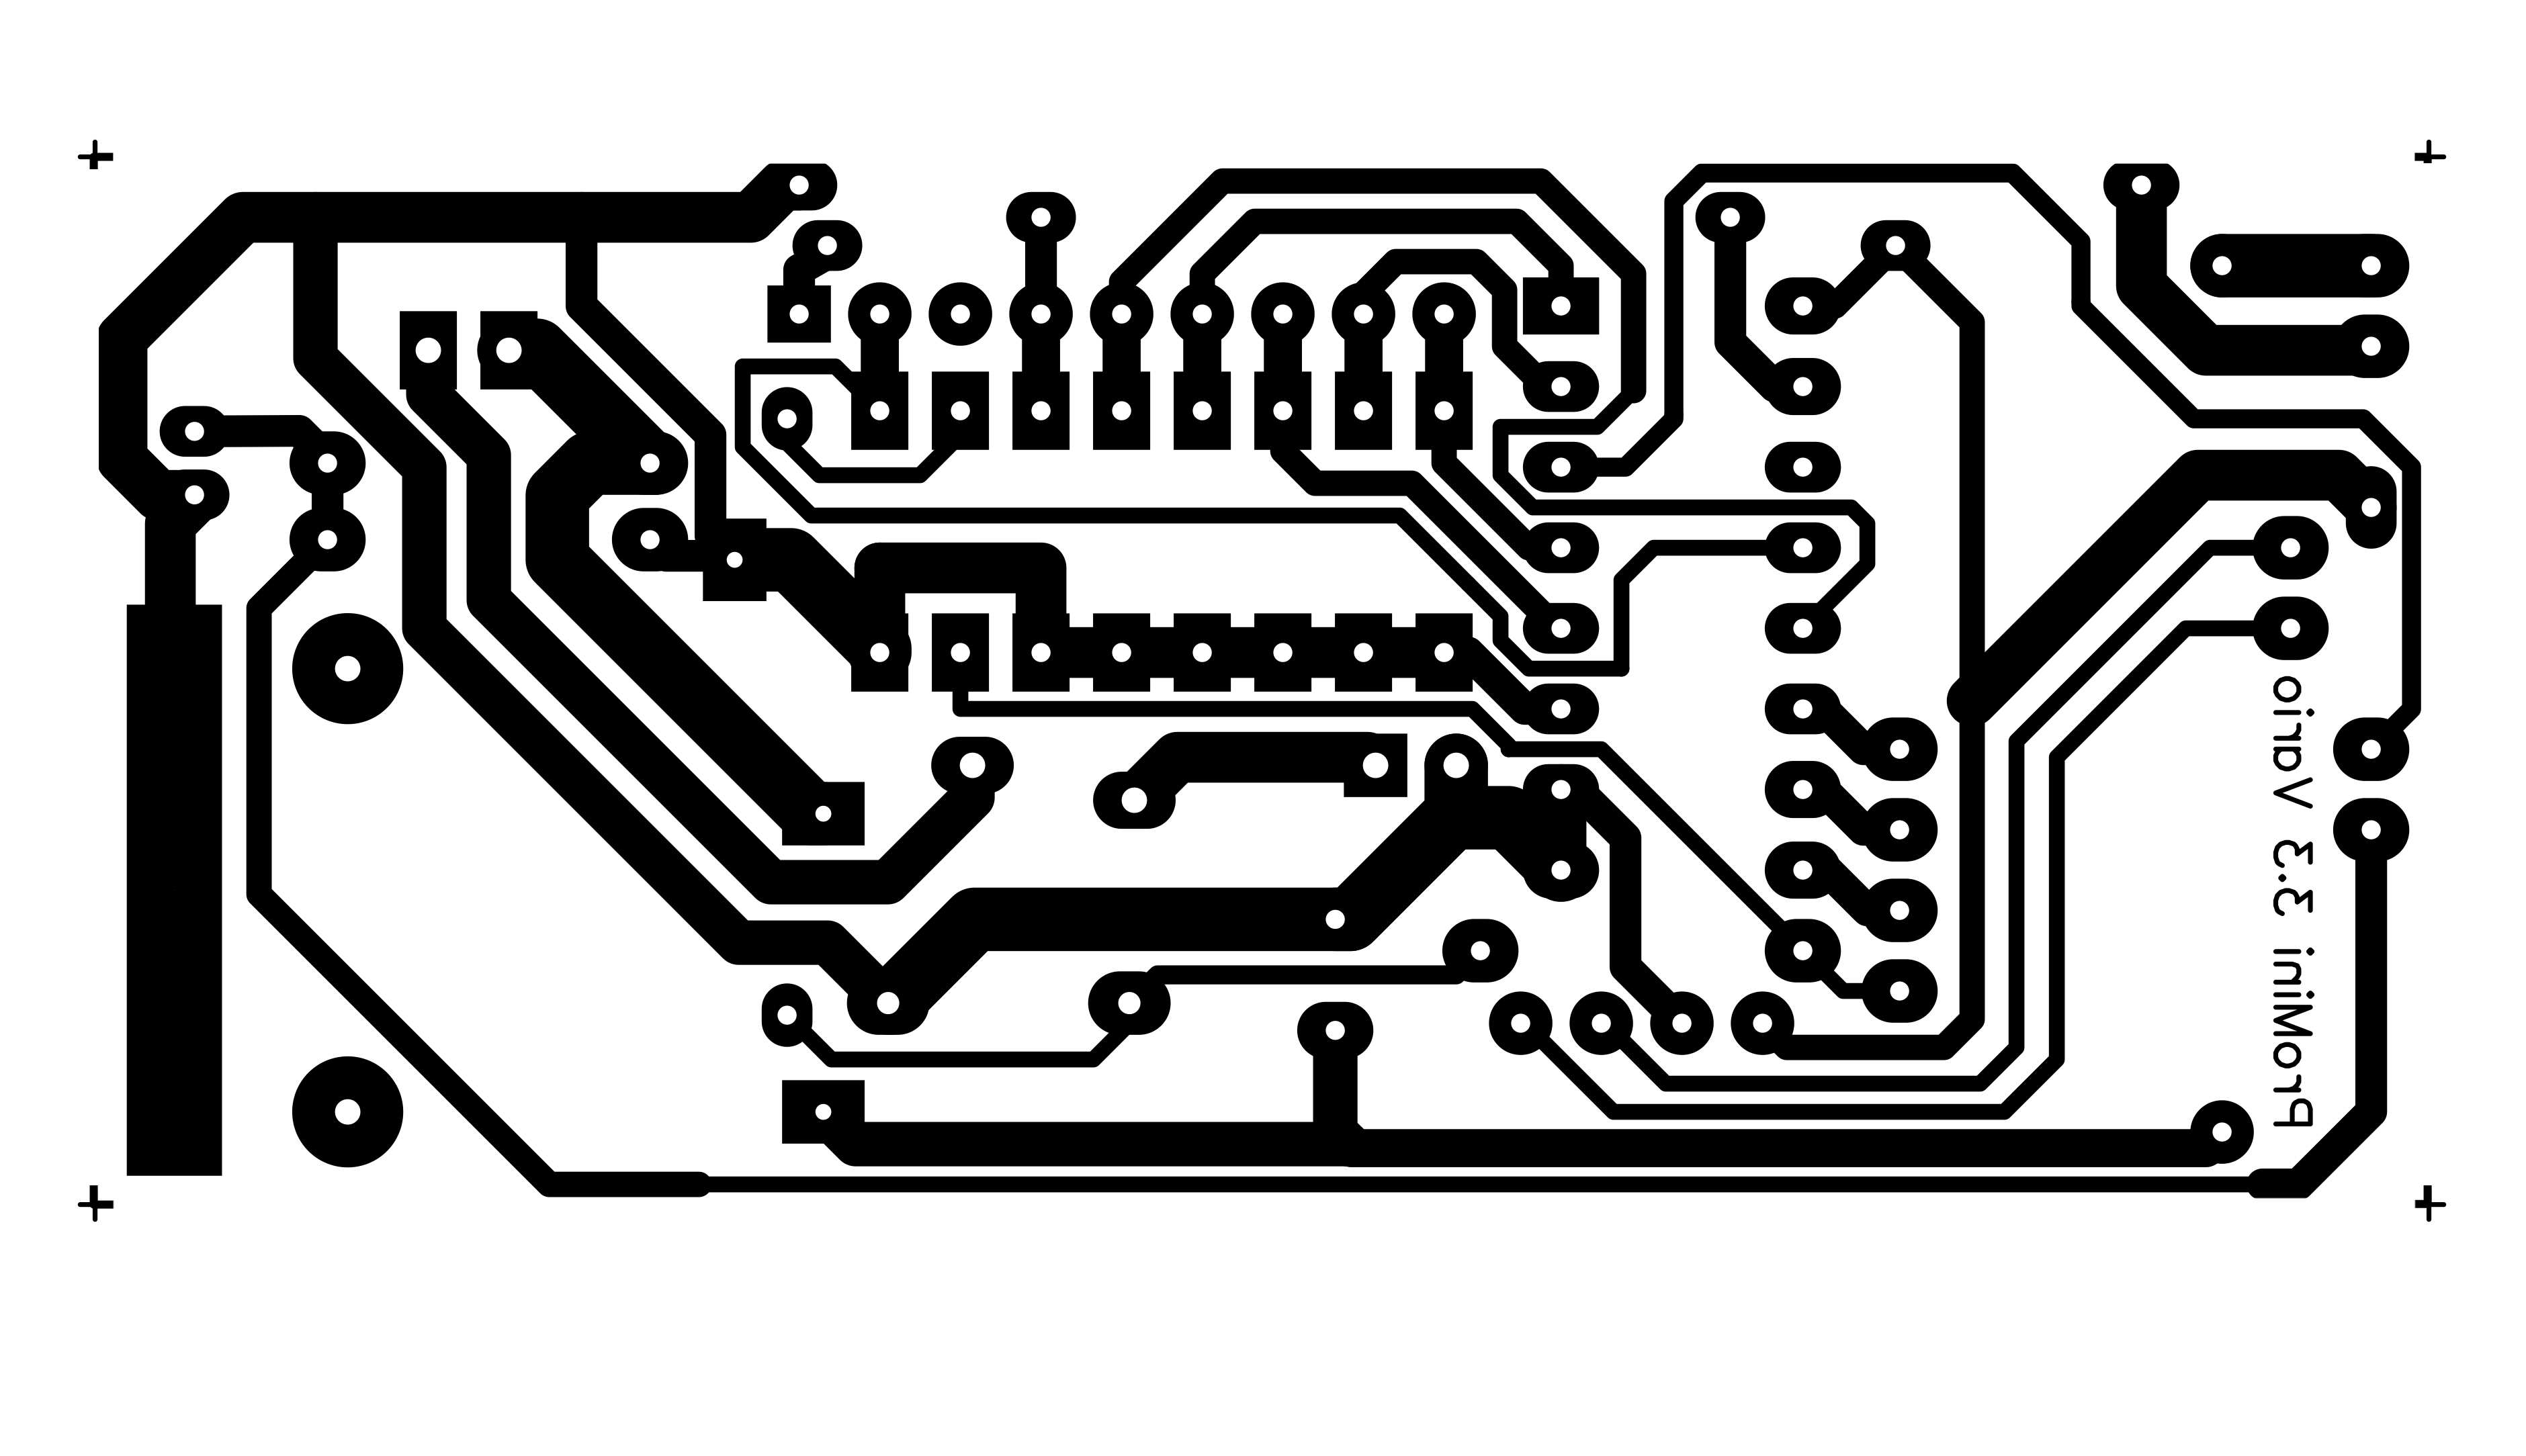
Is used a single face PCB for that reason I had to include a few wire jumpers (the dotted line ones) to solve routes for whole circuit. Follows here the components face but below you have both files, components and solder faces, mirrored, for downloading and printing by the way of a laser printer on "yellow" or "blue" sheets. I used the yellow ones but they say the blue are better (the price is higher). When printing remember to disable toner saving settings, use instead 1200 dpi resolution to have real deep black result. The toner transfer process from magic sheets to PCB is made by the use of an hot iron... Printing both PCB faces makes the project "professional".
Are used a dozen of Arduino pins. Soldering the unused pins is unnecessary and not required: let them free. Place the 6 pins female header on the upper face of the Mini Pro to let, if necessary in the future, FTDI interface to be connected for further updates of the software.
The USB step-up power circuit is placed up-side-down. To hold it in place use two strong pins, normal male pins used for Arduino but without the plastic belt, beside the USB connector where is written "Power USB": use the solder to put all together, two pins and USB connector. 3 wires connect Gnd-, Batt+ and Out+ terminals to this circuit.
GY-63 (MS5611) barometric pressure sensor, P-Sensor on the PCB, is enclosed in a small circuit board and Arduino communicates with it by the way of i2c bus. The use is simple, it includes also a temperature sensor I have not used.
The program calls "readPSensor()" function that is the core of the software. What we need is the relative change of altitude, the function reads many times per second and collects in PrexTotal; every half a second (PrexInterval) it calculates the average change of altitude and proceeds with beep-beep or long beeeeeeep considering dipswitch settings. This simple way for filtering data is good enough; I tried the interesting Kalman filtering way, and also the complicate Madgwick and Mahony filtering algorithms without significantly benefits for this project purpose.
Updates / Tips:- 03.08.2020 for a different sinking sound you could modify code line number 125 as "NewTone (buzzerPin, 200, 10000);"
- 04.08.2020 suggested dip-switch settings: 1=off, 2=on, 3=on, 4=on, 5=off, 6=off, 7=on, 8=off;(volume high, sink -3m/sec, beep +1Hz, sensitivity +0.2m/sec)
- 22.12.2020 try this link for MS5611 library information: https://github.com/jarzebski/Arduino-MS5611
- 24.12.2020 about sounds I used NewTone library v1.0 01/20/2013: https://bitbucket.org/teckel12/arduino-new-tone/wiki/Home
- 27.01.2022 added Gerber PCB .zip file in download section. Before using it check if it fits the requirements of the production company;
- 14.04.2025 I made a new variometer project you may have a look at this link!
Thats all. I really enjoyed with this project! Do it too! :-)
Marco Zonca


_3u05Tpwasz.png?auto=compress%2Cformat&w=40&h=40&fit=fillmax&bg=fff&dpr=2)
Comments
Please log in or sign up to comment.