


Hardware components | ||||||
 |
| × | 1 | |||
Software apps and online services | ||||||
 |
| |||||
You can buy the Elegoo kit https://amzn.to/3EfrVnO on Amazon and apply this code: MD9GXXO9. Valid until 15 September 2021 (23:59).
IntroductionThis is a ELEGOO sponsored project. I was thinking how to use the Most Complete Starter Kit by ELEGOO, to create a very original and simple project.
In this experience we will try to use a keypad in a simple project. I think that component is very useful also for many other projects.
The project is the ELEGOO Keypad Lock, Arduino UNO based. In this project I used "The most complete Starter Kit UNO R3 Project" by ELEGOO. This is a very complete kit, with almost all the sensors and components available on the market and dedicated to Arduino UNO. Feel free to download the manual from this page.
In this project I will use the Arduino UNO board, the ELEGOO keypad, the breadboard, the resistors and leds, the piezo buzz speaker. As you can see, the hardware project it's really simple. In the code there are some good tips like the millis() function and the servo.h library. A possible future upgrade for this solution, is to use the electro magnet component. In this way will be possible substitute the servo motor with an electro magnet to open/close the door.
In my opinion, this is a great project to improve the competencies on Arduino UNO programming and find out how it works the keypad matrix concept.
How to workAfter the switching on the power board, the Arduino UNO starts to flash the red led each second. When you try to push a key on the keypad, the piezo play a sound. If you digit the right code, the servo "open the door", the speaker play a melody, and the green led starts blinking. If you want "close the door" and move the servo motor in the first position, you can digit '*' or '#' on the keyboard, to clear the previous code attempt, and close the door by the servo motor. It this way the loop starts from the beginning, and the only way to open the door is to digit the right code.
FINE TUNING
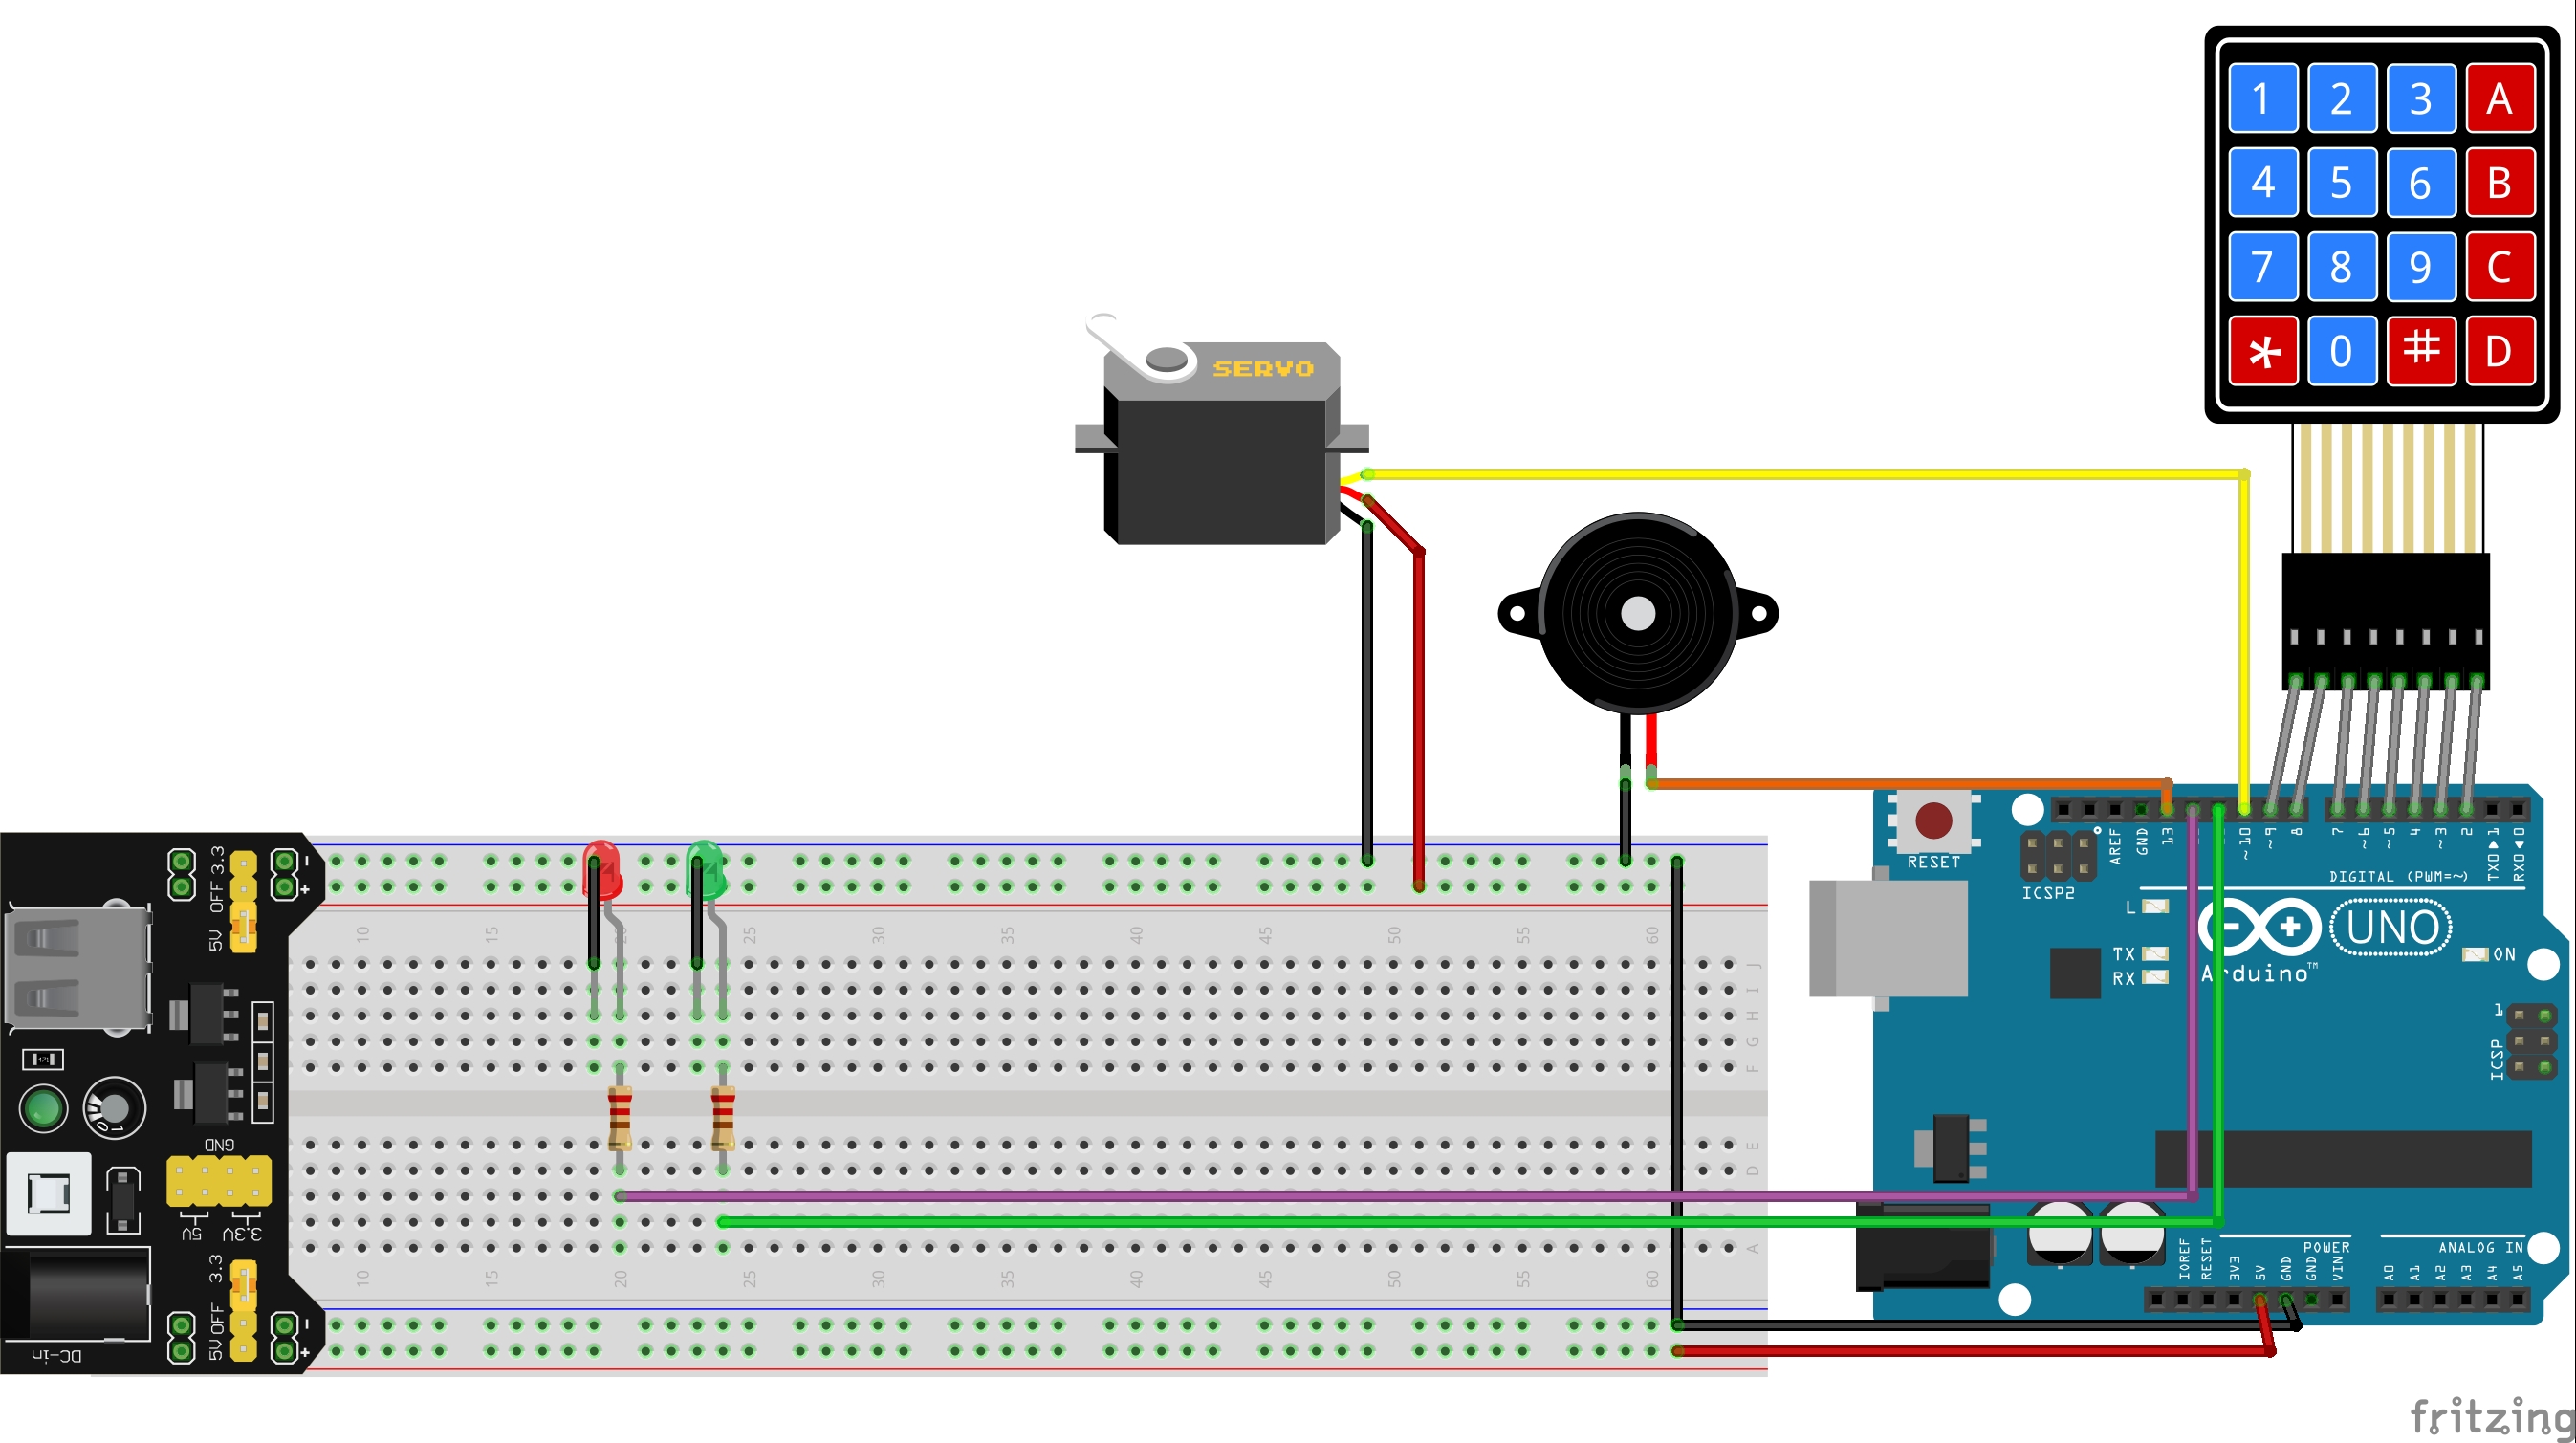
You can change the following variable to improve the performance and customize the experience:- closeServo and openServo to Adjust the servo motor fine movement- password to set the password- note to change the base musicThe hardware project is very simple. You can follow the Fritzing scheme. All the components involved in this project, are available in "The most complete Starter Kit UNO R3 Project" by ELEGOO. (https://amzn.to/3ByXEOK)
The list of material
Like I say before, I used only the ELEGOO kit for this project. This is the list of material:
Connect all the components like in figure:
For the keypad you have to follow the simple role. Start to connect the keypad first pin from the left, with the Arduino pin number 9. Follow the simple order from left to right until the Arduino pin number 2.
This is the electronic scheme for the keypad. You can see the switch and the connections. This is the standard for all the keyboard and keypad components. By reading the single pins you can see which key is pressed.
The softwareFor the software you can refer to the code in this article. No external library or external contribute are requests. The only two library in the code are from official Arduino repo. This includes Keypad.h and Servo.h library.
#include <Keypad.h>
#include <Servo.h>
Pay attention in the Password Manager Section.
// PASSWORD MANAGER
char* password = "455669AA";  // change the password here, just pick any numbers/letters
int lengthpwd = 8; // change the length of the password
int carriage = 0;
int attempt = 0;
And feel free to change the fine movement of the servo motor
int closeServo = 125; // Adjust the fine movement
int openServo = 20; // Adjust the fine movement
This is the millis() function to blink the red led without blocking the loop function.
if (currentMillis - previousMillis >= interval) {
// save the last time you blinked the LED
previousMillis = currentMillis;
// if the LED is off turn it on and vice-versa:
if (ledState == LOW) {
ledState = HIGH;
} else {
ledState = LOW;
}
The result is a protoboard with 2 leds and a speaker. On the protoboard you can connect the Power module by ELEGOO and give current to all the components: the servo, the Arduino UNO board, the leds and the piezo. When start the loop, the servo is closed, after the right code the servo move to 90 degree and "open the door".
The red led blink each second and the speaker sound when you press the keyboard and when you move the servo motor typing the right code on the keypad. After the opening, the green led blink until the door still open. If you use the "#" or "*" key, you can reset the code and close the door moving the servo motor.


Comments
Please log in or sign up to comment.