Most cars you drive today will have radio controls on the steering wheel. The added safety of keeping both hands on the wheel as often as possible can’t be overstated. Since one of my vehicles didn’t have that feature I decided to add it. The cost could be less than $20.
http://www.speedlimit88.com/arduino/jeepioneer-radio-control/
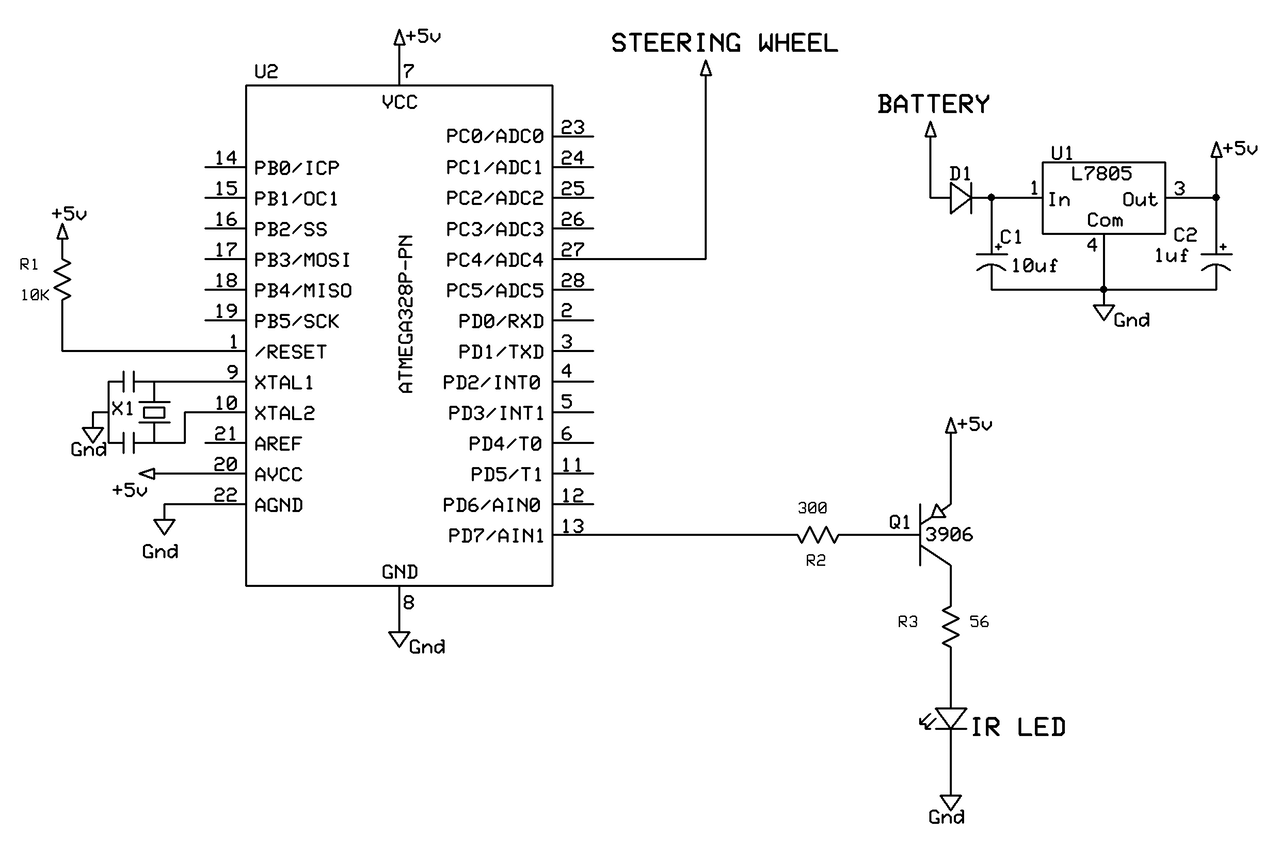
You could build this with an Arduino UNO, some wire, and an IR LED. You could also solder up your own on some protoboard. I used the UNO to test the idea and later I made a board for it to leave in the car. Here is a simple schematic of what is going on.
On the left you see the main processor (U2) with the analog signal coming in from the steering wheel. The voltage regulator (top right) takes in the 12V battery supply from the car and keeps it at 5V for the processor and the IR LED. The regulator is already built into the UNO. The IR LED circuit (bottom right) has a transistor controlled by the processor to activate it. The 56 ohm resistor and 300 ohm resistor are approximate and could be setup differently, but this is what is working for me. I was worried about writing code that might leave the LED on accidentally and burn it out quickly, so that is why I have the 56 ohm.
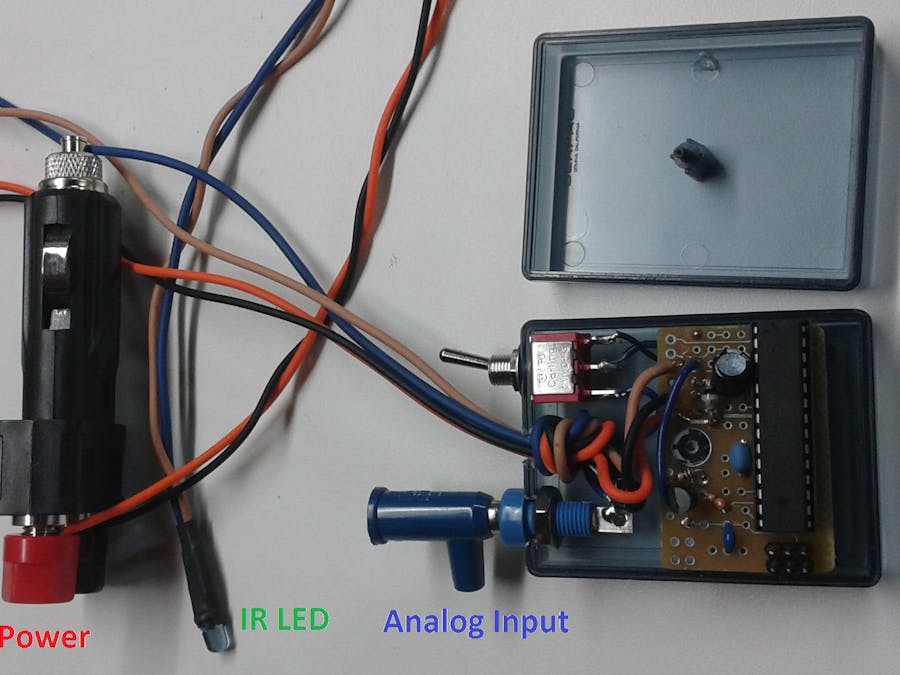
Above is what my setup looks like. The cigarette lighter plug was for quick install testing. It was later hardwired into the fuse panel. The blue banana jack was used so that the box could be unplugged from the car if it needed to be. I added a switch that disconnects the steering wheel input from the device. All of that stuff is optional, so I didn’t include it in my cost. It was all left over equipment I had from other projects anyways. The circuit board that everything is soldered to was nice to have. A couple years ago I had these printed so that I could easily solder small UNO projects like this. It makes the job quicker and lets me fit it in a nice case with room to spare. Again, that was not necessary either.
Installation
Once you have the box built, installing it is easy. On the driver’s side of the dash is the fuse panel. Simply remove the cover, plug the positive power supply into the right side of the 10 amp fuse for the radio (fuse number 21). To do this, take out the fuse, slide the wire into the fuse holder, and then plug the fuse back in. Be careful not to have any stray wires short the fuse. Doing this will make the fuse useless and could later damage wiring in the car if there is a short circuit. For the ground you can wrap the wire around any bolt you can find in the chassis of the car.
Under the radio/HVAC controls, just behind the center console there is a lot of space behind the carpet. I just set the box there. The wires for the LED were tucked under the center console and then ran up near the E-brake handle. That was the only place I could find to install the light that would stay in place without any drilling or cutting.
The wire for the analog input from the steering wheel is all violet in color and is the 6th pin of a 6 pin connector under the steering wheel (2005 year). To make sure you have the right wire you can try measuring the voltage as you press the buttons with key on. Do not tamper with any of the yellow connectors because they are for the air bags! Also, when you install this, it is a good idea to disconnect the battery first.


_ztBMuBhMHo.jpg?auto=compress%2Cformat&w=48&h=48&fit=fill&bg=ffffff)


Comments
Please log in or sign up to comment.