Before energy meters, one of my first hobbies was creating smart switches to automate my room, it all started with a switch activated with an infrared remote control, then controlled from a web page in pure HTML, Ubidots, Home Assistant, and more. However, I always wanted to be able to create one with the same experience of using those commercial switches, where you buy, and install, a mobile app for both Android and iOS, Google Home and Alexa and all without configuring servers, third-party services, or anything like that.
If you are a visual learner I know that a video is worth more than 1000 words, so here is a tutorial video. (I am a Spanish speaker, so please consider turning on English subtitles):
The day has come, and the tool that has allowed me to bring this to reality is the platform developed by Espressif (from the creators of ESP32 and ESP8266), called RainMaker, this is a complete environment designed to create smart devices for our home., from curtains, switches, lamps, fans, thermostats, and much more, and to be able to market them.
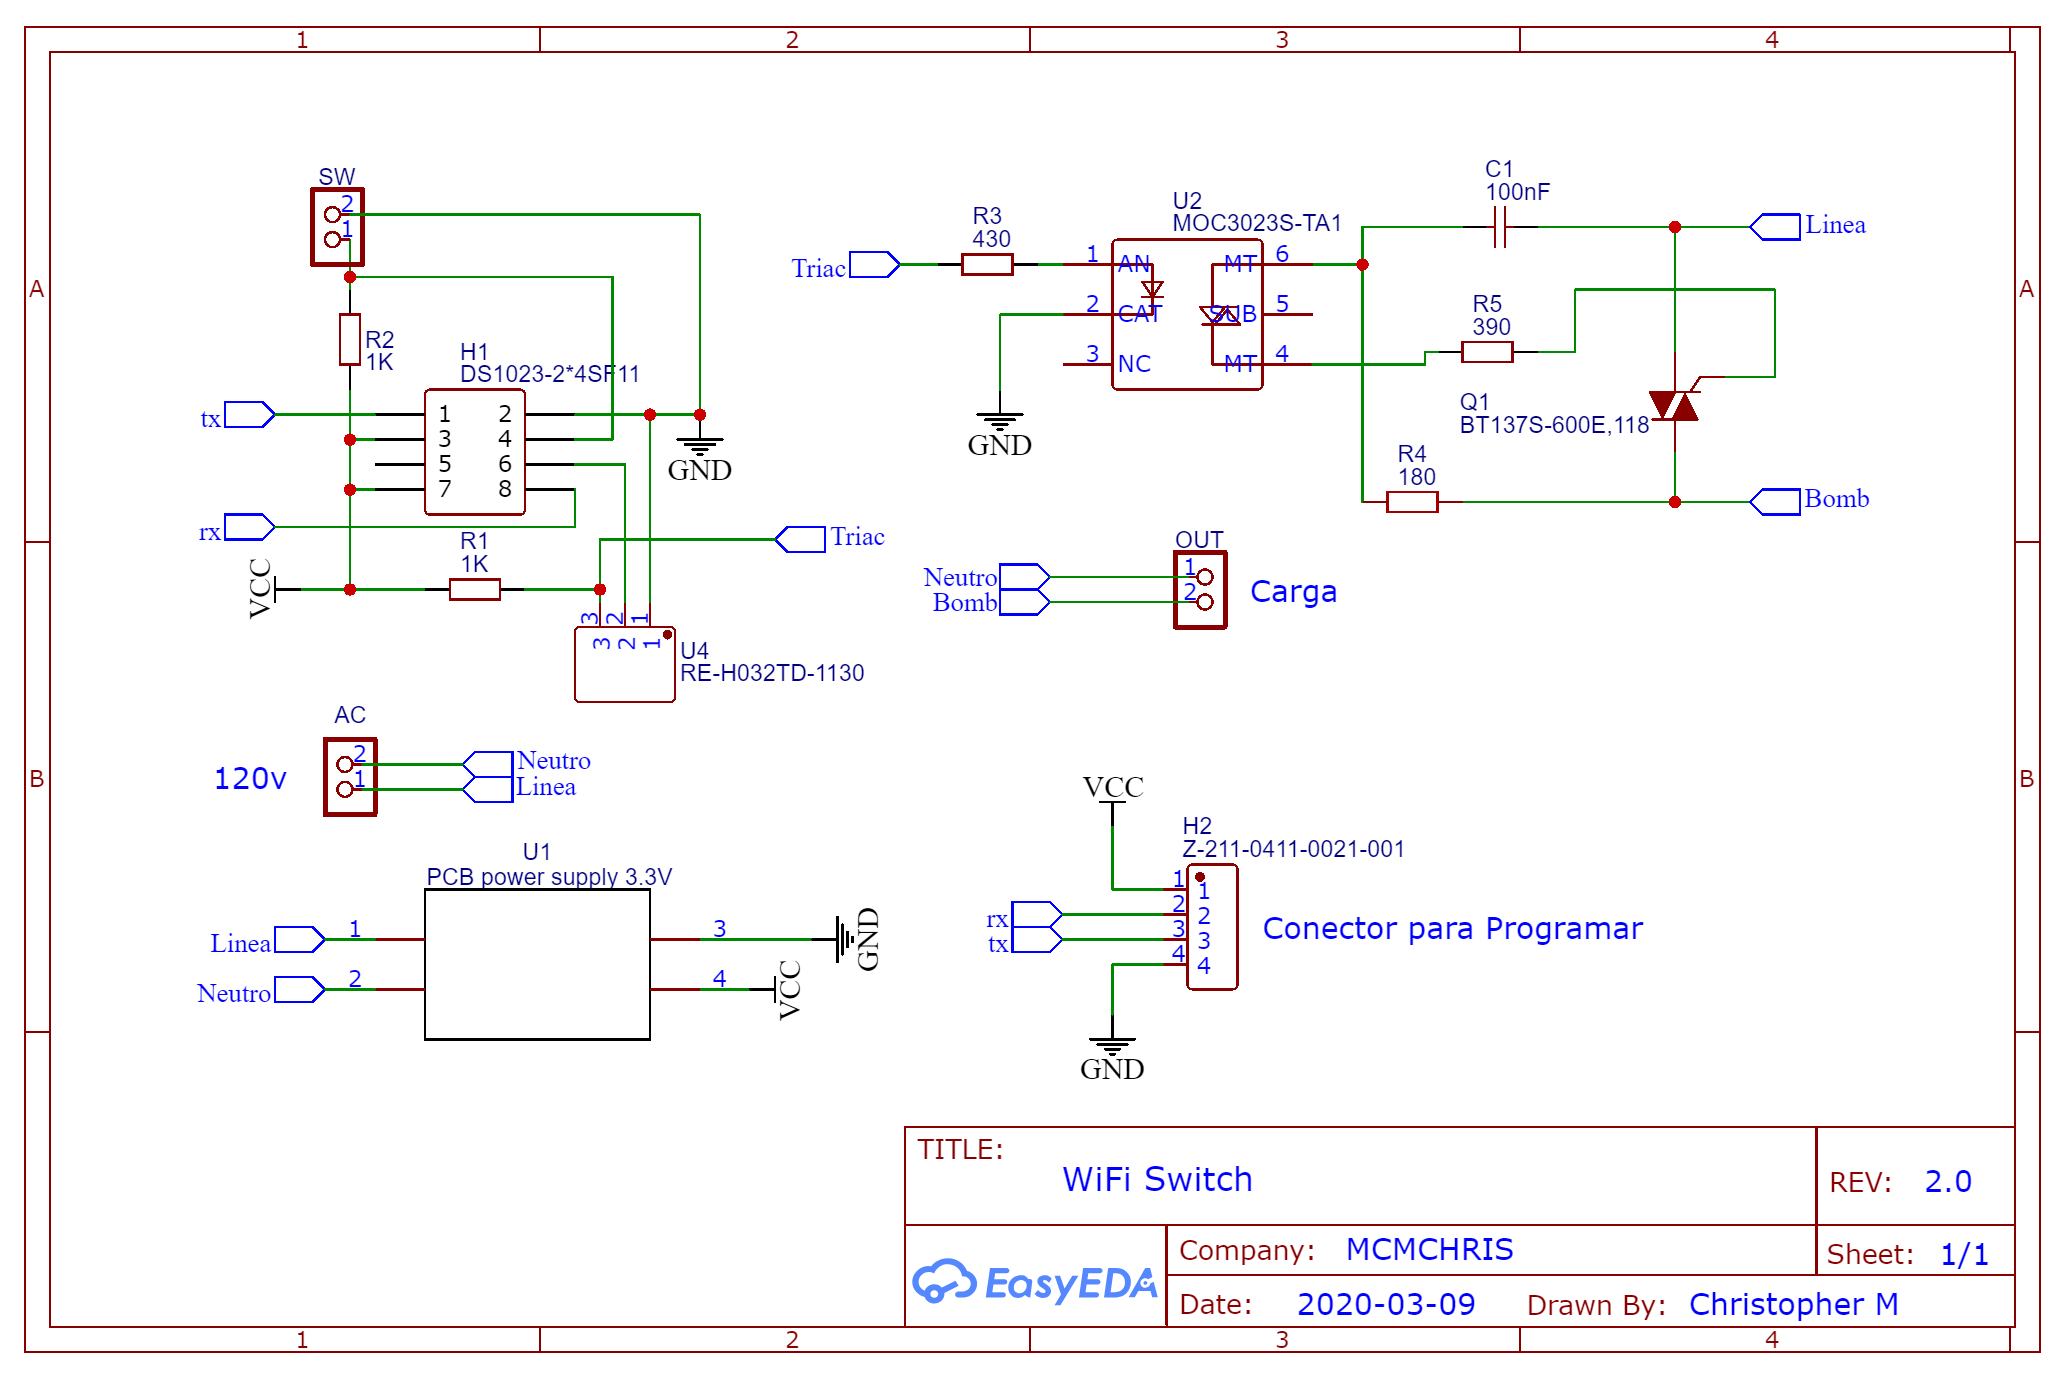
The HardwareIf we look at the diagram from that time, we see that the only thing we need to activate the Triac is to turn on the LED of the optocoupler that we have here.
I designed the circuit in EasyEDA, using the available components (which are many) to also be able to request the assembled board from there, from the surface mount components and those that are not, all that remained to do was solder the white connector and the pins. (for saving).
Note: I ordered my PCBs at JLCPCB PCBA assembly services.
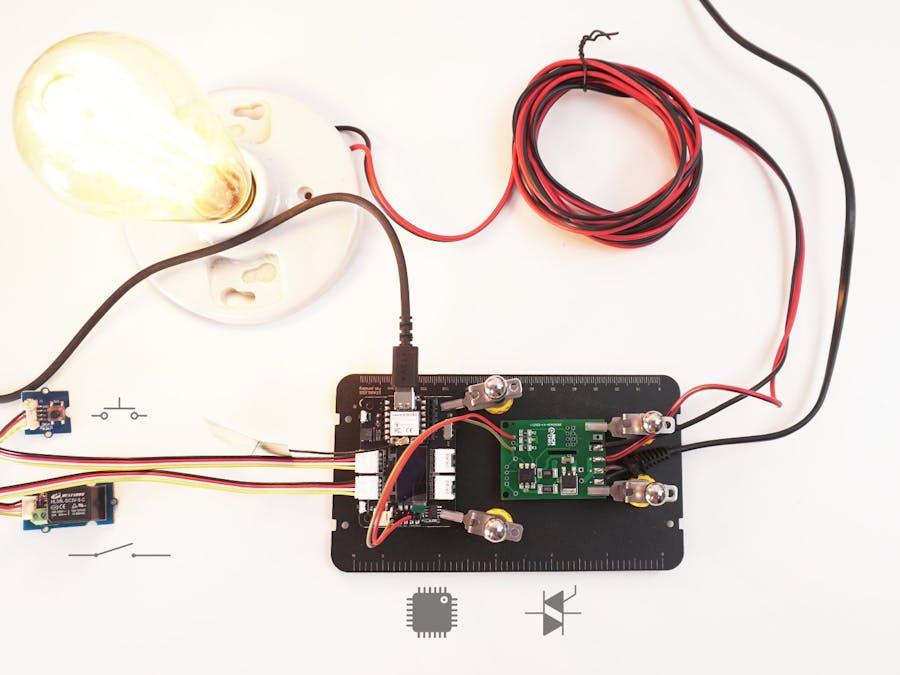
But first of all, we are going to put together the project, for this we will be using some Seeed Studio modules that make prototyping a lot easier, it is a Xiao ESP32C3, and the Xiao expansion board, together with a Relay module, a push button, and the PCB with the triac that I showed you just now. We connect the push button, and the relay.
For the triac part, we are going to quickly solder two cables on the board, the negative one and the one that goes directly to the opto-triac LED, finally, an AC cable and our load output, which in this case it will be a lamp.
Now we are going to install the application with which we will control our switch, we search for RainMaker in Google Play or App Store, we install it, once opened, we create an account, as I already have one, then I log in, as you can see, I do not have any device linked, but we'll do that after the next step.
Let's go to the code now, go to the repository, clone it, and once downloaded, open it in the Arduino IDE.
Here we do not have to be configuring WiFi, or keys, nothing like that, just install the Rainmaker library, compile and upload the code to our ESP32, which in this case is the XIAO ESP32C3 in the list of boards.
Once loaded, a QR code will be printed on the serial monitor.
With the application we installed, we simply click add device and read the code with the camera, it will ask us to define our WiFi network, and then we simply wait for it to complete the bonding process.
That's all people, just turn it on and off from the app and our load will respond accordingly.
We also have a manual control with the button, we give it and invert the state in which the lamp was, a state that is updated automatically in the app as well.
To control with the Google assistant, we just have to go to the Google Home app, set up a new device that works with google, look for the ESP Rainmaker service, log in with the same account we used before and this will automatically include our switch in google devices. Now, with this we can control it with the voice assistant as if it were an intelligent product that we bought in the store.
The same with Alexa, just from the app, activate the ESP Rainmaker skill, and also, the device will appear automatically to be controlled with any Amazon smart speaker
This tool allows us to create smart devices in a professional way, ready to be used by an end customer and without any complexity. This is what is interesting, and it does not compare to any other mobile platform for IoT projects that you and I know of.


Comments
Please log in or sign up to comment.