


Hardware components | ||||||
 |
| × | 1 | |||
 |
| × | 1 | |||
Software apps and online services | ||||||
 |
| |||||
 |
| |||||
 |
| |||||
Embedded Systems and Microprocessors are required courses in the Electrical and Computer Engineering curriculum. In the past this involved lab exercises that require expensive training kits and specialized software IDEs. Today we are much more fortunate to have accessible and affordable hardware kits and free software development tools.
This tutorial will guide you though the use of the MSP432 LaunchPad as a standard platform for teaching and learning microcontroller based embedded systems. Student owned hardware is a possibility thanks to the LaunchPad, which has many features including an integrated debugger with USB connection, prototyping headers both male and female, and free IDE options like Code Composer Studio and Energia.
The LaunchPad can be paired with additional hardware to enhance the learning experience around the MCU peripherals. This tutorial will cover the Educational BoosterPack from Texas Instruments and the Alice EduPad which both can utilize traditional C code examples or Energia Arduino style code examples.
MSP432 HardwareTI Educational BoosterPack
The BOOSTXL-EDUMKII is the ideal hardware for teaching embedded systems when paired with the MSP432 LaunchPad. At $30 it is a compact I/O board for toting around in backpacks and having lab homework be portable for students. The BoosterPack is in a gamepad style form factor which means it is great for projects that require a controller or for creating 2D games on the included color LCD using the sensors and button inputs.
http://energia.nu/guide/edumkii/
http://energia.nu/pin-maps/guide_educationalboosterpackmkii/
http://www.ti.com/tool/boostxl-edumkii
Alice EduPad
The Alice EduPad is the hardware that is supported by the textbook TI MSP432 ARM Programming For Embedded Systems by Muhammad Ali Mazidi, Shujen Chen, Sepehr Naimi, and Misagh Salmanzadeh.
The C code examples for Keil are provided in the text can be found here: http://www.microdigitaled.com/ARM/MSP432_ARM/Code/MSP432_red_codes.htm
Energia code is also provided and we will go through those: http://www.microdigitaled.com/EduPad/TI-ARM-Energia/TI_ARM-Energia.htm
More information about the EduPad is here: http://www.evbplus.com/alice_edupad_arm/index.html
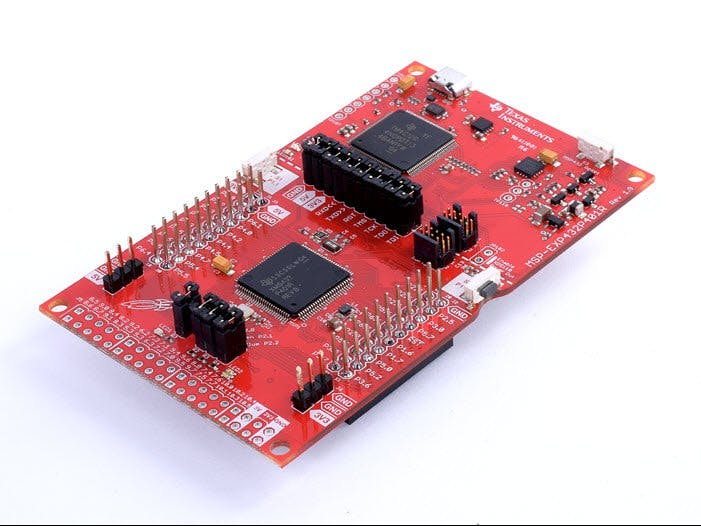
MSP432 LaunchPad
The MSP432 LaunchPad is the ideal choice for academic use for a variety of reasons.
#1 MSP432 provides an entry point for students to learn ARM Cortex M4 architecture. This is an industry skill needed for many types of design positions.
#2 MSP432 provides a low cost kit and no cost software experience to enable students under increasing financial pressures.
#3 MSP432 provides many materials for supporting the education of modern embedded systems including textbooks, SimpleLink Academy, online training, datasheet, application notes, technical reference manuals, reference designs, and much more.
#4 MSP432 provides a professional tool that is closer to what students will use in industry and provides some advanced debugging capabilities and the flexibility of a modular ecosystem.
3 types of MSP432 LaunchPads. Recommended version is the MSP-EXP432P401R for general purpose use. MSP-EXP432P4111 for 2MB flash and LCD controller. MSP-EXP432E401Y for lots of GPIO + CAN + USB peripherals.
http://www.ti.com/tool/msp-exp432p401r
http://www.ti.com/tool/msp-exp432p4111
http://www.ti.com/tool/msp-exp432e401Y
MSP432 Textbookshttps://www.amazon.com/Programmable-Microcontrollers-Applications-MSP43-LaunchPad/dp/1259836193
https://www.amazon.com/Embedded-Instruments-Processor-Synthesis-Lectures/dp/1627054952/
https://www.amazon.com/MSP432-Programming-Embedded-Systems-books/dp/0997925914
https://www.amazon.com/Embedded-Systems-Introduction-MSP432-Microcontroller/dp/1512185671/
https://www.amazon.com/Embedded-Systems-Real-Time-Interfacing-Microcontroller/dp/1514676583/
https://www.amazon.com/Microcontroller-Engineering-MSP432-Fundamentals-Applications/dp/1498772986
MSP432 TrainingMSP LaunchPad Workshop: https://training.ti.com/msp430-workshop-series
SimpleLink Academy for MSP432: http://dev.ti.com/tirex/#/?link=Software%2FSimpleLink%20MSP432P4%20SDK%2FSimpleLink%20Academy
SimpleLink Academy for MSP432 videos: https://training.ti.com/simplelink-academy-msp432-sdk
MSP432 Online training series: https://training.ti.com/msp432-low-power-high-performance-mcus-training-series
MSP432 SoftwareIDEs: Code Composer Studio, CCS Cloud, Energia IDE, Keil IDE, IAR Workbench
Firmware development options: low level C, Energia/Arduino programming, RTOS (TI-RTOS & FreeRTOS), SimpleLink SDK + TI Drivers
Examples of courses using MSP432 LaunchPadVirginia Tech ECE 2534: https://github.com/vt-ece2534-s18/
UC Boulder ECEN2440
Georgia Tech ECE 2881
UF EEL 4939
UT Dallas EE4370
NC State ECE 455
CMU 18-500
NC A&T ECEN 421
Lab ExamplesEducational BoosterPack Lab 1 - CCS Cloud and MSP432 SimpleLink SDK
To start off the workshop we will load up the out of box demo code from Code Composer Studio Cloud. CCS cloud is a full development environment that you can run directly from your browser (Chrome recommended). In the demo code we will control our on board RGB LED on the MSP432 LaunchPad through a Graphical User Interface (GUI) on the PC. CCS Cloud and CCS Desktop are good options for more serious development and are integrated with many resources and documentation from TI for both the hardware and software.
The objective of this first lab is to introduce you to the resources available on TI cloud tools and also help you install the MSP432 LaunchPad drivers via CCS Cloud. You can also manually install the drivers using the instructions on the Energia website or get the drivers when installing the desktop version of Code Composer Studio.
For compiling your code examples you have a choice to use the open source GCC compiler or the TI CCS Compiler which gives you a bit more optimization.
1. Go to dev.ti.com. Click the CCS Cloud box listed under the Applications tab.
2. If you don't have a myTI account already, you can register for one and then sign in. If you do have one, go ahead and sign in and CCS Cloud will load your virtual workspace. Your work will be saved and you can access it whenever you log back in with your TI account. You can also download any of your work to your local machine or upload to GitHub.
3. You should get a work environment to pop up similar to the image below. If so we are doing well.
4. Now we need to get our demo code. We can find demo code in the TI Resource explorer. Resource explorer contains all the released code examples and many other helpful technical resources for all TI embedded processors from microcontrollers to DSPs. Next navigate back to dev.ti.comand click on the Resource Explorer box in the Applications tab. You should arrive to a page like this.
5. We can search for our board by part number by typing "MSP432" and it should come up for us. You can also use the left hand navigation and search by device family. Select MSP-EXP432P401R - Rev 2.x (Red) from the drop down menu.
6. Double check your Package Picker is selecting the latest MSP432 SDK. You can click on the package picker in the upper right square icon next to the home icon. Make sure "SimpleLinke MSP432 SDK" is selected on latest and the related plug-ins. Now you know if you'd like to go back to a previous version of the SDK you can use the Package Picker to customize the versioning.
7. Now in the left hand navigation under the "Software" folder click the "SimpleLink MSP432 SDK..." > "Examples" > "Development Tools" > "MSP-EXP432P401R - Rev 2.x" > "Demos" and click on the "Out of Box Experience" sub folder and the "no RTOS" folder. Then the "CCS Compiler" folder and click one more level to "outOfBox_MSP432P401R" to access the project files. On the right hand side on the top line above "main.c" there is a little cloud icon that says "Import to CCS Cloud" when you hover over it. Click that and it should open the project in your CCS Cloud workspace. As you can see you have many options to use different compilers and to utilize a Real Time Operating System or not.
8. Now in CCS Cloud, make sure you have the "OutOfBox_MSP432P401R" project folder selected on the left hand navigation. You can have main.c open in your program window. Now we are going to upload this to our LaunchPad board.
9. Connect your LaunchPad to the PC with the included USB cable.
10. To run our program on the hardware we are going to click the green play button that says "Run" at the top toolbar. CCS Cloud will now help you install a few items needed to communicate with and flash your TI LaunchPad.
11. You may get a Build dialog to pop up or text may pop up in your console as the code compiles. You should see "build finished" pop up and then a dialog box asking to install the browser extension and TI Cloud Agent. Proceed with the installation of both pieces.
12. After installing both pieces, CCS Cloud needs to restart inside the browser. You can click the refresh button and it should reload the page. Make sure that OutOfBox_MSP432P401R is selected in the left hand navigation as it may have changed on the refresh. You can now click run again.
13. If everything went smoothly you should get a new dialog box indicating it's installing target support for MSP432P401R.
14. Next you may get a dialog about error connecting to the target and a firmware upgrade is required. Proceed with the update. Make sure your LaunchPad is connected to the PC via the USB cable otherwise you may get a different error without the option to update the firmware. If you do, you can refresh the page and repeat the step with the LaunchPad connected.
15. If everything went well, now when you click run you should see the code run and flash to the LaunchPad. You can confirm that the code was written in your output console. Your red LED will be blinking.
16. The out of box demo has two parts. The first part is you can change the speed of the blinking by pressing Button 1 (the left button labeled SW1 or P1.1). You can change the color by pressing Button 2 (the right button labeled SW2 or P1.4).
17. With the LaunchPad still connected to the PC, Click the Connect button. Select the default COM port and click open. You will see the color wheel and sliders which you can manipulate to change the color from the PC. You can also change the value for BPM to change the speed of the blink. Cool!
Make sure to close your connection when done, as we need to free up the serial port for later.
Now you have some experience with using the TI cloud tools. You can use these resources in the future if they suit your needs. As you can see there are other code examples available to explore if you want to use the official SDK, TI-RTOS, or TI provided libraries.
You should also check out the SimpleLink Academy training resources. These will teach you how to use SimpleLink microcontrollers and also learn the basics of how to use Real Time Operating Systems on a SimpleLink MCU.
Another nice benefit of starting in cloud and running the example code is you also now have your drivers which will let you code smoothly in Energia IDE as well. You can manually install your board drivers using the Energia website instructions.
Please note that CCS Cloud (and Code Composer Studio Desktop) will let you code Energia programs. Energia coding does not have to be exclusive to the Energia IDE. To code a new Energia sketch in CCS, go to File > New Energia Sketch...
Educational BoosterPack Lab 2 - TI-RTOS
https://www.hackster.io/measley2/rtos-games-for-embedded-systems-and-iot-courses-0e0493
Educational BoosterPack Lab 3 - Energia IDE
Run the Custom BP test code below
You may need to have the MSP432 LaunchPad drivers installed for Windows machines. http://energia.nu/files/xds110_drivers.zip
This step is not required when using Code Composer Studio or CCS Cloud.
EduPad Lab 1 - Energia IDE
We will run through these examples.
/* Program to control LEDs using push-button switches on Wytec EduBase/EduPad board
* with Tiva TM4C123/MSP432.
* The LEDs are connected to pins 3, 4, 19, 38 and the push-button switches are
* connected to pins 23, 24, 25, 26.
*
* Energia 1.6.10E18
*/
const int LED[] = {3, 4, 19, 38};
const int SW[] = {23, 24, 25, 26};
void setup()
{
 // configure input output pins for switches and LEDs
 for (int i = 0; i < 4; i++)
 {
   pinMode(LED[i], OUTPUT);
   pinMode(SW[i], INPUT);
 }
}
void loop()
{
 // read switches and use the values to set LEDs
 for (int i = 0; i < 4; i++)
 {
   digitalWrite(LED[i], digitalRead(SW[i]));
 }
}
/* Program to display a counter counting from 0 to 3 on seven-segment display of
* Wytec EduPad board with Tiva TM4C123/MSP432.
* The seven-segment display is connected to an 8-bit shift registers on SPI.
* The shift register is used to select the segments of the display.
* The seven-segment display has common cathode. The segment select is high active.
*
* Energia 1.6.10E18
*/
#include <SPI.h>
const int slaveSelect = 34;
void setup() {
   // set the slaveSelectPin as an output:
   pinMode (slaveSelect, OUTPUT);
   // initialize SPI:
   SPI.begin();
}
void loop() {
   const static unsigned char digitPattern[] = {0x3F, 0x06, 0x5B, 0x4F};
   static int i;
   // assert SS low to the shift register of seven-segment LED
   digitalWrite(slaveSelect, LOW);
   // send the digit pattern SPI
   SPI.transfer(~digitPattern[i++ % 3]);
   // deassert SS
   digitalWrite(slaveSelect, HIGH);
   delay(1000);
}
/* Program to flash "HELLO" on LCD on Wytec EduBase/EduPad board
* with Tiva TM4C123/MSP432.
* The LCD controller is connected parallel in 4-bit data mode.
* The connections are:
* Pin 18 - Register select
* Pin 35 - Enable
* Pins 8, 13, 12, 11 - data 7-4
* Make sure the LCD interface selection jumper is set at "parallel".
*
* Energia 1.6.10E18
*/
const int REG_SEL = 18;
const int ENABLE = 35;
const int D4 = 11;
const int D5 = 12;
const int D6 = 13;
const int D7 = 8;
const int dataBus[] = {D4, D5, D6, D7};
const int RS = 1;
void setup()
{
   LCD_init();
}
void loop()
{
   // Write "HELLO" on LCD
   LCD_data('H');
   LCD_data('E');
   LCD_data('L');
   LCD_data('L');
   LCD_data('O');
   delay(1000);
   // clear LCD display
   LCD_command(1);
   delay(1000);
}
void LCD_init(void)
{
   pinMode (REG_SEL, OUTPUT);
   pinMode (ENABLE, OUTPUT);
   digitalWrite(ENABLE, LOW);  // Enable idles low
   pinMode (D4, OUTPUT);
   pinMode (D5, OUTPUT);
   pinMode (D6, OUTPUT);
   pinMode (D7, OUTPUT);
   // LCD controller reset sequence
   delay(20);
   LCD_nibble_write(0x30, 0);
   delay(5);
   LCD_nibble_write(0x30, 0);
   delay(1);
   LCD_nibble_write(0x30, 0);
   delay(1);
   LCD_nibble_write(0x20, 0);  // use 4-bit data mode
   delay(1);
   LCD_command(0x28);          // set 4-bit data, 2-line, 5x7 font
   LCD_command(0x06);          // move cursor right
   LCD_command(0x01);          // clear screen, move cursor to home
   LCD_command(0x0F);          // turn on display, cursor blinking
}
// write 4 bits to LCD controller
void LCD_nibble_write(char data, unsigned char select)
{
   digitalWrite(REG_SEL, select ? HIGH : LOW);
   digitalGroupWrite(dataBus, 4, data >> 4);
   digitalWrite(ENABLE, HIGH);
   delayMicroseconds(1);
   digitalWrite(ENABLE, LOW);
}
// write a command to LCD controller
void LCD_command(unsigned char command)
{
   LCD_nibble_write(command & 0xF0, 0);    // upper nibble first
   LCD_nibble_write(command << 4, 0);      // then lower nibble
   if (command < 4)
       delay(2);         // command 1 and 2 needs up to 1.64ms
   else
       delayMicroseconds(40);   // all others 40 us
}
// write a byte of data to LCD controller
// since the connection is 4-bit, it takes two writes for a byte
void LCD_data(char data)
{
   LCD_nibble_write(data & 0xF0, RS);      // upper nibble first
   LCD_nibble_write(data << 4, RS);        // then lower nibble
   delayMicroseconds(40);
}
// write to a group of output pins
void digitalGroupWrite(const int* group, int length, int data)
{
   for (int i = 0; i < length; i++)
       digitalWrite(group[i], data & (1 << i) ? HIGH : LOW);
}
Many instructors still prefer the MSP430 because they believe it offers a simpler architecture for students to learn the fundamentals. The MSP430 LaunchPads (MSP-EXP430FR5994 recommended) provide many of the similar benefits of the MSP432 hardware and has hardware compatibility with the Education BoosterPack and the EduPad. The MSP430 is a mature architecture with vast documentation and training materials available and still extremely viable for low power draw applications. Either microcontroller will make a great learning platform for embedded systems.


Comments
Please log in or sign up to comment.