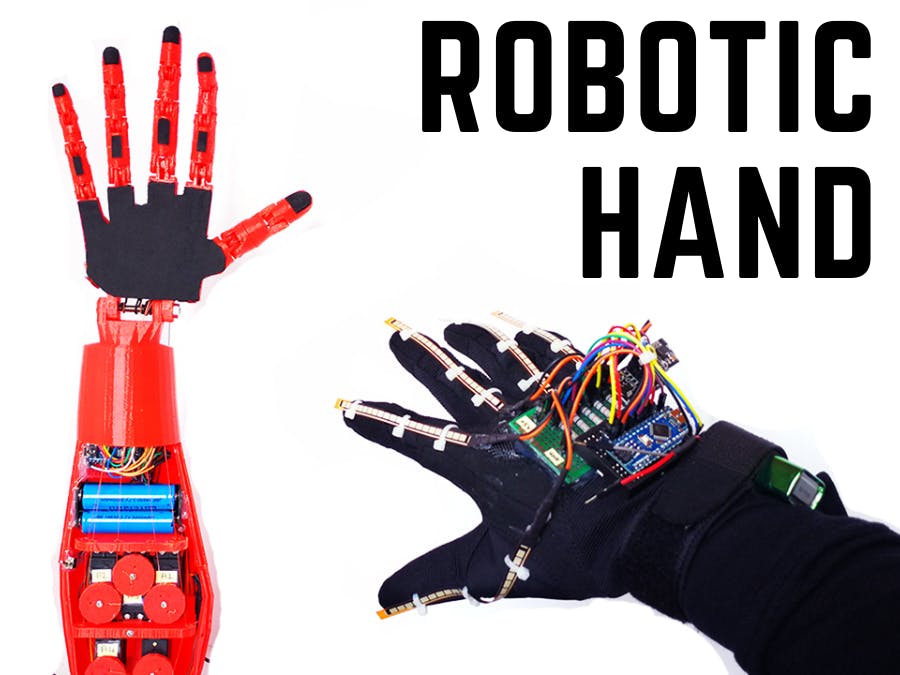
In this project; 3D robot hand assembly, servo control, flex sensor control, wireless control with nRF24L01, Arduino receiver and transmitter source code are available. In short, in this project we will learn how to control a robot hand with a wireless glove.
3D Models of the Hand and ForearmThe hand is part of an open-source project called InMoov. It's a 3D-printable robot, and this is just the hand and forearm assembly. For more information, visit the official InMoov website.
Thanks to InMoov -- http://inmoov.fr/ - http://inmoov.fr/hand-and-forarm/
Assembly of PartsAssembly of robotic arm parts is very detailed and complex, so you can visit the "Assembly Sketches" and "Assembly Help" pages in the InMoov website for more details on assembly. it is explained very thoroughly on the InMoov website. Or you can watch the video I shared.
When assembling the fingers, make sure the parts are oriented correctly before gluing. Keep all servo motors at 10 or 170 degrees before attaching the servo pulleys to the servo motors. When mounting the servo pulleys, keep fingers in the closed or opened position (according to your servo angles). Then wrap around the servo pulley until the braid wires or strings becomes stretched.
Connections of Hand (Receiver)At this point, the servos should already be mounted into the forearm. To connect them to the power supply and Arduino, you can use a small breadboard.
- Remember to connect the negative on the breadboard to the Arduino's GND. All the GNDs in a circuit need to be connected for it to work.
- I recommend using the power adapter for the nRF24L01+ module. Otherwise, communication may be broken due to insufficient current.
- If you encounter the these problems: vibration in servo motors, servo motors not working, communication breakdown and in similar situations, supply your Arduino board with external power (like USB).
- If you used different pins than pins shown in below, change them in codes.
Connections of the Servo Motors:
- Servo-1 connect to the analog 01 (A1) of the Arduino.
- Servo-2 connect to the analog 02 (A2) of the Arduino.
- Servo-3 connect to the analog 03 (A3) of the Arduino.
- Servo-4 connect to the analog 04 (A4) of the Arduino.
- Servo-5 connect to the analog 05 (A5) of the Arduino.
Connections of the nRF24L01 Module:
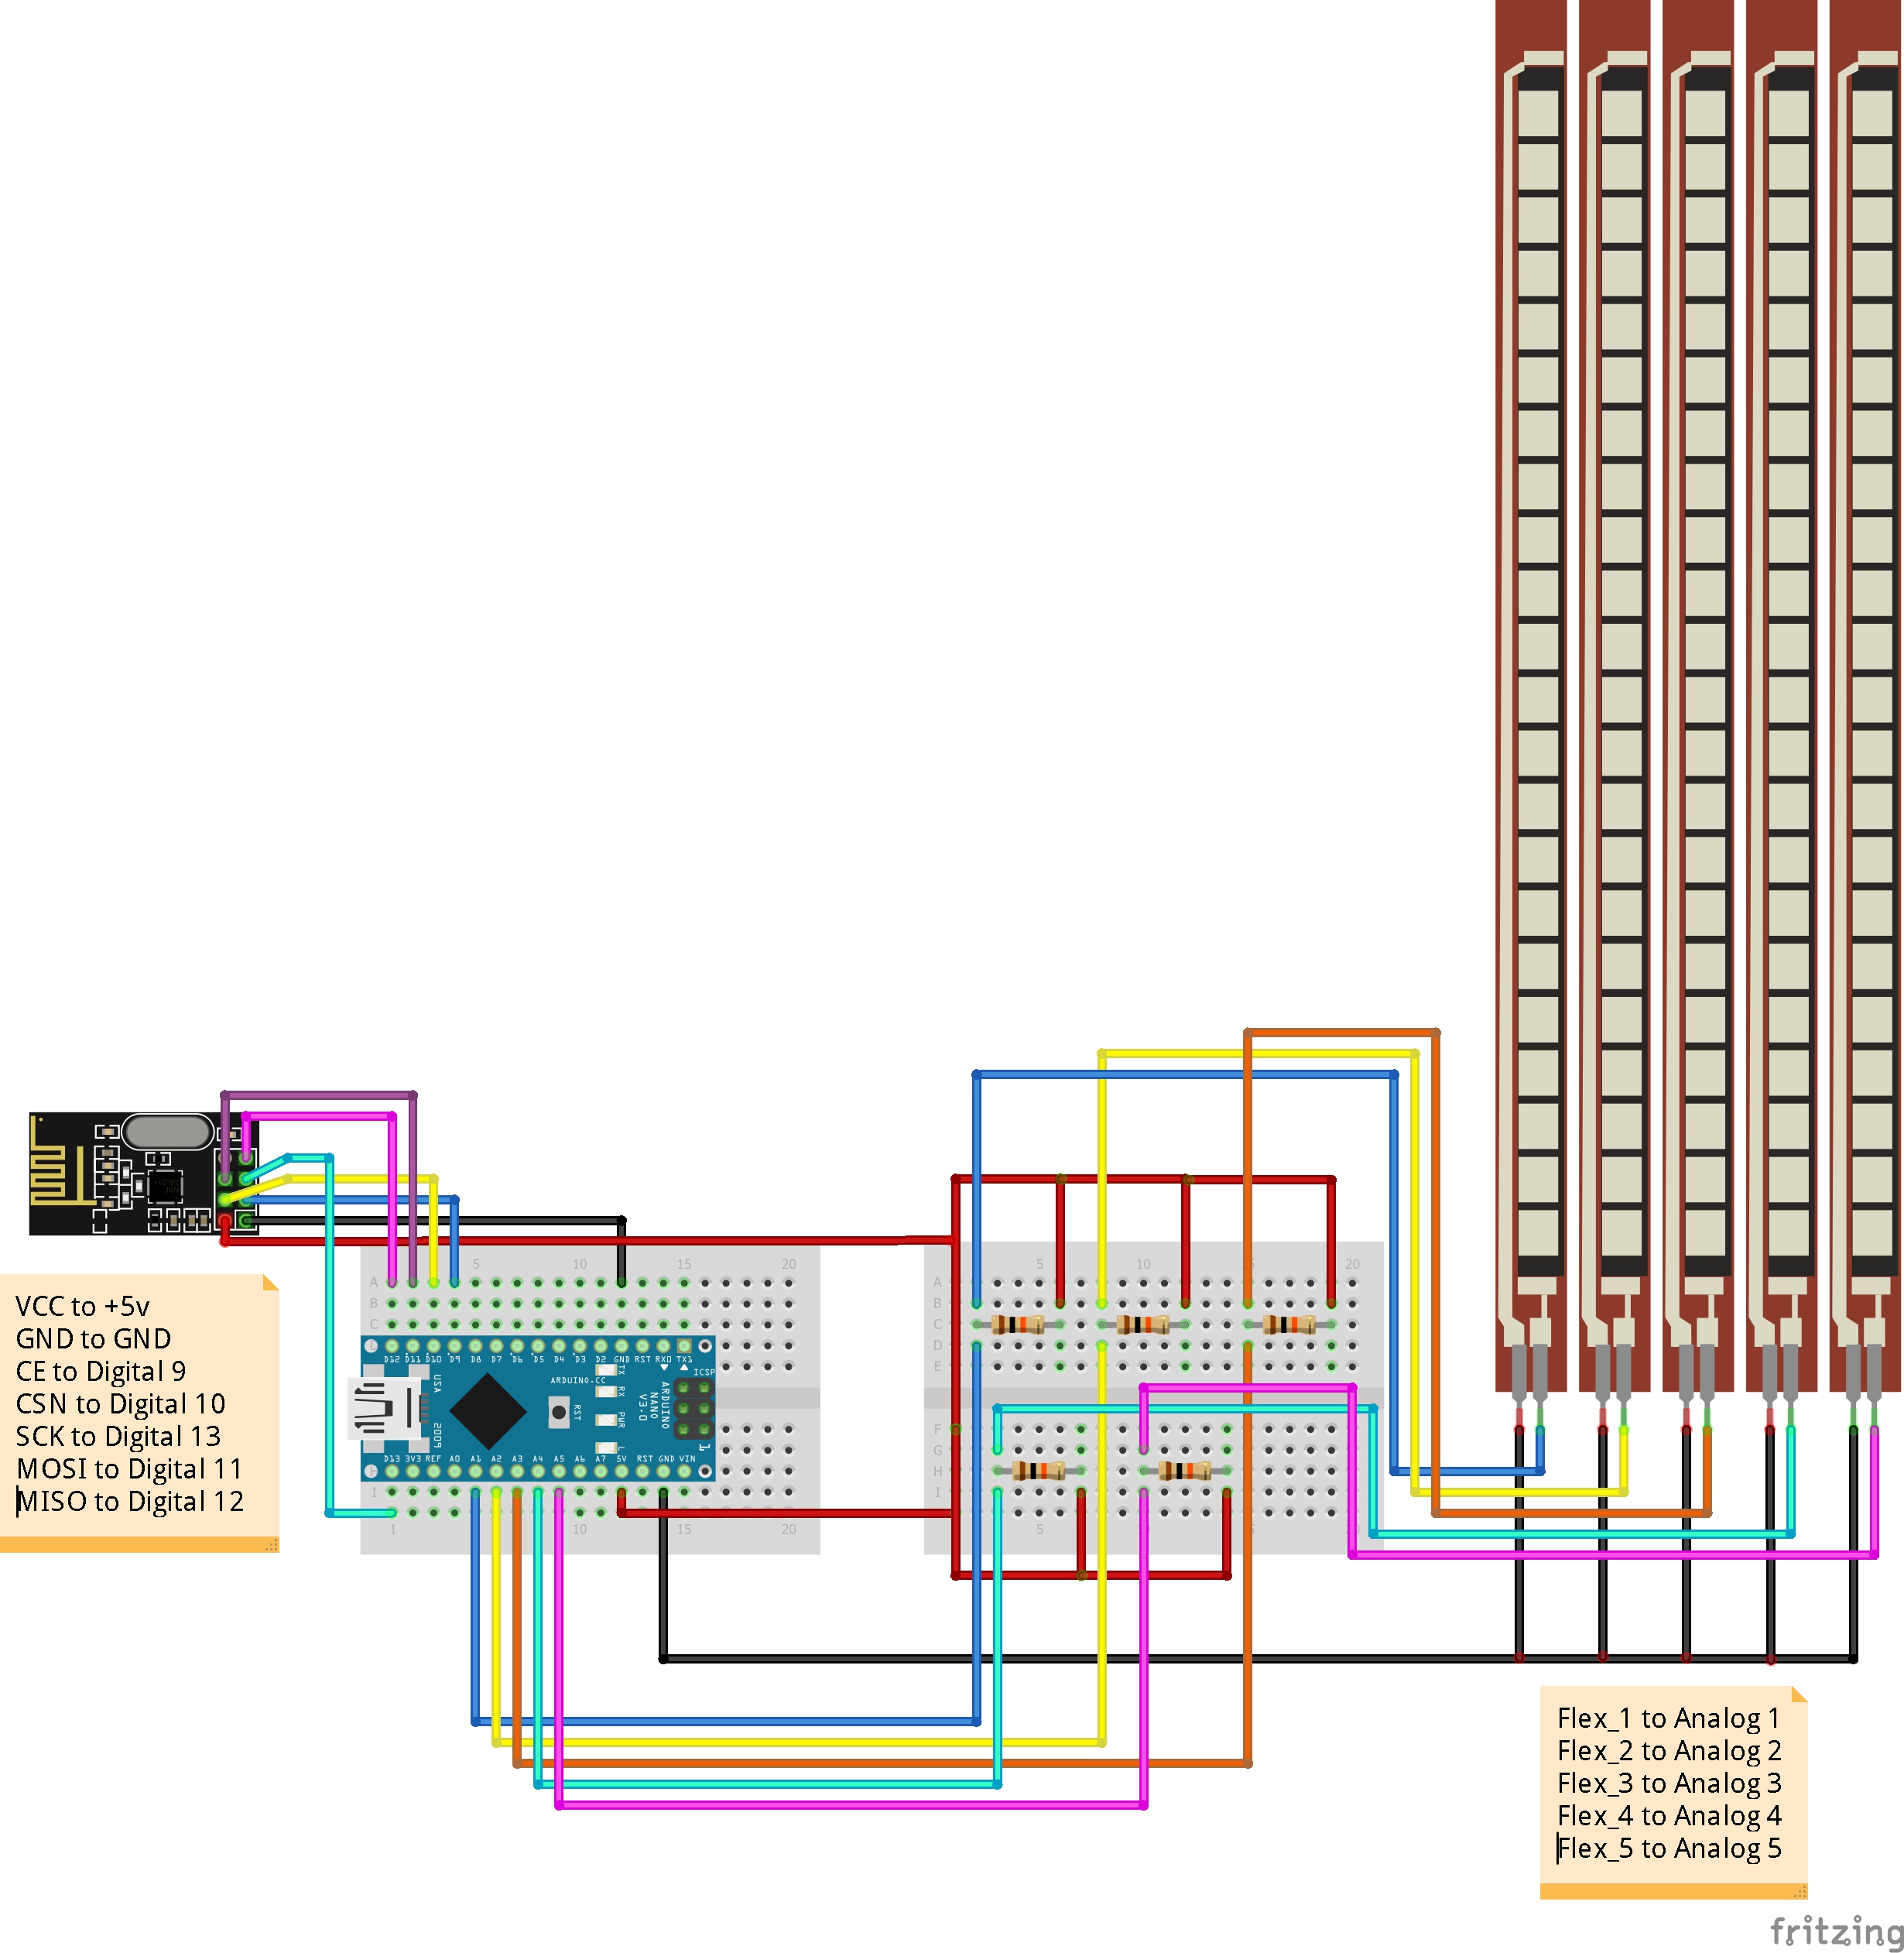
- VCC connect to the +5V of the Arduino.
- GND connect to the GND of the Arduino.
- CE connect to the digital 9 pin of the Arduino.
- CSN connect to the digital 10 pin of the Arduino.
- SCK connect to the digital 13 pin of the Arduino.
- MOSI connect to the digital 11 pin of the Arduino.
- MISO connect to the digital 12 pin of the Arduino.
The flex sensors require a circuit in order for them to be compatible with Arduino. Flex sensors are variable resistors, so I recommend using a voltage divider. I used 10K resistor.
- The main GND (ground) wire connected to all individual GND wires from the sensors, gets connected to the GND of the Arduino. The +5 V from the Arduino goes to the main positive voltage wire. The wire from each flex sensor is connected to a separate analog input pin via the voltage divider.
- I soldered the circuit onto a small PCB, one that could be easily mounted onto the glove.You can build the circuit on the small breadboard instead of the PCB.
- You can use 9V battery for circuit of the glove.
- If you used different pins than pins shown in below, change them in codes.
Connections of the flex sensors:
- Flex-1 connect to the analog 01 (A1) of the Arduino.
- Flex-2 connect to the analog 02 (A2) of the Arduino.
- Flex-3 connect to the analog 03 (A3) of the Arduino.
- Flex-4 connect to the analog 04 (A4) of the Arduino.
- Flex-5 connect to the analog 05 (A5) of the Arduino.
For the source code to work correctly, follow the recommendations:
- Download the RF24.h library and move it to the Arduino libraries folder. https://github.com/maniacbug/RF24
- After the flex sensors are connected o the glove, read and note the minimum and maximum values that each flex sensor has detected.
- Then enter these values into the transmitter (glove) code.
- Keep all servo motors at 10 or 170 degrees before attaching the servo pulleys to the servo motors.
- When mounting the servo pulleys, keep fingers in the closed or opened position (according to your servo positions).
- Then wrap around the servo pulley until the braid wires becomes stretched.
- Move all the fingers to the closed and opened position by checking the servo motors one by one.
- Then get the best angles for servo motors (servo angles while fingers closed and opened).
- Enter the servo motors angles and flex sensor values to the transmitter code as follows.
flex sensor min. value, flex sensor max. value, servo min. angle, servo max. angle
(flex_val = map (flex_val, 630, 730, 10, 170);- There is only one change in the receiver source code. Which flex sensor in the transmitter will control which servo motor in the receiver? For example, msg[0] sends the data of the x sensor-5. If you want to control the servo motor-5 with the flex sensor-5, you can do this by typing 'servo-5.write(msg[0])'.
- If you used different pins than pins shown in circuit, change them in both codes.
I know it's a little complex the last part, but please do not forget: there is no hard! You can do it! Just think, research, trust yourself and try.


Comments
Please log in or sign up to comment.