I've been wanting to play with audio a bunch lately. It's immediately useful with a broad range of applications (intercom, walkie talkies, audio processing, etc), and it demonstrates how to handle moving large pieces of data! I hope you're excited to do this quick build with me!
Note! You might want to get a few of each item, these are a lot more fun when you have more than one. :)
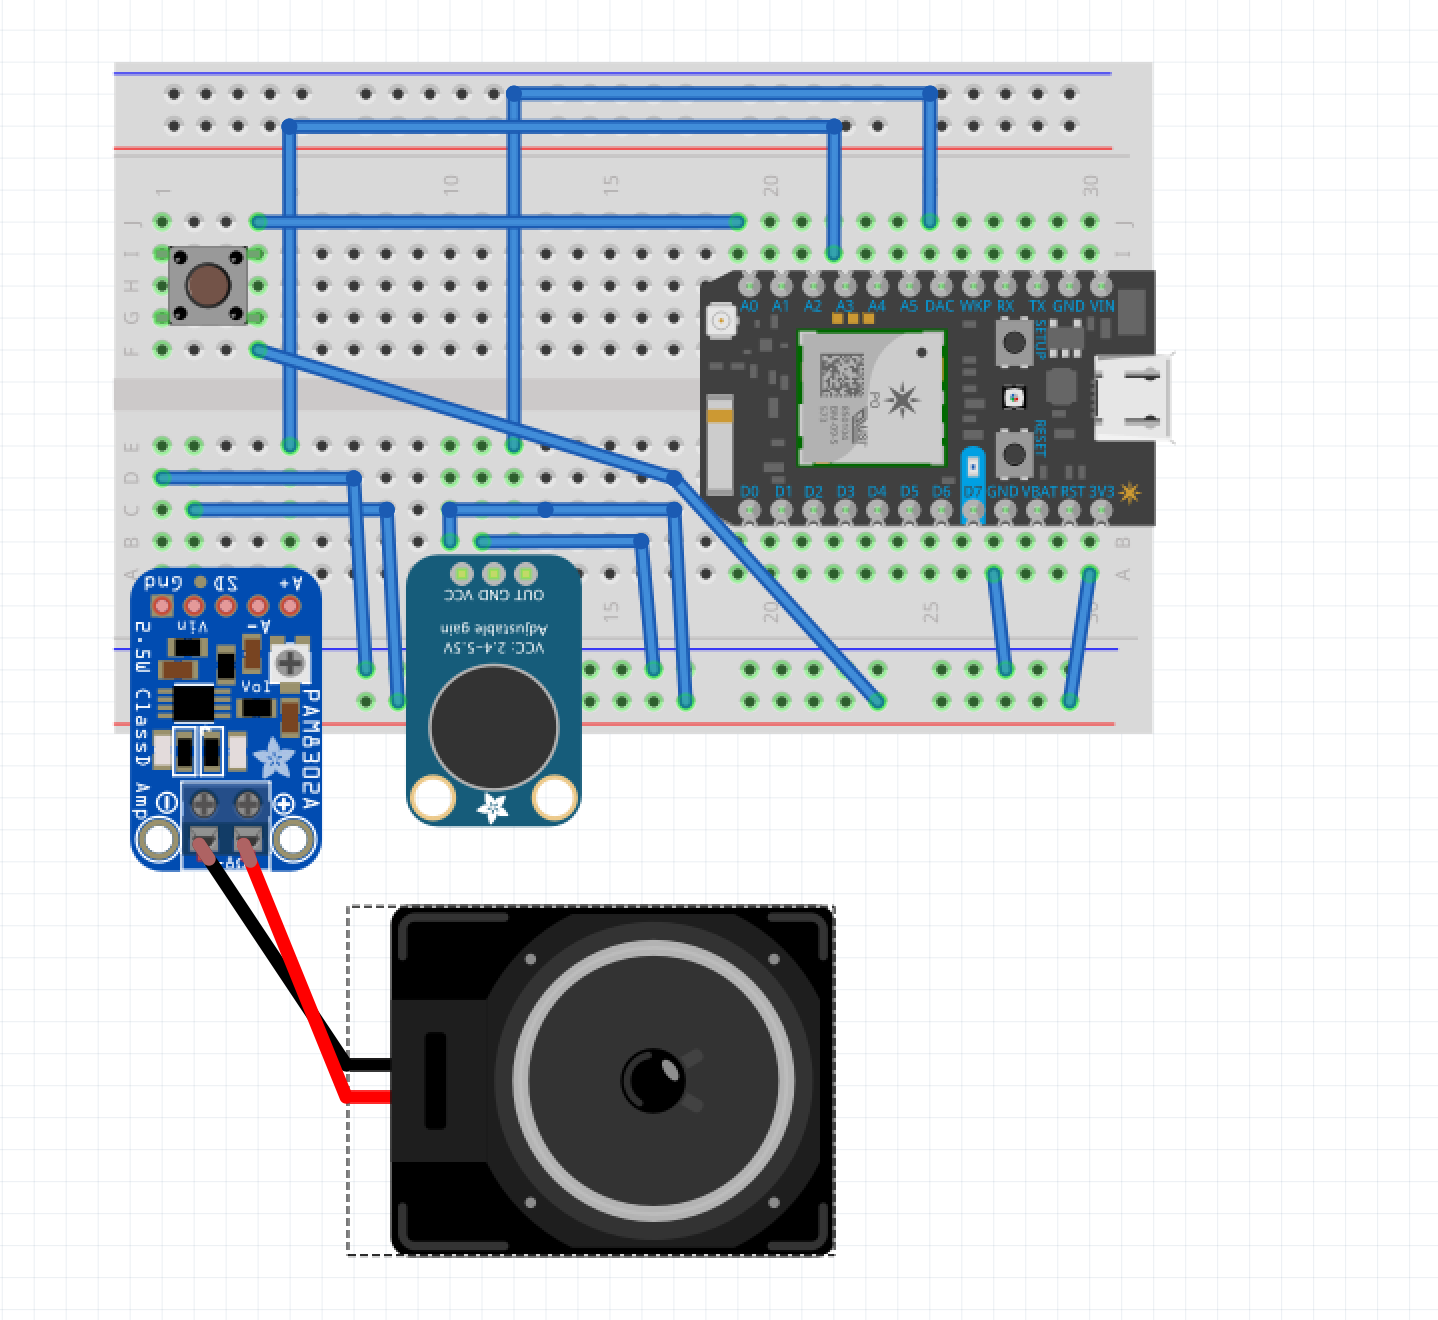
Grab the components, and put em together like in the diagram! Basically we're connecting the audio input (microphone) to the DAC, and the audio output (speaker) to DAC1. These pins are special in that they can read/write true analog values, so they'll play nicely with the smooth waves we want with audio data.
With devices like an Arduino or Photon, you may have toggled an LED on or off using one of the general purpose pins. In this case we're going to be reading and writing pins, only very very quickly. As the microphone vibrates, the resistance of the sensor will change very rapidly, and if we read it fast enough, we'll get sound waves!
We're shooting for 16kHz audio here (or 16,000 samples a second). This means we want to take a reading about every 62 microseconds! It's okay if we fudge this number a little. :) To make the best use of our resources, lets try to transmit a chunk of audio about every 1/10th of a second (100ms), and buffer about 1/2 second (500ms) of audio. This way we can buffer this data up a bit, and play nice on the network. To simplify things, lets time the recording using an interrupt timer which should ensure we don't slip on our timing. If we read the value too early or too late, the sound will sound 'weird'. You might notice I experimented quite a bit in readMic, I was trying to find a version of this that was fast enough to hit our timing goal, and also potentially play back audio at the same time.
Our analogRead gives us 12 bits of precision, so 0-4095, but the UDP socket wants an 8 bit value, so we'll map our range from 0-4095 to 0-255. We'll lose a little audio quality here, but we're not being fancy since we're just sending raw audio on an embedded microprocessor. Compression / fancy audio codecs are an exercise left for the reader. :)
I don't use a timer for receiving and playing audio, since our UDP socket can only hold so much, so I try to check that as often as possible. "readAndPlay" is called in loop, and it pulls in whatever audio has been broadcast. It puts this into another receive buffer, and if we didn't receive anything, it tells the speaker to chill out. Immediately after we've received the audio we try to play it if we can. Playing the audio also requires precise timing, but the playRxAudio function does a decent job. You'll notice we're mapping back from 0-255 to 0-4095 so we get the expanded range on the speaker. We're still losing some audio quality here, but that's okay.
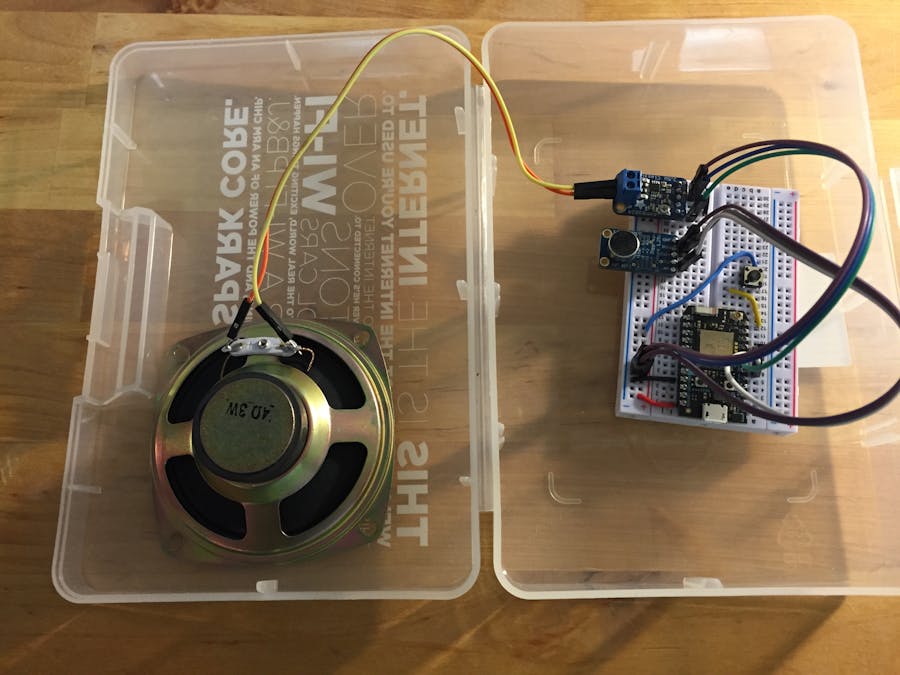
I thought I'd try to use a maker kit box as an enclosure, but without a dremel it proved difficult. Maybe one of these days I'll get a 3d printer!
Checkout the code for the rest, happy walkie talkies! :) Please let me know if you build this, I'd love to see what enclosures people come up with! And I'm happy to expand on any theory or questions if people ask em!
Thanks
-David


Comments
Please log in or sign up to comment.