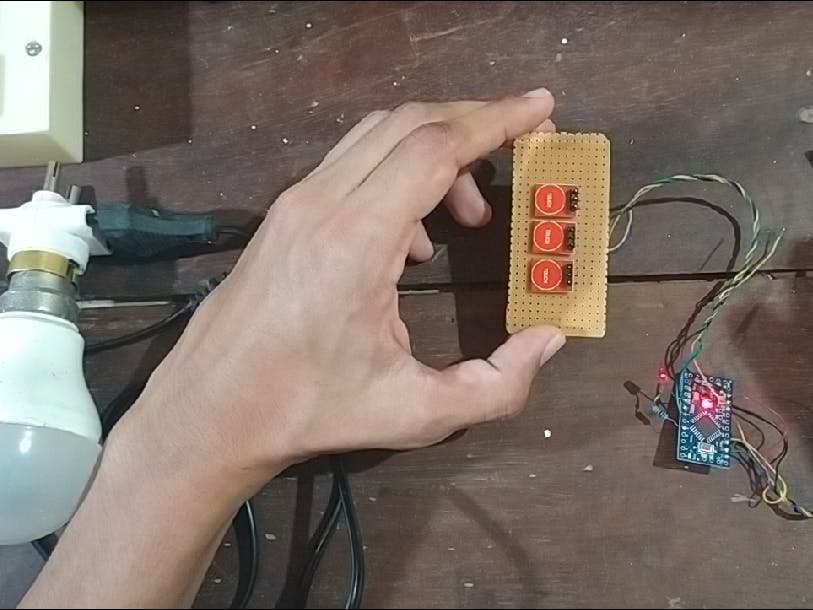
We often come across situations where we have to switch on and off devices in a public space, like fan in an office or lights in your class room. Having such common switches to touch can have a negative impact on our efforts to counter corona. That is why I thought of a gesture switch that can be operated exactly as a traditional switch but comes with some bells and whistles. Gest-R (pronounce it as 'gesture') is a multi purpose 'no touch' switch in the same form factor of an electrical switch. It can be regarded as a premium switch but is in fact very affordable and unlike other non-contact solutions (like IR distance sensors) extremely power efficient.
WorkingIt is very easy to use Gest-R. All you have to do is pretend Gest-R is a toggle switch and try to toggle it. Gest-R recognizes your gesture. If you are pulling down (the imaginary toggle switch) Gest-R will turn on the device and if you are pulling up Gest-R will turn off the device for you. So without touching the switch you can control your devices in style. Premium, right ?!!
See the video for a better understanding how Gest-R works:
Now, hearing my claims of this exotic device you might have wrongly assumed that this is one super high tech device. No ! In fact Gest-R is super simple. Any one having a soldering iron and an Arduino can implement it. I will explain.
Do More!
Now what if you made a downward when Gest-R is already on ?
A timer is initiated that will turn off Gest-R after 5 minutes (or after a user predefined time period). So you are going to bed and want to turnoff the lamp 5 minutes after you enter the room, Gest-R will come to your aid. Just turn on the lamp twice (2 down gestures) and you are good to go.
Similarly you can turn on Gest-R automatically after a predefined interval by switching off Gest-R when it is already off, although I don't know why you want to do that. May be scare your friend with it !
How it's Made
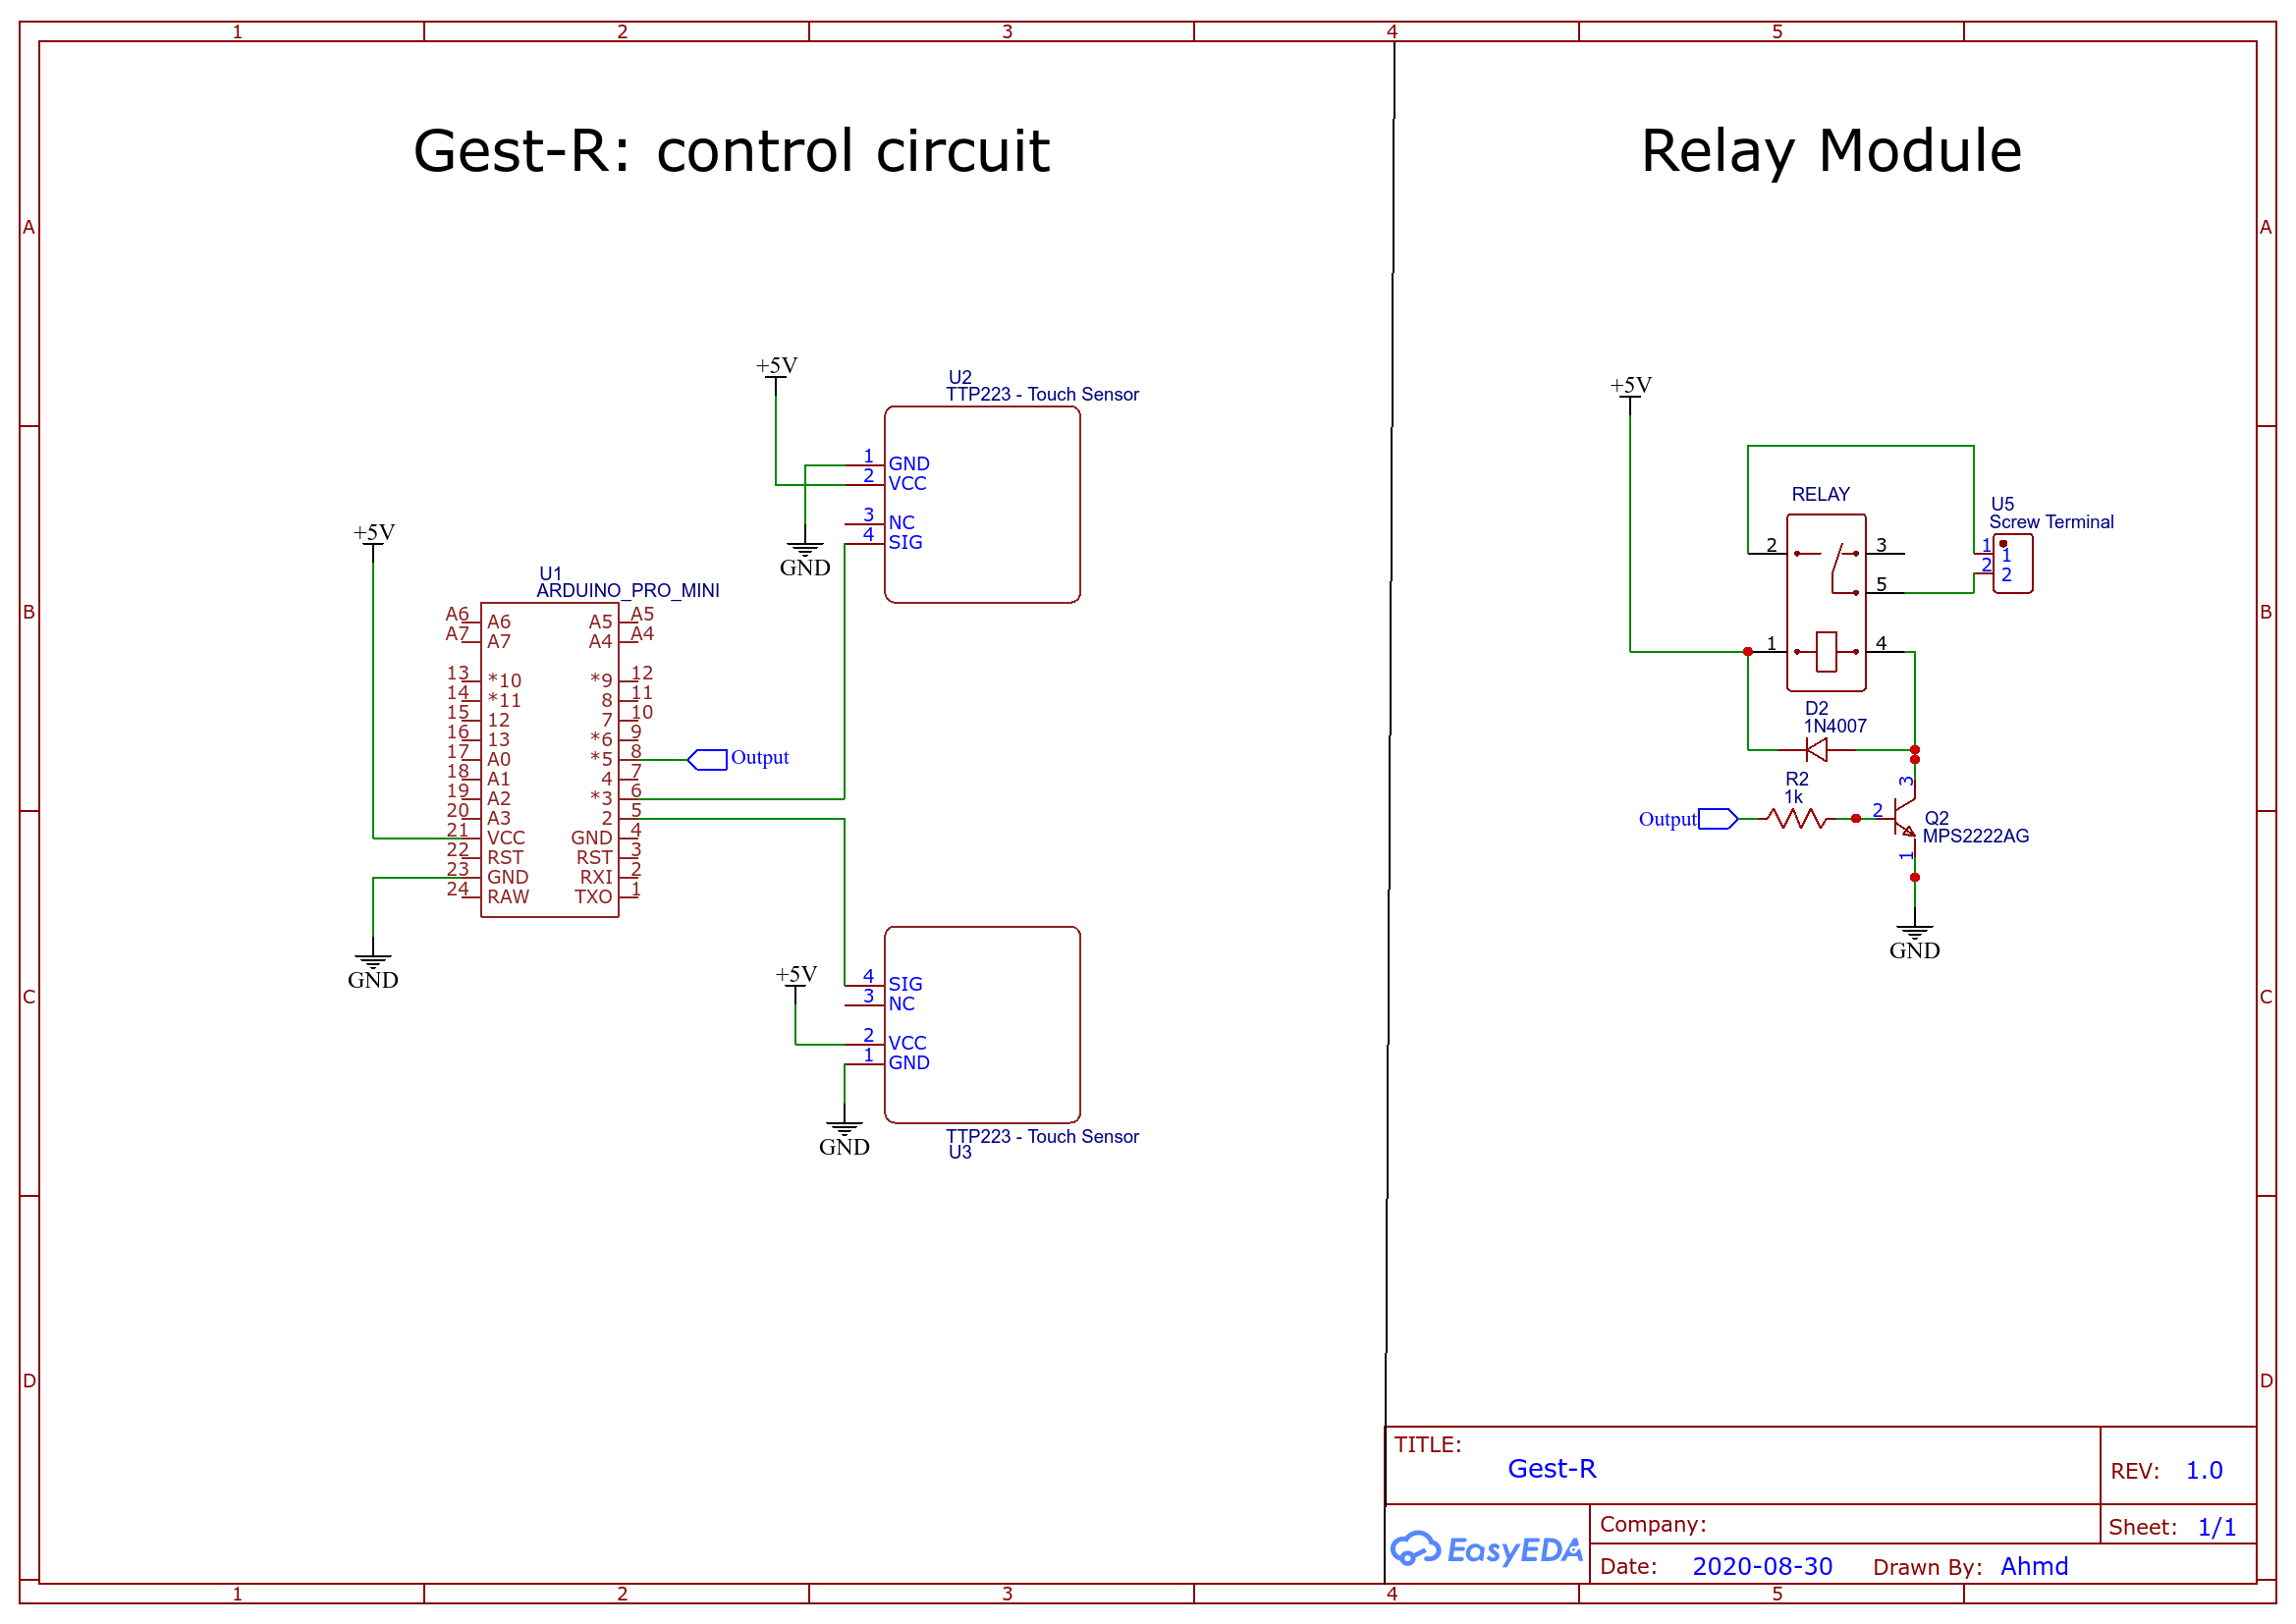
Before explaining about the circuit go take a peek at the schematic.
See, it is super simple. Gest-R makes use of two capacitive proximity sensors, TTP223. The advantage is it is cheap, and being a passive sensor very power efficient.
TTP223 is connected to the two external interrupt pins(pin 2 and 3) of an Arduino Pro Mini here. You can also use an Arduino Nano or Attiny if you want to make it more smaller.
Once the connections are made open your Arduino IDE. Start by attaching interrupts in void setup().
void setup() {
// initialize Pins.
pinMode(Output, OUTPUT);
pinMode(LED_BUILTIN, OUTPUT);
pinMode(2, INPUT);
pinMode(3, INPUT);
// Defining Interrupts
attachInterrupt(digitalPinToInterrupt(2), prox1, RISING);
attachInterrupt(digitalPinToInterrupt(3), prox2, RISING);
}
Output is Digital pin 5 in my circuit. You have to define it in the beginning of the code:
#define Output 5Prox1 and Prox2 are functions to be called when the Interrupts are invoked.
The main loop of the function simply consists of a switch statement:
void loop() {
  switch (GestR){
    case 1:
      digitalWrite(LED, HIGH);
      break;
    case 0:
      digitalWrite(LED, LOW);
      break;
    case 2:
      blinkled();
      digitalWrite(LED, LOW);
      GestR = 0;
      break;
    case -1:
      blinkled();
      digitalWrite(LED, HIGH);
      GestR = 1;
  }
}- Use solid state relays and add dimming/ power regulation feature
- Add a pot to adjust the timer delay
- Make PCB for the circuit
This is my first Hackster project and I am pretty sure that there are plenty of room to improve. Thank you.


_IHYK2AHej1.png?auto=compress%2Cformat&w=40&h=40&fit=fillmax&bg=fff&dpr=2)
_3u05Tpwasz.png?auto=compress%2Cformat&w=40&h=40&fit=fillmax&bg=fff&dpr=2)
Comments
Please log in or sign up to comment.