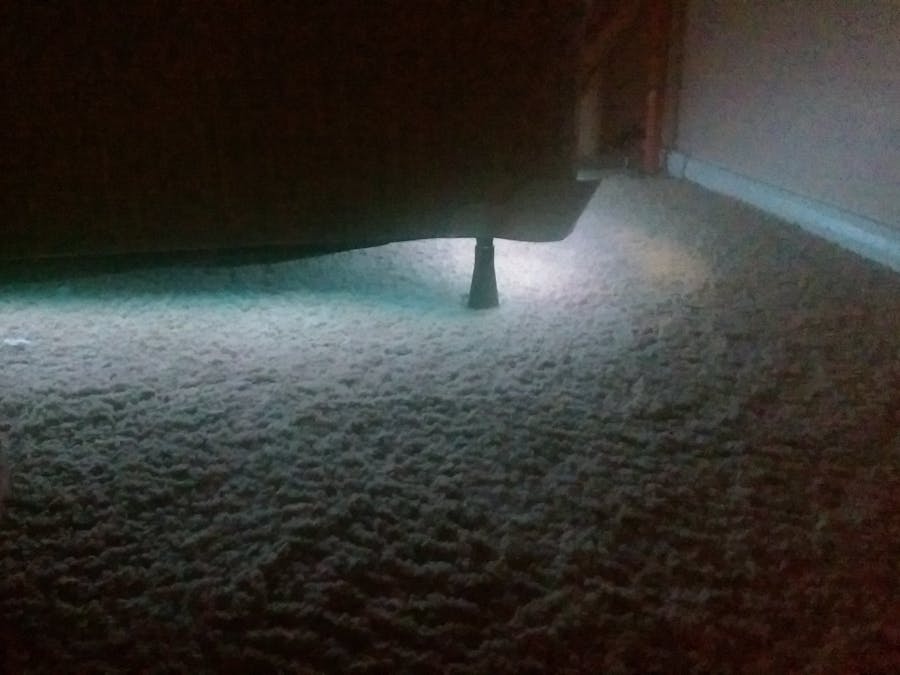
A couple weeks ago, I saw This Is Why I'm Broke post this motion activated bed light.
"Well I can make one of those", I thought to myself. And I can have it change colors or limit when it comes on, and not be limited to however this manufacturer designed it.
As usual, I built it on the Particle platform. I had two objectives - a motion activated under-glow, and a relaxing scene I could play at night.
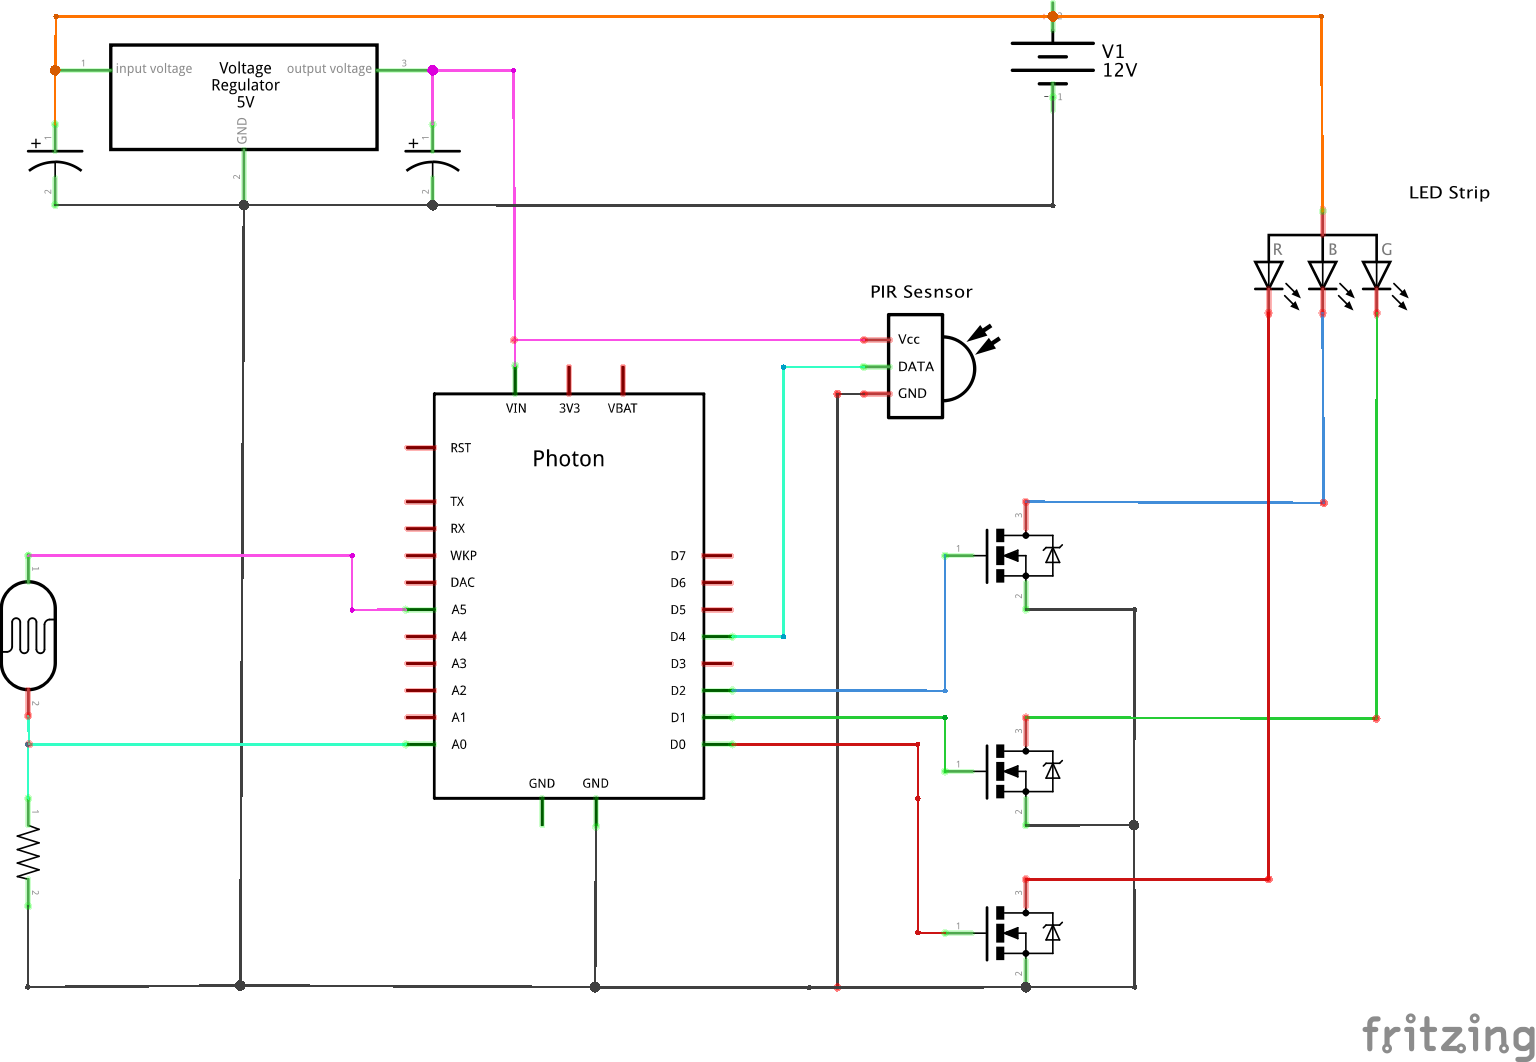
HardwareI'm using a Particle Photon to control an analog RGB LED strip. While tempting to use NeoPixels or other addressable strips, I don't need that level of sophistication. As it's under the bed, I don't have a use for an elaborate display of multicolors, I just want to look out for my dog when I step out of bed at night
Inputs to the system include the PIR motion sensor and a photoresistor. When I the Photon sees motion triggered, it checks the photoresistor first to see if it's dark. No need turning on lights if it's already bright in the room.
Finally, it's all powered by a 12V, 60W power supply. That power is regulated to 5V for the Photon and motion sensor, the rest is available for the LED strip. In theory, the LED strip may want all 60W, but I've setup the code to never max out the strip. The strip's power and RGB power are controlled via power MOSFETs.
SoftwareAll control is event driven. The loop will check to see if it should be running the relax scene, but it doesn't read any sensors. The motion sensor is attached to an interrupt, which when triggered, will turn on the lights and start a timer. Once that timer expires, the Off function is called. To activate the lights scene, an event must be published in the Particle cloud. That function will set a flag for the loop to run a sequence, as well as a timer to clear that flag later.
For fun, I decided to create a library for RGB coloring. The importance of such a library first came to me when I was testing with a single RGB LED. That LED was common anode, whereas my strip would be common cathode. That meant that for testing, I'd need to write:
analogWrite(255 - val)
Instead of:
analogWrite(val)
And then replace it when I deploy the actual system. And thanks to the 24-bit color system, it makes much more sense to write 255 to the blue LED and see full blue. So if I want to make the strip K-State Purple, I'd want to just write the hex color #512888 and not worry about how it's wired. So I created a library so I could write in 24-bit RGB notation, define if it's common anode or cathode, and let the program sort it out.
The first thing I tested was the motion sensor itself. I bought a pack of 5 for $10 on Amazon, so I figured one or two may not work as intended. I wired 5V to the sensor, attached the output to an LED and resistor, and waved my hand around them. I played around with the sensitivity and timing, and found all the sensor were working.
Next, I loaded up the Photon Tinker app, and turned the lights on and off to find the threshold value for the photoresistor. I also wired up the RGB LED and motion sensor, and also Tinkered with them. This is when I found out the RGB LED I had was common anode, vs the common cathode I had bought for my bed. It's very counter intuitive to write all zeros and have the light on full white. Thus my inspiration to write a library to abstract that away.
I can't give the Tinker software enough credit on how much easier it makes testing. If you're unfamiliar, it lets you read/write each pin from your phone, so you don't have to do any coding for basic testing.
Satisfied with my devices, I wrote the program. Super simple - interrupt on motion sensor, check photoresistor, turn on lights and start timer, turn off lights on timer expired. Ran it through its paces, made some adjustments and fixed a divide by zero error, so I replaced the single RGB with the strip, added the 5V regulator and 12V power supply, and viola! Everything's working! Time to put it on a protoboard and box it up.
I chose an enclosure that just barely fit everything. I was also just super excited to get it deployed, so I don't have any close ups of it. I got a DC jack for the photoresistor, and a 4 pin mic cable to attach the RGB LED strip. I wanted to use a 3.5mm stereo jack for the motion sensor, but they're always too small and flimsy, so the motion sensor is still attached to the phoenix block. I might get panel connectors for it someday.
As I'm pretty bad about finalizing and pushing these Hackster projects out, I've had this running for several weeks now, and it's great. I have a cat and dog, and they'll certainly trip it just as well as I do, which is somewhat of a nuisance as I'm going to bed and the dog won't stay still. But I've never been woken up by it, and it's not so bright at night when I do get up, so it doesn't hurt my eyes.
I have code in place for Adafruit.io to be able to change the color, as well as a scene from blue-green-blue-green. They aren't things I need, but I do want to have them available (even if only to show off). One of these days I'll get around to testing and finalizing that portion. I've included the start of that code.


Comments
Please log in or sign up to comment.